Kali Linux

Kali Linux is a Debian-derived Linux distribution designed for digital forensics and penetration testing. It is maintained and funded by Offensive Security.

Masscan — 1000 Times Faster Than NMAP

Masscan is the fastest network port scanner. It can scan the whole internet under 6 minutes with 25 millions per second data transmitting speed. Is it faster than flash?

Masscan kali linux

This fastest port scanner gives the output like nmap but masscan works like unicornscann, Zenmap internally(asynchronous scan). It is faster because of flexibility allowing arbitrary ranges and port ranges.

Masscan uses it’s own custom TCP/IP stack. Anything other than a simple port scan may cause conflict with the local TCP/IP stack.

We will discuss later the differences between masscan and nmap, now let’s check how to install and use masscan in our system.

Installing Masscan

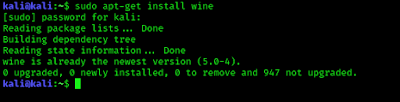
Masscan comes pre-installed with the Kali Linux full version. We can check the basic uses by simply enter following command:

masscan

If our system doesn’t have masscan then we need to install it. Before installing it we need to install it’s dependencies by using following command:

sudo apt-get install clang git gcc make libpcap-dev

Then we can install it by applying following command:

sudo apt-get install masscan

Dependencies doesn’t require to install it, these dependencies help masscan to work perfectly. We also can install it from it’s GitHub repository. The following commands will be useful to install it from Git repository.

git clone https://github.com/robertdavidgraham/masscan
cd masscan 
sudo make

Uses of Masscan

Masscan is used for scan a network, if we want to scan a single port then we can perform it by applying following command:

sudo masscan 172.217.167.46 -p443

This will scan for a single port 443.

We also can use this tool to scan multiple ports separated by comma(,). The example is following:

sudo masscan 172.217.167.46 -p443,80,4444
masscan mutiple port scan

To scan a range of ports we can use following command:

sudo masscan 172.217.167.46 -p12-443

The above command will scan for port 12 to port 443 on our given IP address.

So in case we need to find all the ports then we can use following command;

sudo masscan 172.217.167.46 -p0-65535

There are a limited number of ports, that is 65535. The above command will check for every port.

Lightning Speed!

We said that masscan is the fastest scanner but after using previous commands we didn’t feel that it is faster.

The reason is masscan scans at the rate of 100 packets/sec, which is slow. To increase it we need to use –rate flag with it.

sudo masscan 172.217.167.46 -p0-65535 --rate 25000000

Using the above command we can achieve the fastest speed (25 million packets/sec).

One more thing, we can’t achieve the max speed on Mac, Windows or Virtual Linux systems. Masscan works best on primary installed Linux systems. On other systems we can get only 300,000 packets/sec. That is really fast but with the Linux system we can get the maximum speed.

To scan faster we must need to have a very good internet connection. Usually it happens that masscan can achieve the highest speed but our internet connection can’t send 25 million packets per second. Although the speed we got was faster than any other port scanner.

To see the fastest effect we should choose a bigger network to scan. On small networks or in single IP we can’t see the faster speed in our eyes. Because scanning small networks is work of some seconds so we can’t feel the speed. Let’s talk about it.

Masscan can scan the entire internet in 6 minutes according to it’s author Robert Graham. If we want to scan the whole internet for a specific port (443 port for example) we can use following command:

sudo masscan 0.0.0.0/0 -p443 --rate 250000000 --exclude 255.255.255.255

This command will scan the whole internet for 443 ports, and show us the result as fast as possible. Here we have stopped the scanning. We can see the screenshot.

scanning the whole internet

This is how we can find a specific or vulnerable port all over the internet.

Some More Uses

To save the output result in a file we can use following command:

sudo masscan 172.217.167.46 -p0-65535 > example.txt

Not only txt format we also can save the results in XML (-oX), Grepable (-oG) and JSON (-oJ) formats. We like the Grepable format because we can use the output on other tools.

We also can scan a network for the top ports. So if we give it ‐‐top-ports 100. It’ll scan the top 100 most common ports discovered according to nmap. We can choose our top ports numbers, an example of this is following (Scans for top 10 ports):

sudo masscan 172.217.167.46 --top-ports 100 --rate 100000

There is a pause function in masscan, Yes we can pause the scanning process and resume it when we need. Scanning on a large network we found it useful. During the scanning process we can press CTRL+C then after some seconds it will pause it and save a paused.conf file. This file has all the settings and progresses from the scan. We can resume the scanning process again by using following command:

sudo masscan --resume paused.conf

Nmap vs Masscan

In this article we have learned that masscan has very good features, the output looks like nmap but there are lot’s of differences between. Those are following:

  • Nmap uses synchronous mode scanning which is very slow but accurate but masscan uses asynchronous mode scan which is very fast but not so much accurate.
  • Masscan doesn’t check if the host is up or not, it always treats the host as online but nmap always checks if the host is up or down.
  • Masscan never converts domain names to IP addresses. We manually need to find the IP address and provide it to masscan. But nmap works finely with IP and domain names.
  • We always need to specify ports on masscan.

To know more about nmap vs masscan we can check this article.

There are also some similarities in nmap and masscan. Masscan have some nmap compatible settings/ flags. To check them we can use masscan -nmap command.
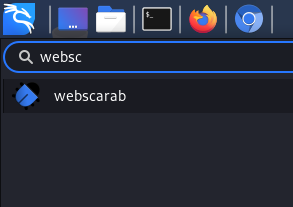
Masscan Web UI

The Offensive Security team has created a web interface for masscan. Using that process we can use masscan on a easy web based GUI. Here is the full guide from Offensive security.

masscan web based interface
Image copyright Offensive Security.

That’s all about masscan. Love our articles? Make sure to follow us on Twitter and GitHub, we post article updates there. To join our KaliLinuxInfamily, join our Telegram Group. We are trying to build a community for Linux and Cybersecurity. For anything we always happy to help everyone on the comment section. As we know our comment section is always open to everyone. We read each and every comment and we always reply.

How to Run Windows Application and Games on Kali Linux

There are so many users recently switched in Kali Linux from Windows, some of them and they want to run Windows programs and games in Kali Linux. So in our today’s tutorial we will describe how to run Windows programs and games in Kali Linux.

run windows apps in Kali Linux

We can easily do this via wine. Wine is a program by using it we can run Windows programs in Linux environment (Linux, macOS, & BSD). The full from of wine is Wine Is Not an Emulator. Really it is not an emulator or virtual machine, wine translates Windows API calls into POSIX calls on-the-fly, eliminating the performance and memory penalties of other methods and allowing us to cleanly integrate Windows applications into our desktop.

How to Install Wine in Kali Linux

In our Kali Linux system we can install wine by simply using following command:

sudo apt-get install wine

The following screenshot shows that we already have wine’s latest version.

Wine instaling in Kali Linux
Wine is already installed in our case

We can’t run it now, we need another tool that is called wine-32. Wine-32 requires for 32 bit packages but it is necessary to run wine tool.

We can install wine32 by simply using apt-get install command but first we need to add 32 bit architecture in our machine. To do this we use following command:

sudo dpkg --add-architecture i386

After this we need to update our system for new architecture’s repository by applying following command:

sudo apt-get update

Then we can install wine32 in our system, so we run the apt-get command:

sudo apt-get install wine32

It may take some minutes depending on our internet speed and system performance. Then it will ask for restarting some libraries, we click here yes(Tab key might be useful). Then after completing the process we restart/reboot our PC.

restarting some libraries

Then we need to configure our wine to run Windows applications. To do that we open wine configuration by applying command:

winecfg

It will open the configuration window of wine. As shown in  the following screenshot:

wine configuration

Here we can configure wine. We can set Windows version, Libraries, Graphics, Audio, Drivers, Audio etc, but for now we leave these on default configuration. 

Run Windows Application in Kali Linux

Now we are all set to run Windows applications and games in Kali Linux. We just need to type wine name-of-installer.exe in terminal.

For an example we are going to install notepad++ in our Kali Linux.

We need to open our terminal where the notepad++ setup file or exe file stored (In our case it’s in our /Downloads directory, as we can see the directory in the following screenshot) and type following command:

wine npp.7.8.8.Installer.x64.exe

Then it will start it’s installing process and we can complete it as we do in Windows OS, as we can see in the following screenshot.

notepad ++ installing in Kali Linux using wine

After complete installation during the funny next next way (Windows installation process LMAO) we check on create desktop icon and we got notepad++ icon on our desktop.

Notepad++ on Kali Linux Desktop

Now we can launch Notepad++ from directly our desktop. Isn’t it really cool ??

We also can start it from Application Menu>Wine>Programs>Notepad++

Notepad ++ on Kali Linux

Now if we want that we don’t wanna use terminal and we need to open every exe file through wine directly. We just skip the terminal then we need to set wine program loader as default for exe files. We need to create a symbolic link of it. To do it we use following command:

sudo ln -s /usr/share/doc/wine/examples/wine.desktop /usr/share/applications

Then the link will be created, now we need to set it default for all exe files. To do so we right click on any exe file and choose “open with another application”.

exe file opening with another application

Now we scroll down very lower (or we can press wine on our keyboard) to find “Wine Windows Program Loader”. We need to select it and must check ✅ on the box “Use as default for this kind of file” as we did in the following screenshot:

Choosing Wine Windows Program Loader as a default

Then we need to click on open. After this point our system will open every exe file via wine as default.

This is how we can install any application in Kali Linux such as Adobe Photoshop, Microsoft Office. Nowadays we can run latest versions of Windows programs in Linux even we can install Adobe Photoshop CS 2020.

Wine creates file systems like Windows in our home directory but it is a hidden directory. Anyways we have opened it in the next screenshot.

wine file system

Here we can see the file system is just like Windows. Wine creates an entire system like Windows that’s why we can run Windows application in Linux, not like virtual machine or emulator they creates another virtual system inside our system.

Additional Wine

Another tool is called “Winetricks”, it helps us to install various Windows games, application, dll libraries, fonts etc.

Lets install Winetricks by using following command:

sudo apt-get install winetricks

This is a very small tool should install in some seconds.

installing wine tricks

After installing it we run this tool by using following command:

winetricks

After this the menu opens like the following screenshot:

winetricks menu

From here we can easily install application, games and much more things.

Some wine tricks applications

Here is some winetricks applications list. We can see MS Office versions here. The MS Office 2013 is available for direct download via winetricks.

funny.gif

Conclusion

This is how we can install & run Wine in our Kali Linux system and install Windows applications and games in Kali Linux. Found it useful? Make sure to follow us on Twitter and GitHub, we post article updates there. To join our KaliLinuxIn family, join our Telegram Group. We are trying to build a community for Linux and Cybersecurity. For anything we always happy to help everyone on the comment section. As we know our comment section is always open to everyone. We read each and every comment and we always reply.

Which Windows application should be installed first ? Please let us know in the comment section. We are curious to know. For any kind of problem and suggestion please leave a comment we always reply.

Scalpel — Recover Permanently Deleted Files

Scalpel was created with as an improvement of Foremost 0.69. We have talked about Foremost earlier. It is a data recovering tool. Foremost’s earlier versions have some issue when it get some CPU heavy jobs. Scalpel bypasses it. Foremost can recover permanently deleted data easily like Foremost.

Scalpel comes pre-installed with Kali Linux. It is one of the best forensics tool comes packaged with Kali Linux.

Recover deleted data on linux

In foremost we need to specify the file types we want to recover on each time we use it. But in scalpel we can modify the scalpel configuration file to specify it which type of files we want to recover.

Configuring Scalpel on Kali Linux

The configuration file is located on /etc/scalpel/scalpel.conf , We can open this by using following command:

sudo mousepad /etc/scalpel/scalpel.conf

The screenshot of the command is following:

scalpel configuration

Here we can see the configuration file of scalpel. We can scroll down and we can see there are lots of file types.

files in scalpel configuration file

In the configuration file we can see that every line is started from ‘#’. # is used to inactive, this is used for comment if we remove the # it will be uncommented. We need to un-# (removing those #) those file types if we need to recover these type of files. That means we need to have a clear idea which type of files we are looking for. If we don’t know any specific file types then we can un-# all the file types.

For an example we are going to remove hashes from gif and jpg files and in this tutorial we are going to recover some gif and jpg images.

So we removed those hashes (#) and save the file, as shown in the following screenshot:

scalpel configuration complete

Just saved (Ctrl+S) and closed it. Now we are ready to rock.

Using Scalpel to Recover Files on Kali Linux

First we check for help options of scalpel to know more about it. We just need to apply following command to see the help of scalpel:

scalpel -h

The following screenshot shows the output of the above command:

scalpel help options

We need to read the lines they are very easy to understand.

We have just run format of a USB drive on our Windows system and it contains lots of gif and jpg images on it. After formatting it got blank. Now we try to recover those images.

We strongly warn to not use this on directly on a disk. First we need to make a bit to bit clone a disk then we can use these kind of recovery tools on the cloned disk images. This is the way to save the real evidence.

We can use Guymager tool to clone an entire disk. Guymager is really very helpful. Here we have a cloned that USB drive in dd file format named KaliLinuxIn.dd (in our Desktop).

files in desktop

Here we run Scalpel to recover GIF and JPG images by using following command:

scalpel -o recovered/ KaliLinuxIn.dd
Scalpel recovery is complete

On the above screenshot we can see that the recovery process is completed. By using the -o flag we specified the output folder. So in our desktop a new folder is created named “recovered”.

We can see the output folder named “recovered” on our desktop.

output folder

Now we can go inside the folder and check for our recovered files. In this article for an example we just recovered only images files.

recovered files using scalpel on Kali Linux

In the output directory we also got a audit.txt file that stores the information of the recovered files.

This is how we can recover deleted files on Linux using scalpel.

While Foremost and Scalpel both can recover files from a storage but Scalpel returned more files than Foremost and Scalpel is very fast. Foremost also have some advantages that Foremost got more accuracy then Scalpel.

Unfortunately, the filenames returned by both tools are not the original filenames and in some instances, there may be duplicates of recovered files as many files may be fragmented and appear to be separate files.

Try both of these tools and please comment down which tool is more useful. We are curious know. Please tell us in the comment section.

Love our super easy articles? Make sure to follow us on Twitter and GitHub, we post article updates there. To join our KaliLinuxIn family, join our Telegram Group. We are trying to build a community for Linux and Cybersecurity. For anything we always happy to help everyone on the comment section. As we know our comment section is always open to everyone. We read each and every comment and we always reply.

20 Reasons You Need to Stop Stressing About SQL Injection

An SQL injection is an attacker’s method to introduce SQL queries into input fields so that the underlying SQL database may process them. This is done using a technique known as SQL injection. When input forms let user-generated SQL queries directly query the database, these vulnerabilities become exploitable and may be exploited by malicious users.

20 Reasons You Need to Stop Stressing About SQL Injection

Take, for instance, a standard login form consisting of user and email fields and a password field. This will serve as an example for you. After submitting the login information, it is merged with a SQL query running on your web server.

Reasons You Need to Stop Stressing About SQL Injection

Techniques for preventing SQL injection Given that user input channels are the primary vector for such assaults, the most effective method is monitoring and vetting user input while keeping an eye out for attack trends. Developers may also avoid vulnerabilities by using the primary preventative measures listed below.

1. Encryption: 

The most secure method for protecting this sensitive data is to encrypt them. Creating and upkeep of these computerised databases take significant work, but ensuring the databases’ safety is the primary obstacle to overcome. Code injections are among the most dangerous attacks that can be launched against these databases and the information they store.

2. Input validation: 

The validation procedure aims to determine whether or not the kind of input the user provided was permitted. Validating the input ensures that it is of the correct type, length, and format, among other things. Only the value determined to be correct after being validated may be handled. It assists in neutralizing any instructions that may have been placed into the input string. It’s like checking to see who’s there before you answer the door when someone’s pounding on it.

Validation shouldn’t only be applied to fields where users may write in data, which means you should also take an equal amount of care with the following situations:

To guarantee reliable input validation, use regular expressions as whitelists for structured data (such as name, age, income, survey answer, and zip code), such as these examples.

Determine which value was returned when there was a defined set of options to choose from (for example, a drop-down list or radio button). The information provided should be an exact match for one of the available selections.

Validation is required for any data obtained from third parties outside the organization. This regulation applies not only to the information supplied by Internet users but also to the information provided by suppliers, partners, vendors, and regulators. These suppliers could be the target of an attack that causes them to send out corrupted data even though they are unaware of it.

3. Parameterized Queries:

Queries with parameters are called parameterized queries, and they are a way to pre-compile a SQL statement so that you can then provide the parameters for the statement to be run. The database will be able to detect the code and differentiate it from the input data as a result of using this strategy.

  • To inject a user-supplied value into our queries, we may employ the parameterized query approach of preparing prepared statements with the question mark placeholder (“?”). This is a highly efficient solution, and it cannot be exploited in any way (unless the implementation of the JDBC driver has a problem, of course).This coding approach helps limit the risk of a SQL injection attack since the user input is automatically quoted, and the given input will not change the program’s intended behaviour.
  • The MySQLi extension allows for parameterized queries; however, PHP 5.1 introduced a far more effective method for interacting with databases known as PHP Data Objects (PDO). PDO uses techniques that make the usage of parameterized queries more straightforward. In addition, it makes the code simpler to understand and more portable since it can now be used with several databases rather than only MySQL.

4. Stored Procedures:

Stored procedures need the programmer to organize one or more SQL statements into a logical unit before they can generate an execution plan. This is referred to as creating a stored procedure (SP). 

  • The ability to automatically parameterize statements is made possible by subsequent executions. To put it more simply, it is a sort of code that may be saved for later use and used several times.
  • Therefore, anytime you need to put the question into action, rather than writing it out over and again, you can just use the stored procedure.

5. Escaping:

Always take advantage of the character-escaping features offered by each database management system for any user-supplied input (DBMS). This is done to ensure that the database management system (DBMS) never mistakes it for the SQL statement that the developer supplied.

6. Avoiding administrative privileges:

Using an account with root access to connect your application to the database should be avoided at all costs to avoid the need for administrative rights. Because the attackers might acquire access to the whole system, this action should only be used under dire circumstances. Even a non-administrative accounts server may pose a threat to an application. This danger would be multiplied if the database server was utilized by several other databases and applications simultaneously.
  • To protect the application against SQL injection, for this reason, it is best to apply the most restrictive privileges possible to the database. Make sure that each program has its database credentials and that those credentials have at least the minimal set of permissions required by the application.
  • Instead of figuring out which access privileges you need to remove, you should concentrate on determining which access rights or higher permissions your program requires. If a user wants access to just a subset of the features, you may design a mode dedicated only to fulfilling this need.

7. Web application firewall:

A web application firewall is one of the most effective ways to detect SQL injection threats and is one of the best practices overall (WAF). The web application firewall (WAF) sits in front of the web servers and analyzes the traffic that moves into and out of the servers. It looks for patterns that might indicate a potential security risk. In its most basic form, it is a firewall that is installed between the web application and the internet.
  • A WAF can function by using web security rules that may be specified and customized. The WAF is given direction on the kind of vulnerabilities and traffic behaviours it should look for based on these rules. Therefore, in light of this knowledge, a WAF will continue to monitor the apps and the GET and POST requests it receives to identify and prevent harmful activity.
  • The convenience with which a WAF’s policies may be modified and implemented contributes to the framework’s value. Rapid deployment of rules and a speedy reaction to incidents are made possible by the ease with which new policies may be established.
WAFs provide adequate protection against a wide variety of harmful security threats, including the following:
  • Injection of SQL syntax
  • Scripting that spans many sites (XSS)
  • Session hijacking
  • DDoS assaults, which stand for distributed denial of service attacks
  • Cookie poisoning
  • Parameter tampering
  • In addition to these advantages, a WAF also provides the following advantages:
  • Automatic protection against unknown and undiscovered attacks, with robust default rules and remedies tailored to your unique WAF architecture.
  • Application security monitoring in the real-time and comprehensive recording of HTTP traffic that enables you to see the state of things at any given moment
When developing a web security defence in-depth plan, a WAF should always be considered because of its many advantages, including the prevention of SQL injection attacks.

8. Examining for potential SQL injections:

When the integrated software is operational, it is common practice to carry out many distinct forms of security testing as part of the quality assurance (QA) procedures that are routinely carried out. Unfortunately, functional testing does not aim to exploit user input fields since the majority of testers do not think like malicious actors.
Aside from the fact that they often need the necessary resources to do so, such as the time or the direction. Testing manually for injection-type vulnerabilities is also challenging since it involves attempting many different input combinations. 
This makes the process more complicated. Fuzzing, often known as fuzz testing, is performed at this point. It generates invalid, unexpected, and unpredictable data to use as inputs to the program being tested. The objective of fuzz testing, like penetration testing, is to discover potential security flaws in a system by probing its publicly accessible interfaces.

9. Examining the Level of Penetration:

It is advantageous to do penetration testing (and, by extension, fuzz testing) since this kind of testing may uncover serious security flaws and flaws that may have crept past the procedure undetected. 
To thoroughly test all conceivable permutations and combinations, however, this kind of testing, like all other dynamic tests, is contingent on the number of tests, code, and API coverage. 
The success of penetration testing is contingent on the exhaustiveness of functional testing, which is usually carried out at the UI level. As a result, it is essential to supplement your penetration testing efforts with API testing and SAST to guarantee that you are being exhaustive.

10. Testing of the API:

API testing helps move left functional and security testing by reducing the need for fragile and time-consuming UI tests. This helps shift left available and security testing. The application programming interface (API) layer is where most of the application’s functionality is located. Testing at this level is more resistant to change and simpler to automate and maintain.

11. API-Level Penetration Testing:

Utilizing software such as Parasoft SOAtest, it is feasible to do API-level penetration testing to uncover SQL injection vulnerabilities. This testing generates automated fuzz tests from pre-existing functional tests to test the application’s business logic. Integration with the well-known penetration testing tool Burp Suite is one of the features offered by Parasoft SOAtest.
API calls described in the test are recorded together with the request and response traffic when functional test scenarios are executed using Parasoft SOAtest. On each test, the Burp Suite Analysis Tool will send the traffic data to a separate instance of the Burp Suite application running in the background. This application instance will then perform penetration testing on the API based on the API parameters it observes in the traffic data using its heuristics.
Any issues discovered by Burp Suite will subsequently be reported as errors inside SOAtest, connected to the test that visited the API through the Burp Suite Analysis Tool. The findings of Parasoft SOAtest are delivered onto a dashboard for reporting and analytics maintained by Parasoft. To provide extra tools for reporting.

12. JPA Criteria API

Considering that the construction of explicit JQL queries is the most common cause of SQL injections, we need to promote the usage of JPA’s Query API wherever it is an option.

13. User Data Sanitization

Data sanitization is a method that involves applying a filter to user-supplied data to make it suitable for usage by other components of our program in a secure manner. Allowlists and blocklists are the primary categories into which filters may be placed, even though their implementations might differ quite a bit.
Be sure that the embedded instructions comprising various data inputs cannot be included in the SQL-specific syntax that SQL recognizes. 
This is a significant security measure. Some data, which may be entered into JSON files without risk, may cause damage to SQL queries and SSH commands

14. Damage Control Techniques:

The idea that we should always construct several protection layers is called the “defense in depth” principle. This is an intelligent security practice. Even if we cannot discover all of the potential flaws in our code – which is a regular occurrence when working with old systems – we should, at the very least, make an effort to restrict the amount of harm that an attack might cause. This is the fundamental principle.

15. Employ the concept of the lowest possible privilege: 

Put as many restrictions as possible on the privileges of the account used to access the Database. Make use of the database-specific mechanisms available to provide an extra layer of security; for instance, the H2 Database has a session-level option that disables all literal values on SQL Queries.

16. Use credentials with a limited shelf life: 

Instruct the application to rotate database credentials often; an innovative method is Spring Cloud Vault.

17. Document everything:

If the application saves client data, then this is an absolute must; several solutions are available that either interface directly with the Database or function as proxies, allowing us to at least evaluate the damage in the event that an attack occurs.
Utilize Web Application Firewalls (WAFs) or other intrusion detection solutions comparable to these: these are the standard instances of blocklists; typically, they come with a massive database of known attack signatures and will trigger a programmed action upon detection. 
Some additionally incorporate in-JVM agents that can identify intrusions by applying some instrumentation. The primary benefit of this method is that it makes it much simpler to patch a potential vulnerability since we will have access to the whole stack trace.

18. Don’t use dynamic SQL; instead, use prepared statements:

Refrain from incorporating users’ supplied data straight into SQL queries. It is required to turn off “data interpretation” to accomplish this goal. This will ensure that the data will not be processed once it has been put into the Database. Even if it is set in the structure of a SQL query, the system will not begin to execute it; instead, it will just place the data in its current state.

19. Limit Database Permissions

Employ the concept of the least privilege possible (POLP). Users must have access at the highest level possible while working on the website since they may be making changes. However, before selecting the “full rights” option that allows unrestricted access, you should consider it seriously first. Instead, it would help if you were sure that the individual who demands the most significant degree of access is, in fact, in need of it to carry out their responsibilities.

20. Restriction of the Display of Particular Errors

On some login screens, an error message that reads “User ‘JohnDoe123’ was not found” may appear if a user enters the incorrect username. By being this detailed, you invite hackers to join your account through brute force. To put it another way, attackers may keep typing in various usernames until the banner is no longer visible. Either restrict the error display’s visibility or turn it off entirely if you want to stop this from happening. This restricts access to the error log to your internal users, ensuring that only they can resolve problems if they arise.
It is also possible to implement the procedure for preventing SQL injections within your company so that you can instruct the employees on what aspects are essential to pay attention to whenever new updates are planned. In addition, it is also possible to implement the procedure for preventing SQL injections within your company.

Conclusion:

Prevention techniques such as input validation, parameterized queries, stored procedures, and escape are effective against various attack vectors. However, they are often inadequate to safeguard databases because of the significant variation in the pattern of SQL injection attacks.
Therefore, to ensure that you have covered all of your bases, you should use the tactics discussed thus far in conjunction with a reliable WAF if you use cyber security news. The most important advantage a WAF provides is the security it offers to bespoke web applications that, in the absence of this feature, would be unprotected.

Kali Linux Looks Like Mac

We have already shows some awesome looks of Kali Linux in our this article. But this article is going to be interesting, because we are going to give our Kali Linux a proper macOS look.

Here we are using Kali Linux 2020.3 primary installation with lightdm display manager. We need to configure lots of things so this article will be full with screenshots and might be lengthy but every step will be useful so we need to have patience. After doing all the process our Kali looks like following screenshot.

It's really Kali
Yes, This is Kali Linux not macOS

First of all we need to update & upgrade our Kali by using sudo apt update and sudo apt upgrade. We update our machine every morning it’s a good practice.

Configuring the Font

Okey, first we need to set our font. We are going to use “Noto sans regular” font in our system but we have to download this font from Google fonts. Now we download this font by clicking on “Download family” as shown in the following screenshot.

downloading noto sans font from google fonts

It will download a zip file before extracting it we open our file manager with root permissions. So we run following command:

sudo thunar

This will ask our sudo password. Then we can see thunar file manager with root access, then we need to right click on zip file and select ‘Extract Here’ option, as shown in the following screenshot:

extract the fonts fonts for Kali Linux

Now we open the extracted folder and see some files. We just need the ‘Noto sans regular’ file so we copy it then we go to the directory /usr/share/fonts/X11 and paste it there. This copy and pasting job will not possible without root accessed file manager.

noto sans font on fonts directory

Now we need to choose the font on our settings. We open our settings manager.

open settings manager

Then we got our settings manager window and we click on Appearance then we move to fonts tab as shown in the following screenshot:

changing fonts options in kali linux

Here we need to choose Noto Sans Regular as ‘Default Font’ the size will be 10.

Noto sans regular font in Kali Linux

Then we click on “Select” and close the settings manager. We have done the font.

Configuring Themes

Our next part is configuring the themes for macOS. Here we use WhiteSur GTK themes. We can download it from this website. After navigating on the website we need to check the files section and download the WhiteSur dark theme and the WhiteSur Light theme. Those are highlighted on the following screenshot:

whitesur theme files on internet

Then we again open our Thunar File Manager with root permission. Whenever we need to configure our system files we need root permissions. So again we use the command:

sudo thunar

Then we navigate to our Downloads folder and we got the themes tar.xz compressed files. Again we decompress (Extract Here) them. Then we need to copy those theme folders to /usr/share/themes directory. As we did in the following screenshot:

whitesur themes in directory

Now we can change the themes from Appearance in the Settings Manager.

whitesur themes in kali linux

Now we can change the style from default Kali-Dark to WhiteSur themes. Here we are choosing the dark one.

And we can change the feels, but need to do some more things.

On our ‘Settings Manager’ we need to navigate to the ‘Window Manager’.

Settings Manager in Kali Linux

Here we are in ‘Window Manager’, and change it’s theme to WhiteSur dark and also we need to change the Active button manager. As we know macOS have those minimise, maximise and close buttons on the left side. Changing the buttons are so simple just drag and drop. As we are doing it on the following screenshot:

window manager settings in Kali linux
Drag and Drop the buttons

Now we are done with the theming part. we are close to looks like a mac.

Installing Icons

Now its time to install icons in our Kali Linux systems. Icon theme will change the icons in our system just like macOS. Let we download the icon theme form this website.

icon theme download

After download this we use the same method to extract it. After extracting we got two folder inside it. One icon theme for light another for dark.


Again opens root accessed thunar file manager and paste the icon theme folders in /etc/share/icons directory, as we did in the following screenshot:

icon themes in directory

Then we can change the icons from the Appearance menu’s icon tab.

choosing icon theme

Not only icons macOS have special kind of cursors. To do change that we also need to download cursors and configure them.

We can download the McMojave cursors from here. We download and extract it. Then we need to copy them in icons directory that is /usr/share/icons

icon themes in directory

Then we can set our mouse cursor we again opens our settings manager and goes to “Mouse and Touchpad” option then we navigate to themes tab there and choose “McMojave cursor”, as shown in the following screenshots.

Mouse and Touchpad settings

Choosing cursor themes

After this our cursor and it’s effects will looks like macOS.

Configuring Top Panel

It’s time to configure our top panel. To do this we need to open our Panel>Panel Preference by right clicking on top panel, as shown in the screenshot:

opening panel settings

After this we got the Panel Preference window here we need to auto hide the panel intelligently as we did in the following screenshot:

Panel hide intelligntly

Then we need to go to the ‘Items’ tab in the ‘Panel Preference’ window. Here we have to change the Whisker Menu’s logo to Apple’s logo. We click on the edit item as seen in the following screenshot:

Whisker menu settings
We need to click on the Edit button mouse pointer shows it

Now we got the settings window as shown in following screenshot:

whisker menu settings

Here to change the button we need to go to the ‘Panel Button’ tab.

whisker button icon in xfce

Here we can change the button icon. To do it we click on the icon and after couple of seconds all the application icons comes in front of us. But to set Apple’s icon we need to navigate to ‘All icons’ from ‘Application Icon’.

all icon

Here in search bar we search for Start and we got a Apple logo we click on it and click on ‘OK’ to set it.

apple logo on Kali linux

Now we can do other customization on other items whatever we need. For an example we can remove the workspace switcher if we don’t need it. As we like it.

Plank

Plank is a Linux dock this will give us the ultimate look of macOS. Here we need to install it and auto start it. To install it we need to run following command:

sudo apt-get install plank -y

After installation is complete we ca run it by applying following command:

plank

It will create a beautiful dock in our system as we can see in the following screenshot.

plank

We got a dock but it’s not looks like macOS. Let’s configure it we need to add theme on plank. We already have downloaded the themes inside the WhiteSur Light and WhiteSur Dark themes folder.

We open our file manager thunar with root permission by using sudo command. Then we need to navigate to our Downloads directory and we can find a folder called plank inside the WhiteSur folders. Here we need to copy them in planks theme folder.

Before do it we need to rename those folders because light and dark themes for plank both are named as ‘plank’ and we can’t copy them in a same directory. We change the name of plank folders to ‘WhiteSur-light-Plank’ and ‘WhiteSur-dark-Plank’.

renaming plank theme folders

Then copy and paste those folders to /usr/share/plank/themes directory. As we did in the following screenshot.

plank themes on directory

Now we can change the theme of plank. To do this we need to open plank settings by clicking right with the ctrl key over the plank (press and hold Ctrl key and click right over plank items) then we need to go into the Preference. Then we can change the themes.

Opening Plank Settings

Here we got a Plank Preference window here we need to set the theme WhiteSur drk/light and enable the Icon Zoom (with 150 value) as shown in the following screenshot.

plank theming

We also can add Plank docklets from the docklets tab. We just double click on ‘Trash’ & ‘Desktop’ docklets to add them on our plank dock.

plank docklets

To add new items on Plank dock we can drag and drop applications form main application window. To remove a item from plank dock we need to drag and through on the right side of desktop.
 

Here we notice that sometimes we got a shadow of the plank dock on our screen. To remove it we goes to the Settings Manager>Window Manager Tweaks Then navigate to ‘Compositor’ tab and uncheck the “Show shadows under dock windows”.

removing the shadow line from plank dock

Now we need to set plank for auto start, if we did this then we don’t need to run plank command to start it. It will automatically start when we boot our system.

To set it we need to open our ‘Settings Manager’ again. Then forward to ‘Session and Startup’ then navigate to ‘Application Autostart’ tab and click on the ‘➕Add’.

Add autostart apps

Now we give it a name ‘Plank’ and the staring command will be plank. We fill it up and click on ‘OK’. 

Plank autostart adding

Now we added plank on auto start apps. We are almost done.

Wallpaper

We have done lot’s of theming and modification but the original thing is the wallpaper without a mac wallpaper it will not bring the feeling. So we search on Google to Download HD macOS wallpaper and download some default macOS wallpaper image.

After downloading it we right click on it and set it as wallpaper.

setting up a wallpaper

To move our desktop icons on right side, we open Desktop settings by right clicking on our Desktop.

Changing desktop wallpaper

After opening Desktop settings we move to icons tab and set the icons orientations to ‘Top Right Vertical’.

Search Box of Mac

Here we give our system a search menu which will appear when we press “Ctrl+ Space Bar” 

To do this we need to run the following command to install Synapse.

sudo apt-get install synapse

After installation complete we will add this on our top panel we right click on our panel then Panel>Panel Preference>Items>Add(+)>Launcher>Add.

Then we click on launcher edit.

adding a launcher application

Here we click on ‘+’ icon to add a application. Then we set Synapse here as we did in the following screenshot.

synapse in kali linux

After adding this we need to change it’s logo/icon to change it we click on edit as shown in the following screenshot:

editing the icon of synapse

Then we click icon the icon and we got list of icons here we go to all icons search for ‘Search’.

setting up another icon

Now we can move this search icon from Items tab where we want to place it.

Then we can click on it to open, and we click on the right top button to open preference, as we showed in the following screenshot:

search window settings opening

On the Preference window we check ✅ the “Startup on login” and uncheck the “Show notification icon” then we choose the theme to “Virgillio”.

Search box themimg

Then we close it and whenever we need to search anything on our system we can click the search icon on our top panel or “CTRL+{SPACE-BAR}” to launch it.

Now our Kali looks similar to macOS as we can see in the following screenshot.

Kali Llinux on MacOS theme

In this detailed article we give our Kali Linux a proper macOS theme. Trying it was a fun but it’s really looks awesome. 

Nowadays Kali got ZSH as default so our terminal is also is ZSH just like the macOS.

Love our articles? Make sure to follow us on Twitter and GitHub, we post article updates there. To join our KaliLinuxIn family, join our Telegram Group. We are trying to build a community for Linux and Cybersecurity. For anything we always happy to help everyone on the comment section. As we know our comment section is always open to everyone. We read each and every comment and we always reply.

What is Kali Linux ?

What is Kali Linux

Kali Linux (rebuild of BackTrack), is an open-source, Debian based Linux distribution which was created for advanced penetration testing. Kali Linux is widely popular between ethical hackers, security researchers and digital forensics experts. Kali Linux has lots of tools inbuilt for security research. Kali Linux is freely available for everyone.

Kali Linux preview

Key Features of Kali Linux

  • More than 600 tools for cybersecurity experts.
  • Completely FREE for ever.
  • Well maintained open-source repository.
  • Wide-ranging device support.
  • Nethunter and Raspberry Pi support.
  • Totally Customizable.
  • ARMEL and ARMHF support.

How Kali Linux is different?

Here we need to keep on mind that Kali Linux is created for professional security researchers and penetration testers. So it is somewhere different from other Linux distro like Ubuntu, POP! OS etc. There are some key changes on Kali Linux as we discussed in following points:

  1. Network services disabled by default: Kali Linux contains systemd hooks which disable the network services by default. These hooks allow us to install various services on Kali Linux, while ensuring that our system remains secure by default, no matter what packages are installed. Additional services such as Bluetooth are also blacklisted by default. But we can enable it and use it.
  2. Custom Linux kernel: Kali Linux uses an upstream kernel, and the kernel has the latest injection patches included.
  3. A minimal and trusted set of repositories: Kali Linux has very minimal set of repositories which is trusted. It makes the software sources of Kali Linux is absolute minimal. Many new Kali users are tempted to add additional repositories to their sources.list, but doing so runs a very serious risk of breaking our Kali Linux system.

Who Should Use Kali Linux?

As the distribution’s inventors, you might anticipate us to recommend that everyone should be using Kali Linux. The fact of the matter is, still, that Kali is a Linux distribution specifically geared towards professional penetration testers and security specialists, and given its unique nature, it’s NOT a recommended distribution if you ’re strange with Linux or are looking for a general- purpose Linux desktop distribution for development, web design, gaming,etc.

Indeed for educated Linux druggies, Kali can pose some challenges. Although Kali is an open source design, it’s not a wide-open source design, for reasons of security. The development platoon is small and trusted, packages in the depositories are inked both by the individual committer and the platoon, and-importantly-the set of upstream depositories from which updates and new packages are drawn is veritably small. Adding depositories to your software sources which haven’t been tested by the Kali Linux development platoon is a good way to beget problems on your system.

While Kali Linux is architected to be largely customizable, don’t anticipate to be suitable to add arbitrary unconnected packages and depositories that are “ out of band” of the regular Kali software sources and have it Just Work. In particular, there’s absolutely no support whatsoever for the apt-add- depository command, LaunchPad, or PPAs. Trying to install Steam on our Kali Linux desktop is an trial that won’t end well. Indeed getting a package as mainstream as NodeJS onto a Kali Linux installation can take a little redundant trouble and tinkering.

Still, if you don’t have at least a introductory position of capability in administering a system, if you’re looking for a Linux distribution to use as a literacy tool to get to know your way around Linux, If you’re strange with Linux generally.

In addition, abuse of security and penetration testing tools within a network, particularly without specific authorization, may beget irrecoverable damage and affect in significant consequences, particular and/ or legal. “ Not understanding what you were doing” isn’t going to work as an reason.

Still, if you’re a professional penetration tester or are studying penetration testing with a thing of getting a pukka professional, there’s no better toolkit-at any price-than Kali Linux.

If you are looking for a Linux distribution to learn the basics of Linux and need a good starting point, Kali Linux is not the ideal distribution for you. You may want to begin with Ubuntu, Mint, or Debian instead. If you’re interested in getting hands-on with the internals of Linux, take a look the Linux From Scratch project.

I installed Kali Linux Now I’m a Hacker…

No my friend. You might had installed Kali Linux which is created for ethical hackers but just by installing it you can’t be a hacker and there is such no magical tool for one-click hack.

Let know about the tools like nmap, Metasploit, Brup Suite or WireShark these tools are the infamous tools on Kali Linux (there are more). But non of these tools will led you to hack anything by just using them. These tools just did some automated process which may save your time a lot during the penetration testing.

I use Kali

So installing Kali Linux or using Kali Linux from a long time doesn’t makes you an Ethical hacker. Kali Linux just an operating system just like Windows is an operating system. Your knowledge, your experience and the way you think will make you a hacker.

Love our articles? Make sure to follow us on Twitter and GitHub, we post article updates there. To join our KaliLinuxIn family, join our Telegram Group. We are trying to build a community for Linux and Cybersecurity. For anything we always happy to help everyone on the comment section. As we know our comment section is always open to everyone. We read each and every comment and we always reply.

Rainbow Tables & Rainbowcrack Cracking Passwords on Kali Linux

In today’s detailed article we are going to discuss about how we can use ‘Rainbow Table‘ to crack password hashes easily on our Kali Linux system. We also learn the use of RainbowCrack tool. RainbowCrack is really faster like Barry Allen.

rainbow tables and rainbowcrack on kali linux

What is Rainbow Table?

Rainbow table is a pre-computed table for caching the output of cryptographic hash functions, mainly for cracking password hashes. Rainbow table was invented by Philippe Oechslin.

We know that our passwords are stored on a website or WiFi. There is isn’t stored as a plain text. The stored passwords are hashed in various methods like LM, NTLM, MD5, SHA1 etc. This type of encryption is one-way encryption, that means we can encrypt it from a plaintext but we can’t decrypt it in a plaintext from it’s hash.

Then how brute-force attack works?

Well, as we know brute-force uses a list of passwords. In the brute-force it creates a hash of a password and match it hash with the target hash (if they are same or not). It did same process for the all passwords one by one in the list. That’s why this attack is very time consuming and computer resource consuming also, but brute-force didn’t uses much storage as compared to rainbow tables.

Rainbow table works on the principle of time-memory trade-off, using less computer processing time and more storage than a brute-force attack. Rainbow crack is much faster then brute-force. For more about rainbow table works we can check this. For the computer with low processing power rainbow table is batter is than brute-force.

We can create a rainbow table at once and use it, or we can download rainbow tables from internet. There are some types of rainbow tables depending on type of hashes, characters and length of password.

For an example a rainbow table is for SHA1 and uses all lowercase (a,b,c…z) and for password length 1 to 7, will be different from a rainbow table for SHA1, lowercase password with length of 1 to 9.

We can see or download (free and paid) rainbow tables on this website.

Rainbow Tables for Download

Here rainbow tables are divided by hashing algorithms (LM, NTLM, MD5, SHA1), charset (numeric, lowercase etc), length of the password (in plaintext). We can download rainbow tables from this website or we can create our own rainbow tables as per our own requirements. Here we should keep in mind that rainbow tables are large (from 20GB — more than TB).

Creating own Rainbow Table using RainbowCrack

We can create our own rainbow table by using ‘RainbowCrack’ tool. This tool comes pre-installed on our Kali Linux system.

Creation of rainbow table takes much time and storage space on system, but after creating a table we are able to use it to crack passwords faster every time.

For an example we are going to create a rainbow table to crack a MD5 password which have plaintext length 4 and using only lowercase alphabets.

To do this we need to open our Kali Linux terminal window and use rtgen command. rtgen stands for rainbow table generation.

First we run it with -h to see the options as following:

rtgen -h

Then the help menu of rtgen will open in front of us, as we can see in the following screenshot:

rainbow crack rtgen help options

On the above screenshot we can see how to use rtgen with some example.

To generate a rainbow table for a MD5 hash of a 4 plaintext length (containing only alphabets) we use following command:

sudo rtgen md5 loweralpha 1 4 0 1000 1000 0

In the above command rtgen md5 is for generating rainbow table for MD5 hash, we have set it for lowercase alphabets only by using loweralpha. Then 1 is for minimum length of plaintext password and 4 is for maximum. Then we use left everything default. 0 for table index, chain length & chain number set to 1000, part index is 0.

Then our rainbow table will be generated as we can see in the following screenshot:

rainbow table generated
This is a small rainbow table so generated in seconds

We can see the used character set, plaintext count and plaintext length on the above screenshot.

This rainbow table will be stored in /usr/share/rainbowcrack directory.

rainbow table generataion location

Cracking Hashes using RainbowCrack

Now we can use this rainbow table to crack four (4) characters password’s MD5 hash.

Here we have a md5 hash which have 4 characters plaintext length in lowercase.

d6ca3fd0c3a3b462ff2b83436dda495e

We are going to crack it using our created rainbow table. Before that we need to sort our rainbow table by using the following command:

sudo rtsort .

Then the rainbow table will be sorted as we can see in the following screenshot:

rainbow tables are now sorted

Now we can use RainbowCrack tool to crack the password hash. to crack it we use following command:

rcrack . -h d6ca3fd0c3a3b462ff2b83436dda495e

Here we call rcrack aka RainbowCrack to crack the hash, then use used -h flag for hash, then we use the password hash to crack.

Then it will crack the password in seconds as we can see it on the following screenshot:

rainbow crack cracked the file

We also can use a hash list stored in a txt file. Here we have a hash.txt file on our Desktop.

list of hashes on Desktop

To crack all hashes inside it, we use -l flag for list, as shown in following command:

rcrack . -l /home/kali/Desktop/hash.txt

Then RainbowCrack will crack the the hashes in seconds as we can see in the following:

RainbowCracked hash cracked on files

This is about rainbow tables and how to crack passwords using RainbowCrack on our Kali Linux system.

This is not ends here. We are giving a practice task.

Create a md5 rainbow table for 6 characters plaintext password (lowercase only) and crack hashes of this file.

Share the screenshot of the practice on Twitter and mention us @KaliLinux_in or comment down in the comment section.

Love our article? then make sure to follow us on Twitter and GitHub, we post article updates there.

For anything we always happy to help everyone on the comment section. As we know our comment section is always open to everyone. We read each and every comment and we always reply.

To join our family, join our Telegram Group. We are trying to build a community for Linux and Cybersecurity.

TempoMail — Command Line Temporary Email in Linux

During penetration testing many times we need to register on websites and they send a lots of mails. Even sometime we don’t want to share our original e-mail id. Then how we can hide ourself from website’s eye?

Well, there are tons of temporary or disposable mail services in market that provides us this feature through their websites but we can’t say what’s running in their backend and we personally hates those annoying ads !!
Here in this article we will discuss about an open-source command line tool that will provide us a disposable e-mail address. We can use it to bypass e-mail verification of any website.
Command line temporary email in linux

This tool is called TempoMail. TempoMail is written in go language by Kavish Gour. First we need to install go language in our Kali Linux system. After installing Go Language we open terminal and clone the GitHub repo by using following command:
git clone github.com/kavishgr/tempomail
The screenshot of the command is following:
Tempomail clonning
 
Then we need to go inside the temomail directory by using cd command:
cd tempomail
Now we need to build this by using following command:
go build .
If the building process is successful then we got a file called tempomail in our directory. As we can see in the following screenshot:
Compailing tempomail

Now we need to move this tempomail file to /usr/local/bin where the software installed locally by using following command:

sudo mv tempomail /usr/local/bin/
The output of the command is shows in the following screenshot:
moving tempomail file

Now we have installed tempomail successfully. We can check it via running following command from anywhere in terminal:

tempomail -h

Here in the following screenshot we can see that our emails will locally saved on /tmp/1secmails/ by default. We can change it by using -path string.

Now we can set our custom mail by using tempomail. To do this we run tempomail command in our terminal:

tempomail
Then it will ask us the “Input Name”, here we can put anything to get a mail id with thee name(if available on this time) we have putted ‘kalilinux’. As we can see in the following screenshot:
tempomail custom name

After this we got a mail id with this name. Shown in the following screenshot:

custom temp mail id

Now if anyone send mails on this email id we got the mail. Yoo, We got an e-mail. After we got a mail in our inbox it shows like following:

tempomail recived

To open our mailbox we need to open another terminal window and type following command:

ls /tmp/1secmails/

The above command shows a mail in the directory.

tempomail default inbox

Now we can see what’s inside the mail using cat (or any text viewer or editor tool). We run the following command to see the mail.

Recived a Mail using tempomail

This is how we can receive an e-mail on our custom temporary mail id running on command line. We found this good at bypass the e-mail verification during penetration testing and avoid spam or unwanted mails on our original mail id.

This is how we can create our custom disposable e-mail address directly from our terminal.

Love our articles make sure to follow us on articles on Twitter and GitHub. We publish updates of articles there.

For any problem or suggestion comment down in the comment section. We read comments and always reply.

How to Manage Big Passwordlists

In the penetration testing journey we must learn how to brute force attack. But the success of brute force attack depends on our password list. We need a bigger and specialized password list to be successful in dictionary attack or brute force attack. We can find over 20GB password lists on the internet easily.
Managing a bigger sized password list is always a headache for everyone. Ever tried to edit an <10GB wordlist text file on a mid-range laptop? After trying this anyone will know what is real pain!
But sometimes we need to create a custom wordlist and we also want to use the big sized common password list. Sometimes we also need to delete some passwords from the list or add some passwords to the list. In this situation we have two ways to do it.

how to manage big passwordlists

First is we may use a famous tool called Dymerge. This tool might be famous but we think it sucks. Then we should follow the second one. Wait a bit first we are going to learn about Dymerge tool then we learn about the second method.

Dymerge in Kali Linux

Dymerge is a python tool that we can use our password lists. It is a simple command line tool that help us to marge wordlists or add/remove specific keywords from a wordlist.

Let’s use Dymerge in our Kali Linux system. First we need to copy it from it’s GitHub repository by using following git clone command:
git clone https://github.com/k4m4/dymerge
The screenshot of the command is following:

cloning Dymerge in Kali Linux

Then we need to navigate inside the dymerge directory by using following command:

cd dymerge

We can see following files in dymerge directory by using ls command:

ls

In the following screenshot we can see the dymerge.py the python script we need.

dymerge python tool

To see Dymerge’s help option we can use following command:

python dymerge.py --help

Dymerge will open the help menu after the above command as the following screenshot:

dymerge help option

Here we can see that we can marge two wordlists using this tool. For example we gathered some wordlist files on our Desktop.

wordlist text files on our desktop

Now we will marge all these wordlists into a giant wordlist and we want the output in compressed format. Here we compress all the wordlists on the directory, for that we just need to specify the directory only.
If we want to merge individual wordlists then we have to specify the file names also. -o flag is used for the output location & format. We also want to insert one more password “KaliLinuxIn” into our giant wordlist, so use need to use -i flag.
We can remove the duplicate passwords and keep the unique passwords only by just using the -u flag. We also can reverse the passwords by using -r flag but we are not using that on our this example.
So we apply the following command in our terminal.

python dymerge.py /home/kali/Desktop/my-wordlists -u -f -o /home/kali/Desktop/my-wordlistsgiantwordlist.txt -i KaliLinuxIn -z bz2
Here we have run the command and the output is following:

dymerge is running

In the above screenshot we can see Dymerge is started its job. We just need wait some seconds (It’s depends on our wordlist’s size and our machine’s processing power). After finish the work it looks like the following screenshot:

dymerge is finished it's job

We had choose the same directory for the giant wordlist’s output as zip. After complete the process we got the giant wordlist on our required directory or folder, as we can see in the following screenshot.

our giant wordlist is created
We got the giant zipped wordlist. Don’t follow our wallpaper it changes automatically in minutes

That is how Dymerge works. But this can be replaced by some simple bash commands that is the second method. Bash can easily replace all it’s functions, so why we need this? That why we told that Dymerge sucks.

DyMerge Vs Bash

When Bash commands can replace Dymerge then why we need to carry an extra python script on our machine. We don’t need to download and run an extra tool to do it.
Moreover, Dymerge doesn’t work well with too large files. This is because it loads every word from each dictionary into an array, causing the computer system’s memory to overload and possibly even crash.
Here is some Dymerge uses and Bash commands that can replace those:
Dymerge command:

python dymerge.py /usr/share/wordlists/rockyou.txt /lists/cewl.txt -s -u

Bash command to replace this

sort -u /usr/share/wordlists/rockyou.txt /lists/cewl.txt > output.txt

Dymerge command:

python dymerge.py /lists/cewl.txt /lists/awlg.txt -s -u -i Passw0rd,inpuT

Bash command to replace this

sort -u /lists/cewl.txt /lists/awlg.txt <(echo 'Passw0rdninpuT') > output.txt

Dymerge command:

python dymerge.py ~/fsocity.dic -s -u -r -o ~/clean.txt

Bash command to replace this

sort -r <~/fsocity.dic | uniq> clean.txt

Dymerge command:

python dymerge.py /dicts/crunch.txt /dicts/john.txt -s -u -f -z bz2

Bash command to replace this

sort -u /dicts/crunch.txt /dicts/john.txt | bzip2 > output.bz2

Even though all of DyMerge’s main features can be fulfilled with classic bash, the tool has actually gained publicity.  — Nikolaos Kamarinakis (Creator of DyMerge)

So, this all for this tutorial hope everyone liked this. In this tutorial we have learned how to manage bigg wordlists on our system.

Love our articles? Make sure to follow us to get all our articles directly on inbox. We are also available on Twitter and GitHub, we post article updates there. To join our family, join our Telegram Group. We are trying to build a community for Linux and Cybersecurity. For anything we always happy to help everyone on the comment section. As we know our comment section is always open to everyone. We read each and every comment and we always reply.

WebScarab — Web Application Analysis Tool

WebScarab is a tool that we can use in web security testing. It acts like a web proxy and allow user to intercept the request (HTTP and HTTPS) and web server replies. Sounds familiar? Oh Burp ? Yah, we can consider WebScarab as a alternative of BurpSuite.

WebScarab is an open source tool developed by The Open Web Application Security Project (OWASP), and was implemented in Java so it could run across multiple operating systems.

Webscarab Kali linux

As WebScarab’s default configuration, it uses port 8008 to capture HTTP requests, so we need to configure our browser to use that port in localhost as a proxy. We need to follow the similar steps to configure our browser’s proxy as we did for the Burpsuite only the default port will be 8008.

WebScarab comes pre-installed with Kali Linux 2020 full version,or we can use following command to install it:

sudo apt-get install webscarab

We can find it on application menu.

WebScarab in app menu

After opening WebScarab we got it’s main screen like following screenshot:

WebScarab main screen

Now we will test it against bwapp on our localhost. We found the request on the “Summary” tab.

Now we right click on the folder and click on “Spider tree” to see all the requests on the network.

webscarab spider tree

Now in the “Proxy” Tab we found the listener. Here we can start or stop the listener.

webscarab proxy listner

Whenever we do any post request we can see WebScarab’s request editor will come in front of us just like BurpSuite as we can see in the following screenshot:

edit bwapp's post request

Here we change some data on post request and click on “Accept” to forward the request.

editing request on the webscarab

Here in the following screenshot we can see that we have successfully changed the post request.

WebScrab changes bwapp post request

Not only changing post requests this tool can do a lot of things. We just gave this example

According to WebScarab’s official website it’s main features are following:

  • Fragments – extracts Scripts and HTML comments from HTML pages as they are seen via the proxy or other plugins.
  • Proxy – observes traffic between the browser and the web server. The WebScarab proxy is able to observe both HTTP and encrypted HTTPS traffic by negotiating an SSL connection between WebScarab and the browser, instead of simply connecting the browser to the server and allowing an encrypted stream to pass through it. Various proxy plugins have also been developed to allow the operator to control the requests and responses that pass through the proxy.
  • Manual intercept – allows the user to modify HTTP and HTTPS requests and responses on the fly, before they reach the server or browser.
  • Beanshell – allows for the execution of arbitrarily complex operations on requests and responses. Anything that can be expressed in Java can be executed.
  • Reveal hidden fields – changes all hidden fields found in HTML pages to text fields, making them visible and editable. Sometimes it is easier to modify a hidden field in the page itself, rather than intercepting the request after it has been sent.
  • Bandwidth simulator – allows the user to emulate a slower network in order to observe how their website would perform when accessed over, say, a modem.
  • Spider – identifies new URLs on the target site, and fetches them on command.
  • Manual request – allows editing and replay of previous requests, or creation of entirely new requests.
  • Session ID analysis – collects and analyzes a number of cookies to visually determine the degree of randomness and unpredictability. Note that this analysis is rather trivial, and does not do any serious checks, such as FIPS, etc.
  • Scripted – operators can use BeanShell (or any other BSF supported language found on the classpath) to write a script to create requests and fetch them from the server. The script can then perform some analysis on the responses, with all the power of the WebScarab Request and Response object model to simplify things.
  • Parameter fuzzer – performs automated substitution of parameter values that are likely to expose incomplete parameter validation, leading to vulnerabilities like Cross Site Scripting (XSS) and SQL Injection.
  • Search – allows the user to craft arbitrary BeanShell expressions to identify conversations that should be shown in the list.
  • Compare – calculates the edit distance between the response bodies of the conversations observed and a selected baseline conversation. The edit distance is “the number of edits required to transform one document into another.” For performance reasons, edits are calculated using word tokens, rather than byte by byte.
  • SOAP – parses WSDL and presents the various functions and the required parameters, allowing them to be edited before being sent to the server. Note: This plugin is deprecated, and may be removed in the future. SOAPUI is way beyond anything that WebScarab can do, or will ever do, and is also a free tool.
  • Extensions – automates checks for files that were mistakenly left in the web server’s root directory (e.g. .bak, ~, etc). Checks are performed for both files and directories (e.g. /app/login.jsp will be checked for /app/login.jsp.bak, /app/login.jsp~, /app.zip, /app.tar.gz, etc). Extensions for files and directories can be edited by the user.
  • XSS/CRLF – a passive analysis plugin that searches for user-controlled data in HTTP response headers and body to identify potential CRLF injection (HTTP response splitting) and reflected cross-site scripting (XSS) vulnerabilities.       

WebScarab’s spider, similar to the Burp Suite, is useful for discovering all referenced files in a website or directory without having to manually browse all possible links and to deeply analyze the requests made to the server and use them to perform more sophisticated tests.

WebScarab is a good alternative of infamous Burp Suite. Follow us on GitHub and Twitter we post updates about our new articles there.

All opinions and thoughts are welcome in the comment section. We always reply.

Open Whatsapp chat
Whatsapp Us
Chat with us for faster replies.