November 24, 2022
We have already shows some awesome looks of Kali Linux in our this article. But this article is going to be interesting, because we are going to give our Kali Linux a proper macOS look.
Here we are using Kali Linux 2020.3 primary installation with lightdm display manager. We need to configure lots of things so this article will be full with screenshots and might be lengthy but every step will be useful so we need to have patience. After doing all the process our Kali looks like following screenshot.
| Yes, This is Kali Linux not macOS |
First of all we need to update & upgrade our Kali by using sudo apt update and sudo apt upgrade. We update our machine every morning it’s a good practice.
Configuring the Font
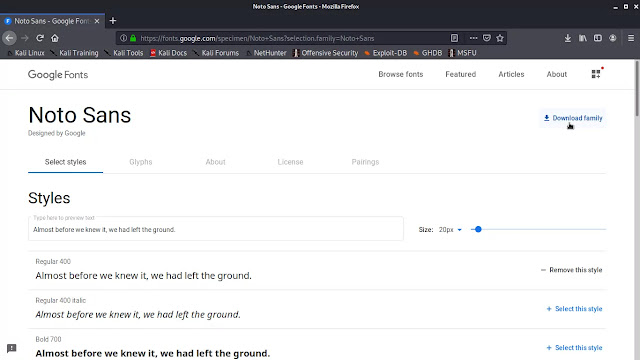
Okey, first we need to set our font. We are going to use “Noto sans regular” font in our system but we have to download this font from Google fonts. Now we download this font by clicking on “Download family” as shown in the following screenshot.

It will download a zip file before extracting it we open our file manager with root permissions. So we run following command:
This will ask our sudo password. Then we can see thunar file manager with root access, then we need to right click on zip file and select ‘Extract Here’ option, as shown in the following screenshot:

Now we open the extracted folder and see some files. We just need the ‘Noto sans regular’ file so we copy it then we go to the directory /usr/share/fonts/X11 and paste it there. This copy and pasting job will not possible without root accessed file manager.

Now we need to choose the font on our settings. We open our settings manager.

Then we got our settings manager window and we click on Appearance then we move to fonts tab as shown in the following screenshot:

Here we need to choose Noto Sans Regular as ‘Default Font’ the size will be 10.

Then we click on “Select” and close the settings manager. We have done the font.
Configuring Themes
Our next part is configuring the themes for macOS. Here we use WhiteSur GTK themes. We can download it from this website. After navigating on the website we need to check the files section and download the WhiteSur dark theme and the WhiteSur Light theme. Those are highlighted on the following screenshot:

Then we again open our Thunar File Manager with root permission. Whenever we need to configure our system files we need root permissions. So again we use the command:
Then we navigate to our Downloads folder and we got the themes tar.xz compressed files. Again we decompress (Extract Here) them. Then we need to copy those theme folders to /usr/share/themes directory. As we did in the following screenshot:

Now we can change the themes from Appearance in the Settings Manager.

Now we can change the style from default Kali-Dark to WhiteSur themes. Here we are choosing the dark one.
And we can change the feels, but need to do some more things.
On our ‘Settings Manager’ we need to navigate to the ‘Window Manager’.

Here we are in ‘Window Manager’, and change it’s theme to WhiteSur dark and also we need to change the Active button manager. As we know macOS have those minimise, maximise and close buttons on the left side. Changing the buttons are so simple just drag and drop. As we are doing it on the following screenshot:
 |
| Drag and Drop the buttons |
Now we are done with the theming part. we are close to looks like a mac.
Installing Icons
Now its time to install icons in our Kali Linux systems. Icon theme will change the icons in our system just like macOS. Let we download the icon theme form this website.

After download this we use the same method to extract it. After extracting we got two folder inside it. One icon theme for light another for dark.
Again opens root accessed thunar file manager and paste the icon theme folders in /etc/share/icons directory, as we did in the following screenshot:

Then we can change the icons from the Appearance menu’s icon tab.

Not only icons macOS have special kind of cursors. To do change that we also need to download cursors and configure them.
We can download the McMojave cursors from here. We download and extract it. Then we need to copy them in icons directory that is /usr/share/icons

Then we can set our mouse cursor we again opens our settings manager and goes to “Mouse and Touchpad” option then we navigate to themes tab there and choose “McMojave cursor”, as shown in the following screenshots.
 |
| Mouse and Touchpad settings |
 |
| Choosing cursor themes |
After this our cursor and it’s effects will looks like macOS.
Configuring Top Panel
It’s time to configure our top panel. To do this we need to open our Panel>Panel Preference by right clicking on top panel, as shown in the screenshot:

After this we got the Panel Preference window here we need to auto hide the panel intelligently as we did in the following screenshot:

Then we need to go to the ‘Items’ tab in the ‘Panel Preference’ window. Here we have to change the Whisker Menu’s logo to Apple’s logo. We click on the edit item as seen in the following screenshot:
 |
| We need to click on the Edit button mouse pointer shows it |
Now we got the settings window as shown in following screenshot:

Here to change the button we need to go to the ‘Panel Button’ tab.

Here we can change the button icon. To do it we click on the icon and after couple of seconds all the application icons comes in front of us. But to set Apple’s icon we need to navigate to ‘All icons’ from ‘Application Icon’.

Here in search bar we search for Start and we got a Apple logo we click on it and click on ‘OK’ to set it.

Now we can do other customization on other items whatever we need. For an example we can remove the workspace switcher if we don’t need it. As we like it.
Plank
Plank is a Linux dock this will give us the ultimate look of macOS. Here we need to install it and auto start it. To install it we need to run following command:
After installation is complete we ca run it by applying following command:
It will create a beautiful dock in our system as we can see in the following screenshot.

We got a dock but it’s not looks like macOS. Let’s configure it we need to add theme on plank. We already have downloaded the themes inside the WhiteSur Light and WhiteSur Dark themes folder.
We open our file manager thunar with root permission by using sudo command. Then we need to navigate to our Downloads directory and we can find a folder called plank inside the WhiteSur folders. Here we need to copy them in planks theme folder.
Before do it we need to rename those folders because light and dark themes for plank both are named as ‘plank’ and we can’t copy them in a same directory. We change the name of plank folders to ‘WhiteSur-light-Plank’ and ‘WhiteSur-dark-Plank’.

Then copy and paste those folders to /usr/share/plank/themes directory. As we did in the following screenshot.

Now we can change the theme of plank. To do this we need to open plank settings by clicking right with the ctrl key over the plank (press and hold Ctrl key and click right over plank items) then we need to go into the Preference. Then we can change the themes.

Here we got a Plank Preference window here we need to set the theme WhiteSur drk/light and enable the Icon Zoom (with 150 value) as shown in the following screenshot.

We also can add Plank docklets from the docklets tab. We just double click on ‘Trash’ & ‘Desktop’ docklets to add them on our plank dock.

To add new items on Plank dock we can drag and drop applications form main application window. To remove a item from plank dock we need to drag and through on the right side of desktop.
Here we notice that sometimes we got a shadow of the plank dock on our screen. To remove it we goes to the Settings Manager>Window Manager Tweaks Then navigate to ‘Compositor’ tab and uncheck the “Show shadows under dock windows”.

Now we need to set plank for auto start, if we did this then we don’t need to run plank command to start it. It will automatically start when we boot our system.
To set it we need to open our ‘Settings Manager’ again. Then forward to ‘Session and Startup’ then navigate to ‘Application Autostart’ tab and click on the ‘➕Add’.

Now we give it a name ‘Plank’ and the staring command will be plank. We fill it up and click on ‘OK’.

Now we added plank on auto start apps. We are almost done.
Wallpaper
We have done lot’s of theming and modification but the original thing is the wallpaper without a mac wallpaper it will not bring the feeling. So we search on Google to Download HD macOS wallpaper and download some default macOS wallpaper image.
After downloading it we right click on it and set it as wallpaper.

To move our desktop icons on right side, we open Desktop settings by right clicking on our Desktop.

After opening Desktop settings we move to icons tab and set the icons orientations to ‘Top Right Vertical’.
Search Box of Mac
Here we give our system a search menu which will appear when we press “Ctrl+ Space Bar”
To do this we need to run the following command to install Synapse.
After installation complete we will add this on our top panel we right click on our panel then Panel>Panel Preference>Items>Add(+)>Launcher>Add.
Then we click on launcher edit.

Here we click on ‘+’ icon to add a application. Then we set Synapse here as we did in the following screenshot.

After adding this we need to change it’s logo/icon to change it we click on edit as shown in the following screenshot:

Then we click icon the icon and we got list of icons here we go to all icons search for ‘Search’.

Now we can move this search icon from Items tab where we want to place it.
Then we can click on it to open, and we click on the right top button to open preference, as we showed in the following screenshot:

On the Preference window we check ✅ the “Startup on login” and uncheck the “Show notification icon” then we choose the theme to “Virgillio”.

Then we close it and whenever we need to search anything on our system we can click the search icon on our top panel or “CTRL+{SPACE-BAR}” to launch it.
Now our Kali looks similar to macOS as we can see in the following screenshot.

In this detailed article we give our Kali Linux a proper macOS theme. Trying it was a fun but it’s really looks awesome.
Nowadays Kali got ZSH as default so our terminal is also is ZSH just like the macOS.
Love our articles? Make sure to follow us on Twitter and GitHub, we post article updates there. To join our KaliLinuxIn family, join our Telegram Group. We are trying to build a community for Linux and Cybersecurity. For anything we always happy to help everyone on the comment section. As we know our comment section is always open to everyone. We read each and every comment and we always reply.
Article posted by: https://www.kalilinux.in/2020/09/kali-linux-looks-like-mac.html
——————————————————————————————————————–
Infocerts, 5B 306 Riverside Greens, Panvel, Raigad 410206 Maharashtra, India
Contact us – https://www.infocerts.com
This is the article generated by feed coming from KaliLinux.in and Infocerts is only displaying the content.
