April 11, 2023
Zenmap is Official Graphical User Interface (GUI) version of Nmap. Zenmap is also very powerful tool like
After the installation is complete we just need to run following command to start Zenmap:
Now we can see that the above command opens Zenmap on our Kali Linux system in the following screenshot:
This is how we can install and run Zenmap on Kali Linux using Kaboxer.
Using Zenmap on Kali Linux
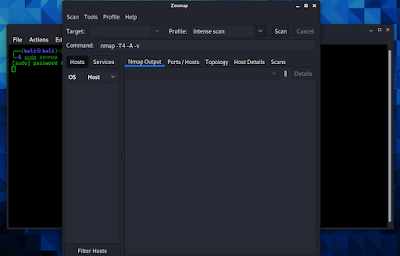
After a successful installation we can use Zenmap. If we use Zenmap with root then we can use it’s all options. So we open it with root by using following command:
We can see that Zenmap is opened on the following screenshot:
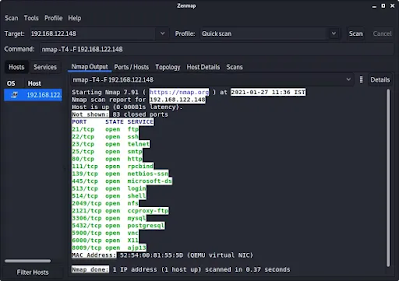
Here everything is very easy. Here we need to put the IP address of our target network. For an example we are choosing our localhost system’s IP address (192.168.122.148), we also can choose the website’s address.
Then we need to choose the profile as “Quick Scan“. For an example we have chosen “Quick Scan” we can choose other profiles as per our requirements. Then we just need to click on “Scan”. Then the result will comes in front of us as the following screenshot:
In the above screenshot we can see the open ports on our target.
Once the scan has completed, we can click on each tab to get further details about our target. If we’re performing a scan on an entire network, the “Topology” tab will help us create a network diagram of the target network.
Zenmap is very easy to use and user-friendly. This is how we can install Zenmap on Kali Linux new versions and it’s uses.
Liked our article? Then make sure to follow our mail-subscription to get new articles directly on inbox. We also update articles on our Twitter and GitHub profiles. Make sure to follow us there. We also have Telegram group for chatting with everyone.
For any kind of problem and queries make sure to comment in the comment section. We always reply.


