November 1, 2022
Linux Fundamentals Lesson 9 : Service Management in Linux
Exercises
Introduction
Lab Topology
Exercise 1 — Service Management in Ubuntu
Exercise 2 — Service Management in CentOS
Review
Start
Learning Outcomes
In this module, you will complete the following exercises:
- Exercise 1 — Service Management in Ubuntu
- Exercise 2 — Service Management in CentOS
After completing this lab, you will be able to:
- Start and Stop Services in Ubuntu
- Start and Stop Services in CentOS
- Check the Status of Services and Enable them Permanently
- Start/Stop/Restart services in both CentOS and Ubuntu Operating Systems
- Enable Services in CentOS and Ubuntu
Lab Duration
It will take approximately 40 minutes to complete this lab.
Lab Topology
During your session, you will have access to the following lab configuration.
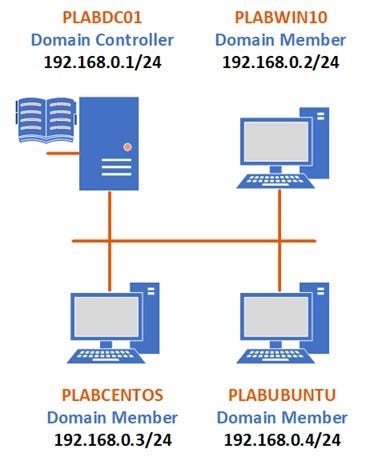
Depending on the exercises, you may or may not use all of the devices, but they are shown here in the layout to get an overall understanding of the topology of the lab.
- PLABDC01 — Windows Server 2019 (1809) (Domain Controller)
- PLABWIN10 — Windows 10 (1903) (Domain Member)
- PLABCENTOS — Centos 7 (Domain Member)
- PLABUBUNTU — Ubuntu 19.04 (Domain Member)
Exercise 1 — Service Management in Ubuntu
This is a very simple exercise in which we will learn how to start a service and stop/restart a service in Ubuntu. We will also see how to permanently enable a service to not have to start again after a reboot. As service management is different in both Ubuntu and CentOS, we will learn how to perform this in both operating systems. Some services start on OS boot and we need to manage those services using various Linux commands to control their processing.
Learning Outcomes
After completing this exercise, you will be able to:
- Start and Stop Services in Ubuntu.
- Check the Status of Services and Enable them Permanently.
Your Devices
During your session, you will have access to the following lab configuration.
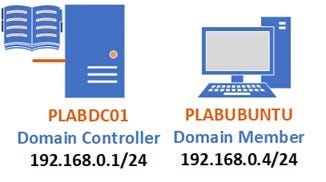
Depending on the exercises, you may or may not use all of the devices, but they are shown here in the layout to get an overall understanding of the topology of the lab.
- PLABDC01 — Windows Server 2019 (1809) (Domain Controller)
- PLABUBUNTU — Ubuntu 19.04 (Domain Member)
Task 1 — How to Start/Stop and Restart services in Ubuntu
In this task, you will learn how to start/stop and restart services in Ubuntu. Also, enable a service in an Operating system. You will also learn how to check status of the service after stopping it manually and then again reloading it.
Step 1
Connect to PLABUBUNTU, logging in using the following credentials if needed:
Username:
Admin
Password:
Passw0rd
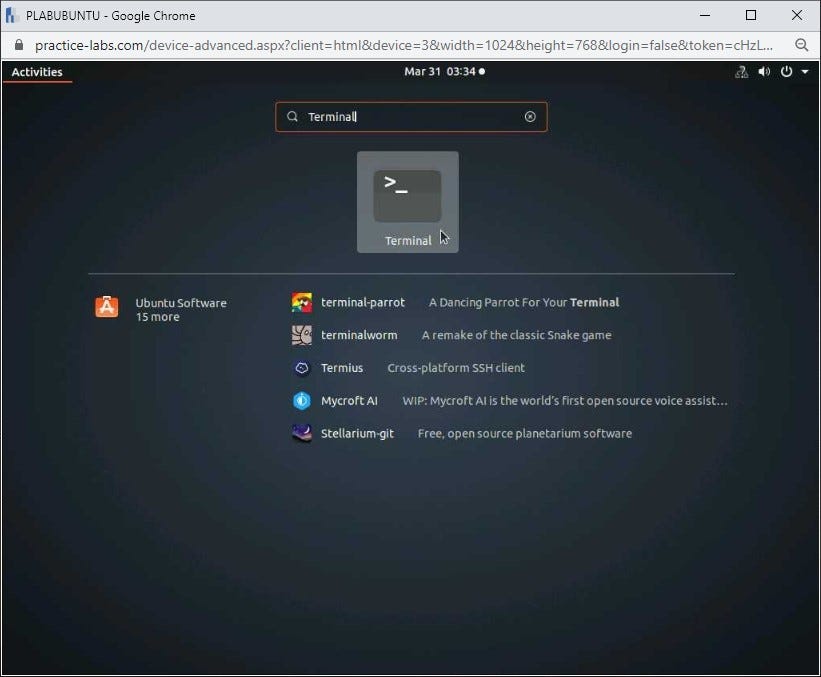
Once logged in, navigate to Show Applications in the bottom-left hand side of the screen and open the Terminal by typing the following into the search bar:
Terminal
Select the program once it appears.
Step 2
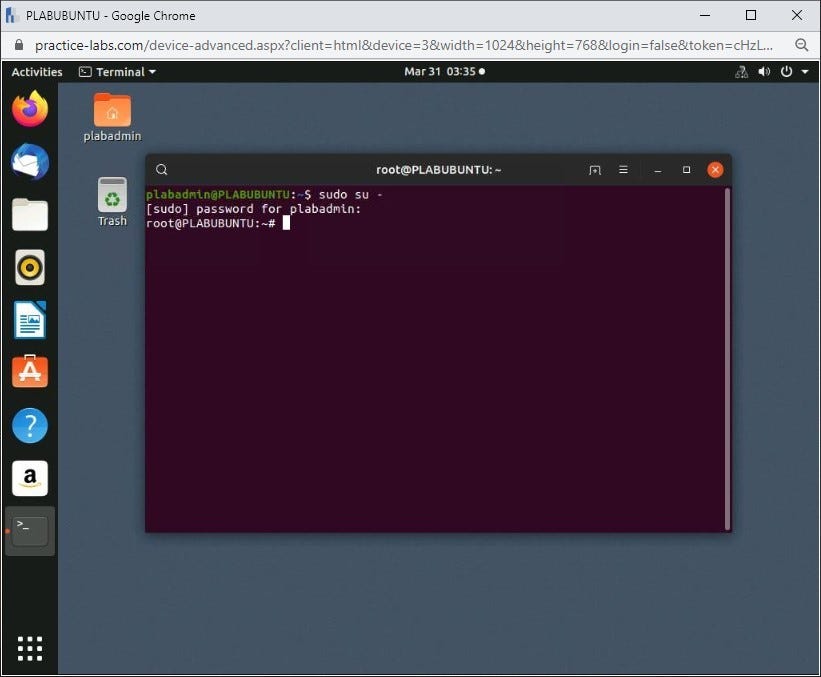
Once the program has opened, first log in as the root user using the command:
sudo su -
and enter the password for the root user:
Passw0rd
Step 3
We will take the apache2 service as an example. Before learning how to manage services, we will start by installing it first. You can do this by typing the following command:
apt-get install apache2
After running this command, you will receive a prompt of Yes/No for proceeding further. Type the following:
y
to proceed.
Note: in a live environment, you can also add a -y switch in the above command to force Yes.

Step 4
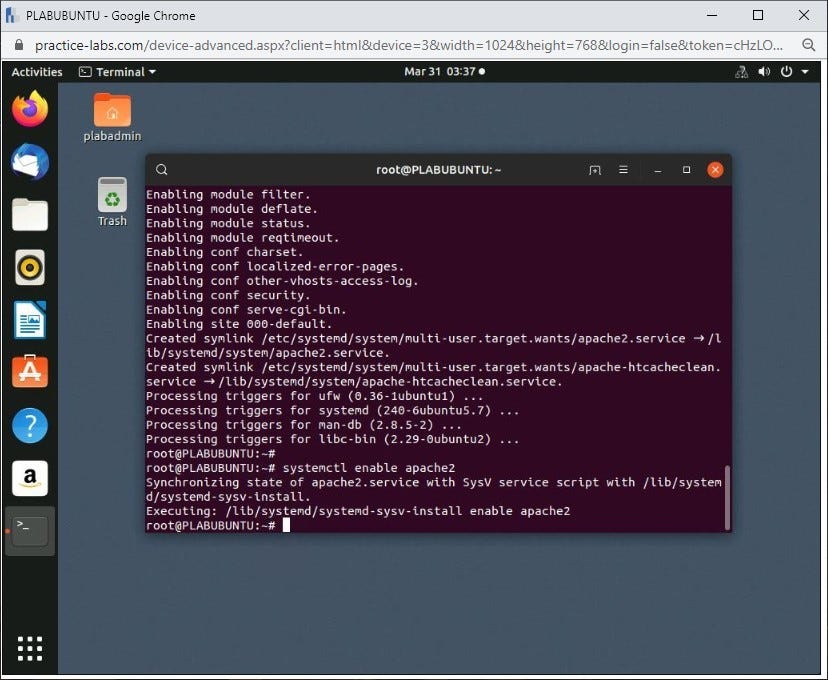
A very important step to do after installation is to enable the service so that it does not stop after every reboot and keeps running on its own. We need to run the following command to do so:
systemctl enable apache2
Step 5
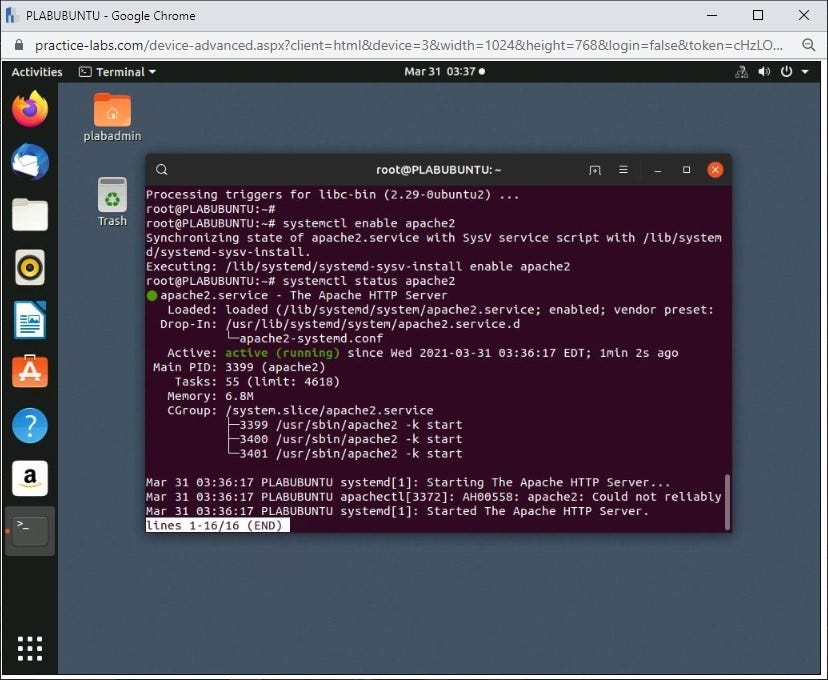
Now, we will check the status of apache2 if it is active or inactive by running the following command:
systemctl status apache2
It will run by default. We will stop it in the next step.
Step 6
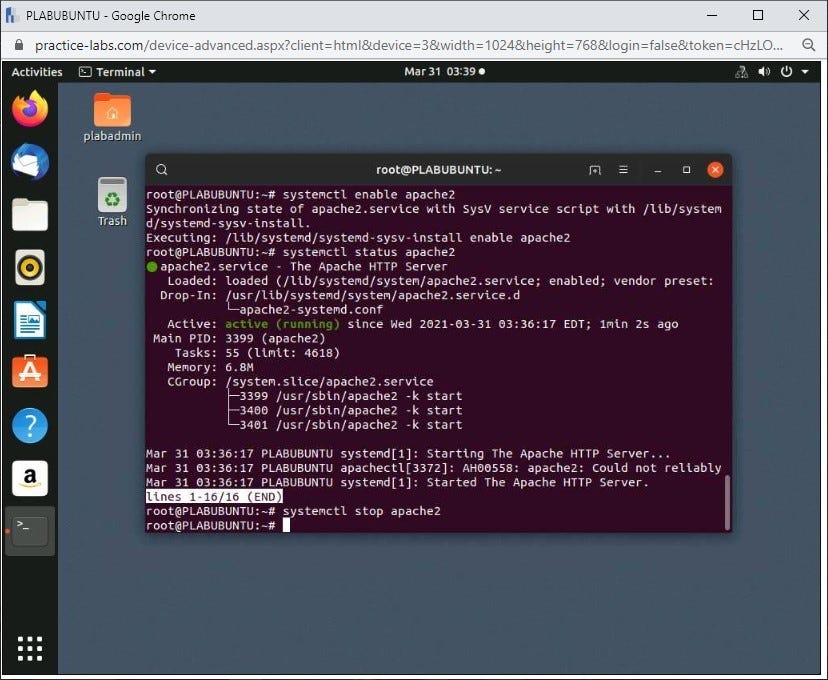
Now, we will stop the apache2 service and later check its status. To exit the current prompt, press Ctrl & C.
Once you have been returned to the root@PLABUBUNTU prompt, enter the following command:
systemctl stop apache2
Press Enter.
Step 7
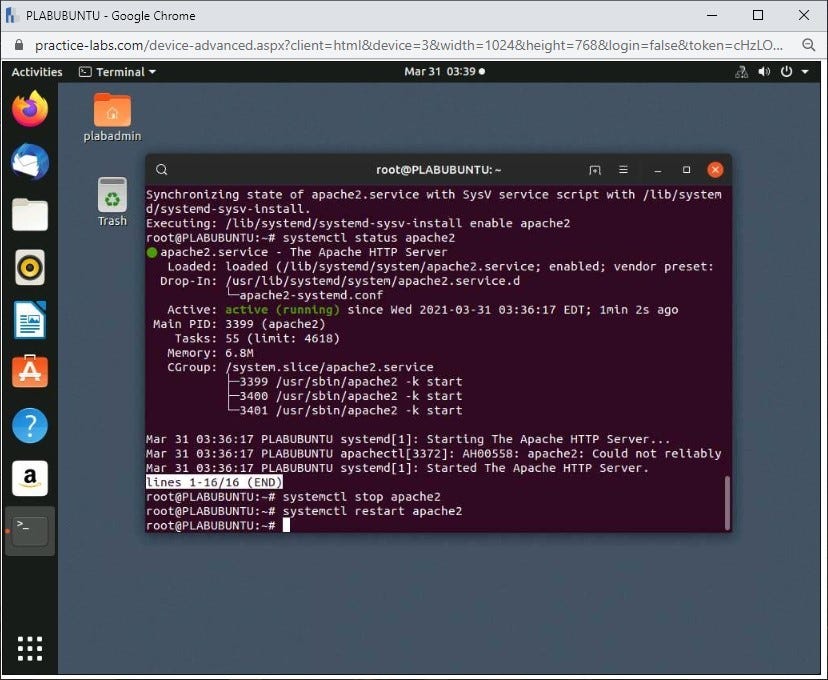
Now, we can either start the service using the start command, or we can restart the service using the following:
systemctl restart apache2
We can also use the reload switch to load the service again, rather than break the whole session and start it again.
Exercise 2 — Service Management in CentOS
Same as the previous exercise, we will learn how to manage services in CentOS. There is not much difference in start/stop commands, but the update and certain other commands are different in this operating system.
Learning Outcomes
After completing this exercise, you will be able to:
- How to Start/Stop Services in CentOS.
- Check the Status of Services and Enable them Permanently.
Your Devices
During your session, you will have access to the following lab configuration.
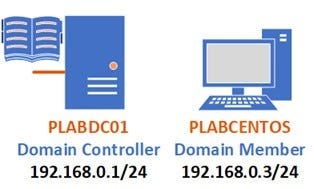
Depending on the exercises, you may or may not use all of the devices, but they are shown here in the layout to get an overall understanding of the topology of the lab.
- PLABDC01 — Windows Server 2019 (1809) (Domain Controller)
- PLABCENTOS — Centos 7 (Domain Member)
Task 1 — How to Start/Stop and Restart services in CentOS
In this task, we will learn how to install, enable and start/stop the http service. We will also learn how to check status of http service after stopping it manually.
Step 1
Connect to PLABCENTOS, logging in using the following credentials if needed:
Username:
Plabadmin
Password:
Passw0rd
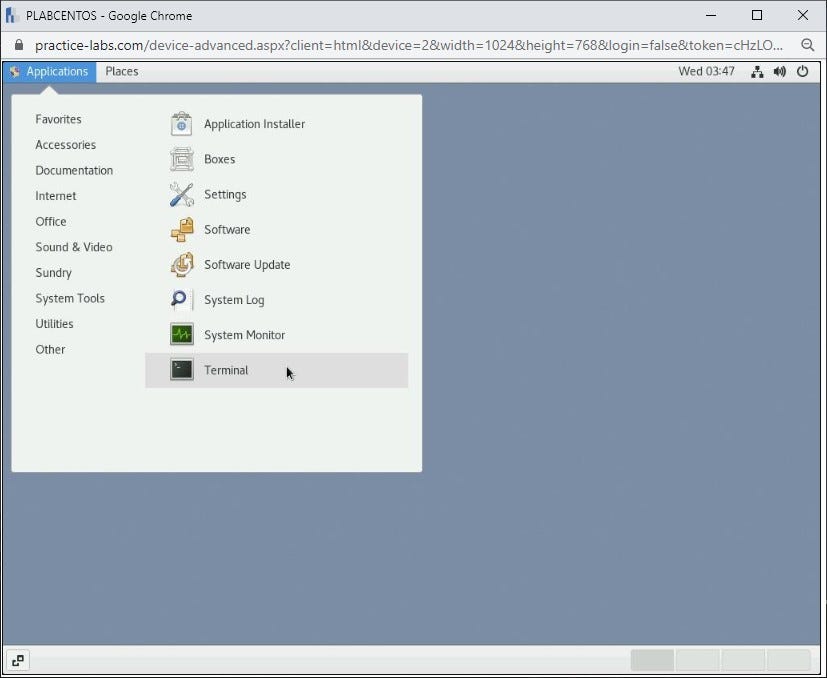
Once logged in, navigate to Applications >System Tools >Terminal in the top right-hand side of the screen.
Step 2
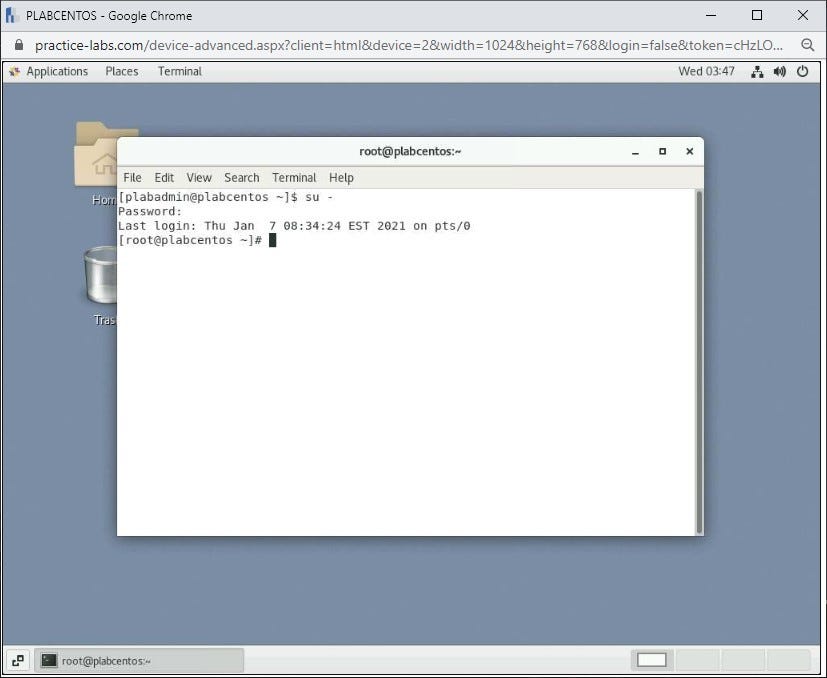
Next, we will enter as root user by running the following command:
su -
Again, you will be prompted to provide a password so please type the following:
Passw0rd
Step 3
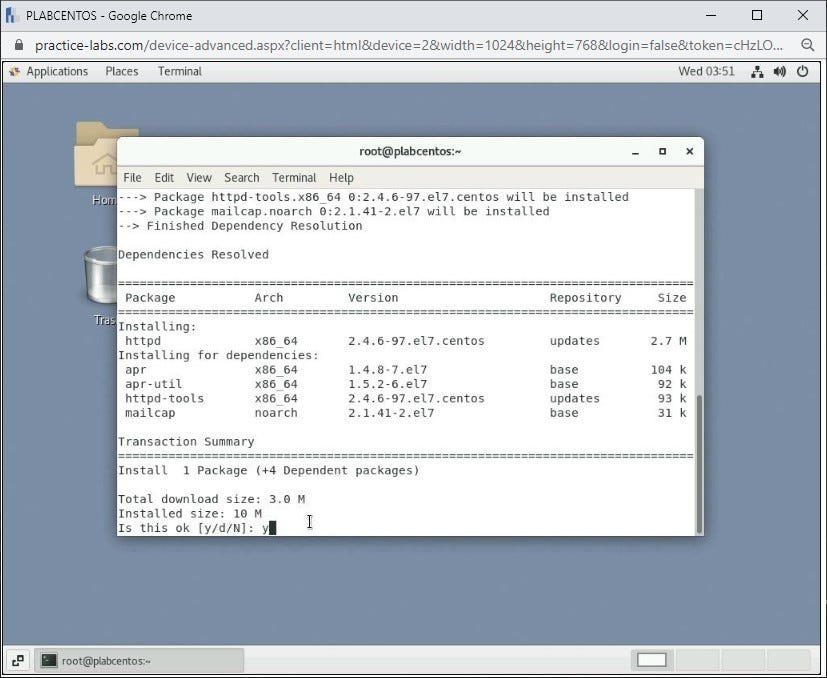
We will take the same example, but the name of Apache is different in CentOS, which is now httpd. We will install it using the following command:
yum install httpd
Once the install has started, you will be asked if the size of the install is okay. Type the following to proceed:
y
Press Enter.
Step 4
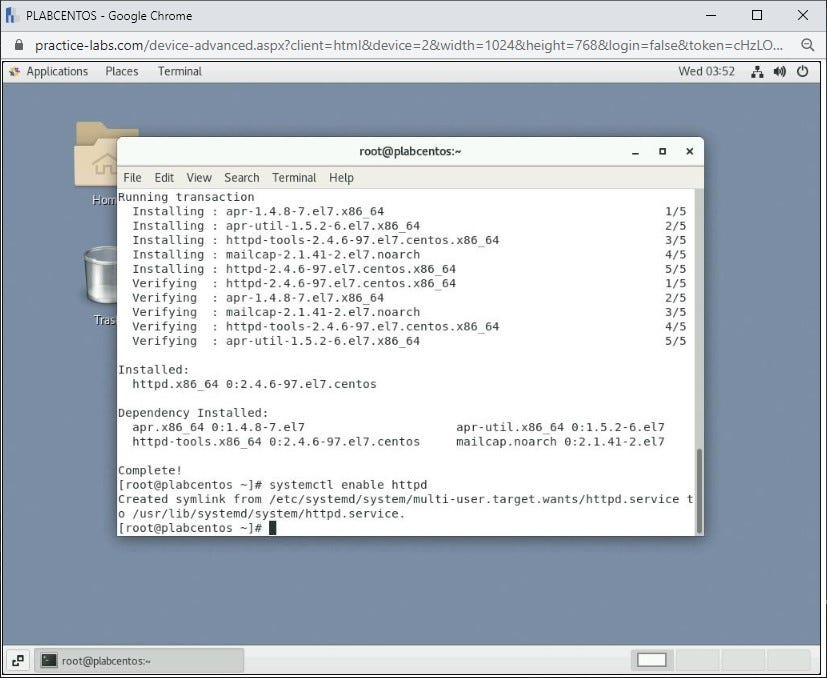
As in the previous exercise, a very important step to do after installation is to enable the service to not stop after every reboot. We need to run the following command to do so:
systemctl enable httpd
There is one more method to do enable the httpd service in CentOS, which is mentioned below and will serve the same purpose:
chkconfig httpd on
Step 5
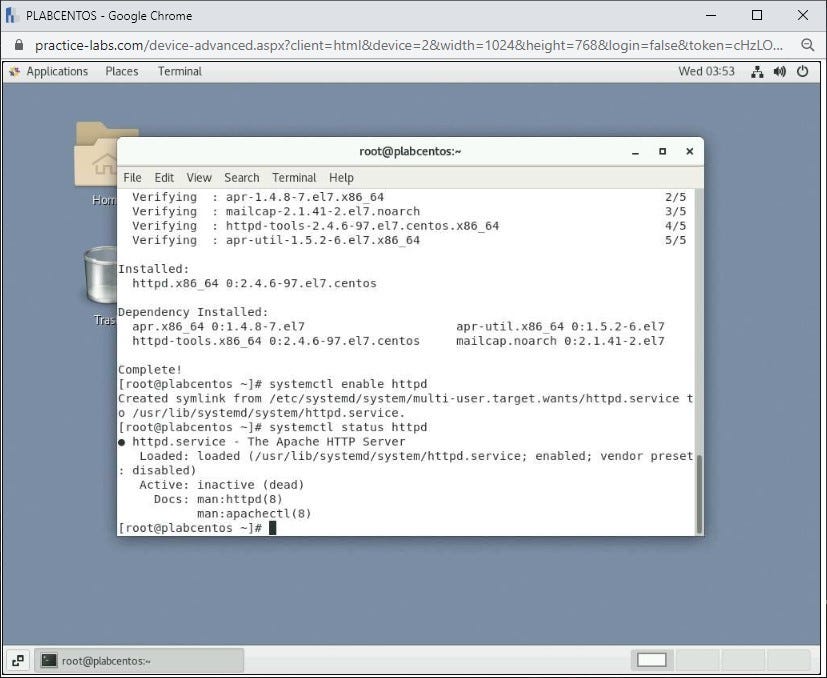
Now we will check the status of httpd if it is active or inactive by running the following command:
systemctl status httpd
By default, it is not active in CentOS, so we will have to start it manually.
Step 6
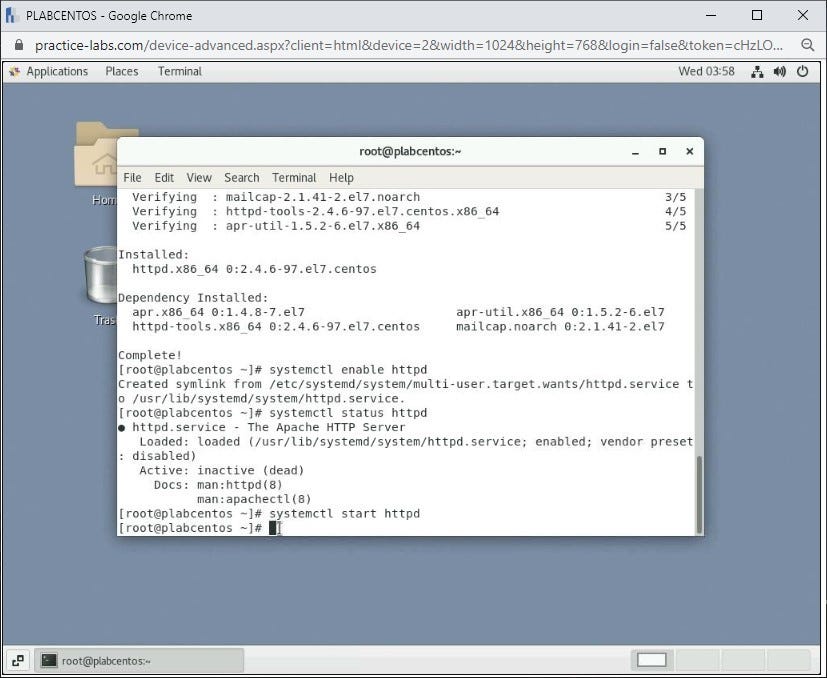
Now we will start the httpd service and check its status just as we did in step 5. Run the following command to do so:
systemctl start httpd
Step 7
Now we will stop the httpd service manually. Run the following command:
systemctl stop httpd
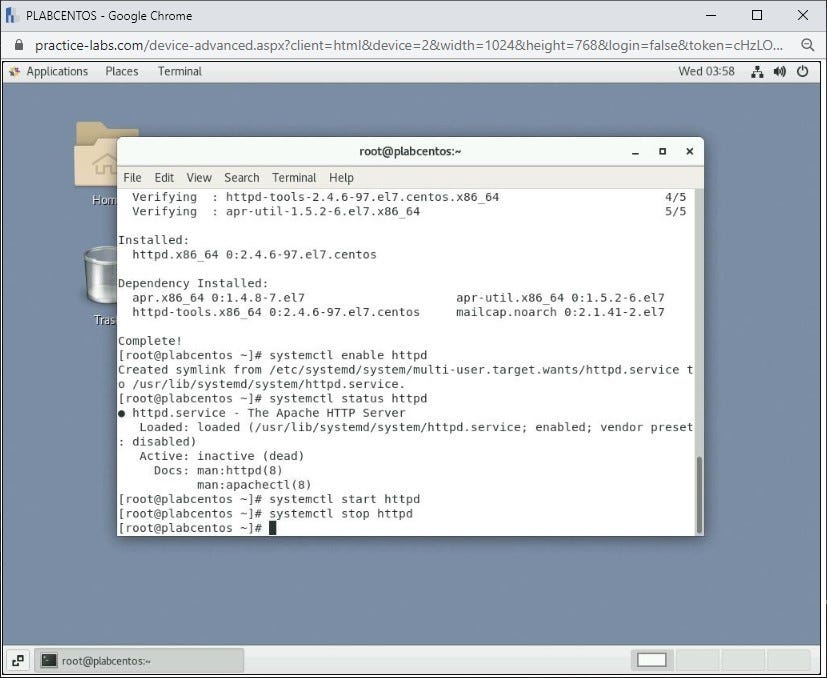
Note: You can try to reload and restart the service to check its status.
Review
Well done, you have completed the Service Management in Linux Practice lab.
Article posted by: https://certmaster.me/linux-fundamentals-lesson-9-service-management-in-linux-a8d2e802cf7d?source=rss-d9e5f258a4e8——2
——————————————————————————————————————–
Infocerts, 5B 306 Riverside Greens, Panvel, Raigad 410206 Maharashtra, India
Contact us – https://www.infocerts.com
