November 1, 2022
Linux Fundamentals Lesson 4 : Introduction to Bash
Exercises
Introduction
Lab Topology
Exercise 1 — Introduction to Bash
Review
Learning Outcomes
In this module, you will complete the following exercises:
- Exercise 1 — Basic Bash Commands of Linux
After completing this lab, you will be able to:
- Navigate Through and Understand Basic Linux commands
Lab Duration
It will take approximately 1 hour and 30 minutes to complete this lab.
Lab Topology
During your session, you will have access to the following lab configuration.
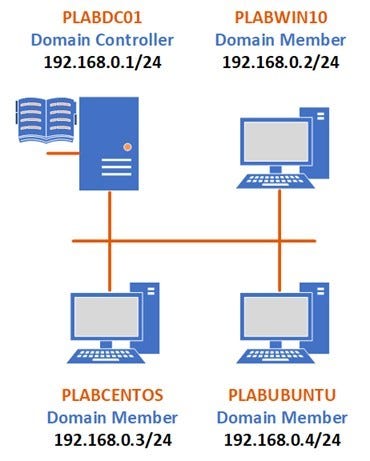
Depending on the exercises, you may or may not use all of the devices, but they are shown here in the layout to get an overall understanding of the topology of the lab.
- PLABDC01 — Windows Server 2019 (1809) (Domain Controller)
- PLABWIN10 — Windows 10 (1903) (Domain Member)
- PLABCENTOS — Centos 7 (Domain Member)
- PLABUBUNTU — Ubuntu 19.04 (Domain Member)
Exercise 1 — Introduction to Bash
Linux uses Bash, which is a Unix based command line in order to execute commands via the Terminal, which is a command line interpreter. A good comparison you may be familiar with is Command Prompt, which is the command line interpreter for Windows operating systems.
Bash can also be used to run scrips in order to run a series of commands in unison. Bash is typically a text file that is scripted by a developer in order to perform either one specific or a series of tasks. Bash, like other scripts, runs in the order that it is written, starting from the first line to the bottom.
This exercise will discuss the basic bash commands and try them all on the terminal in a CentOS machine. As discussed above we could save a series of commands to execute as a script, although we will just be going over singular commands in this example.
Learning Outcomes
After completing this exercise, you will be able to:
- Navigate Through and Understand Basic Linux commands
Your Devices
During your session, you will have access to the following lab configuration.
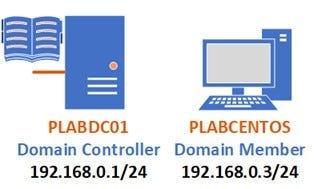
Depending on the exercises, you may or may not use all of the devices, but they are shown here in the layout to get an overall understanding of the topology of the lab.
- PLABDC01 — Windows Server 2019 (1809) (Domain Controller)
- PLABCENTOS — Centos 7 (Domain Member)
Task 1 — Learning Basic Bash commands in Linux
Let’s learn about basic Bash commands and try them on our CentOS lab machine. These commands are the same in almost all Linux distros and can be transferred between machines with different operating systems.
Step 1
Connect to PLABCENTOS, logging in using the following credentials:
Username:
Plabadmin
password:
Passw0rd
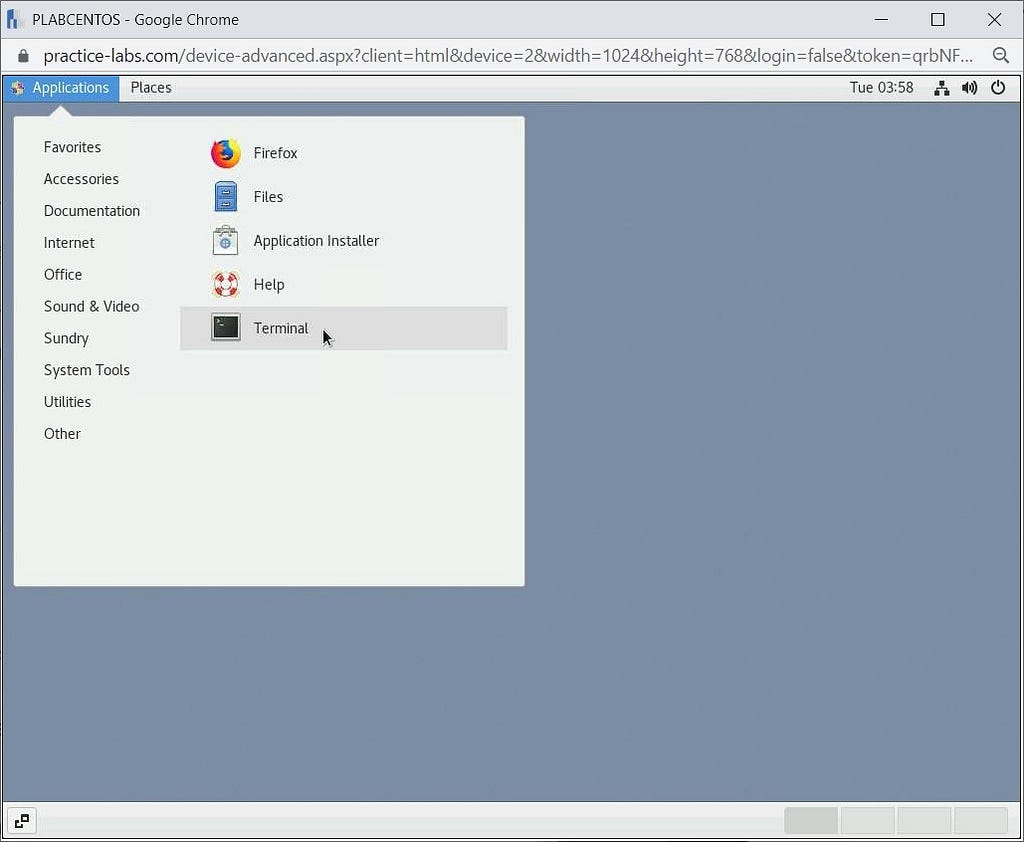
Once logged in, navigate to Applications > Terminal to start using bash commands.
Step 2
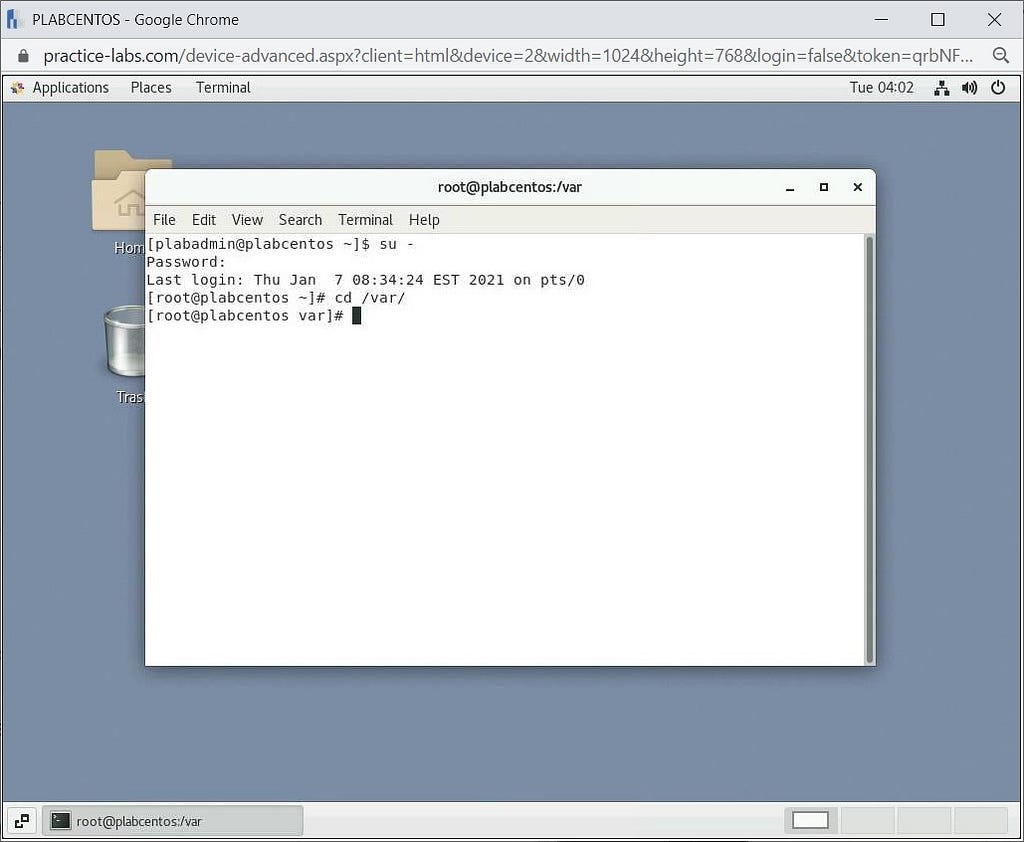
Once the Terminal window opens, type the following command:
su -
and then enter the following password:
Passw0rd
The first command that we will discuss is the cd command.
This command is used to change your system’s directories, which include read, manipulate etc. of various directories.
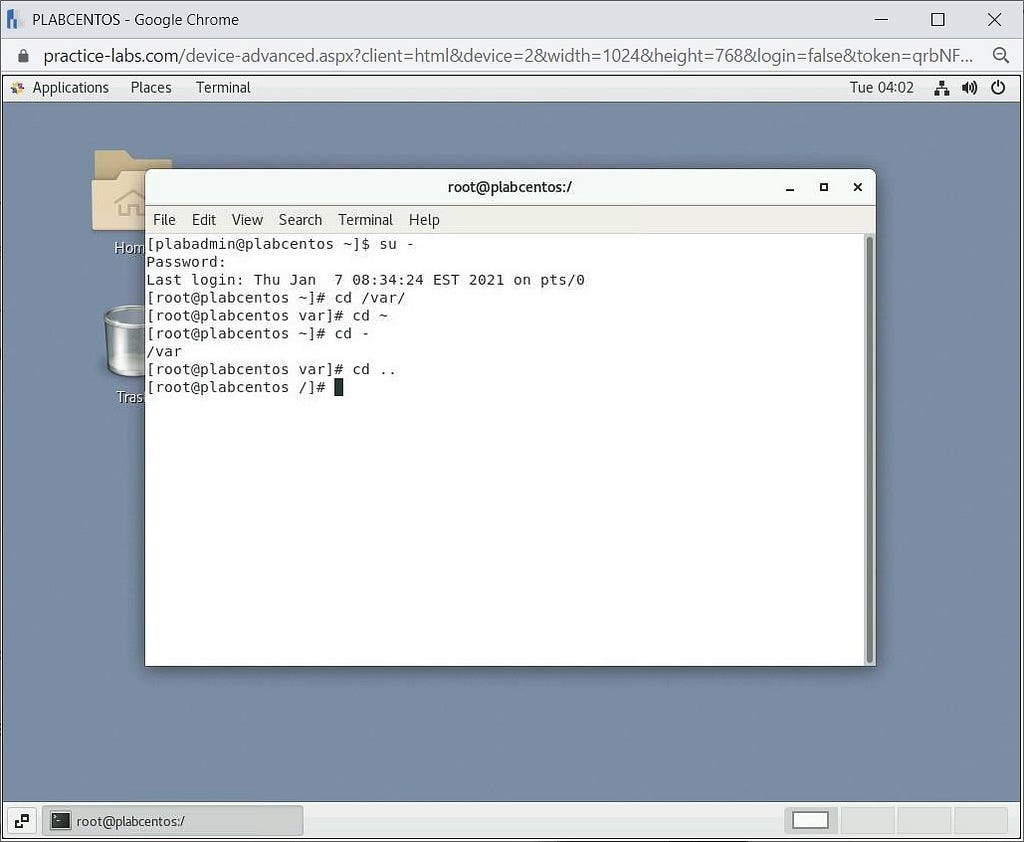
We can enter the /var directory using the cd command by typing:
cd /var/
A few other switches are used along with the cd command, and using those you can either reach the root directory or switch between your previous directory:
- “cd ~” is used to switch to the home directory of that particular user
- “cd -“ is used to switch back to the previous working directory
- “cd ..” is used to go back to the previous directory
cd ~
cd -
cd ..
These commands are shown as an example, although please note that Linux may return an error, specifically with the cd . . command depending on which directory you are currently accessing.
Step 3
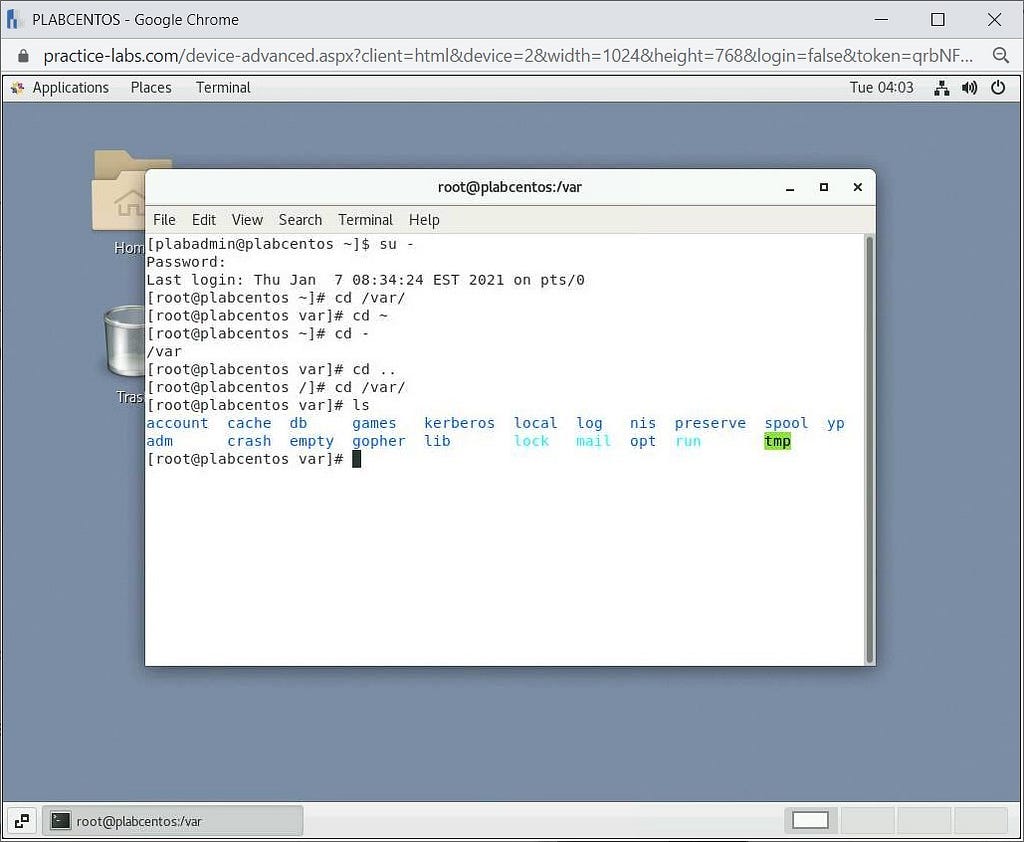
Let’s now discuss the ls command. This command is used to list all files in the directory you are currently navigating.
In our case, we will list all the files in the var directory. We will go to var directory using the cd command as in the previous step and then use ls to list all its files. Type the following:
cd /var/
Press Enter and then type the following:
ls
Step 4
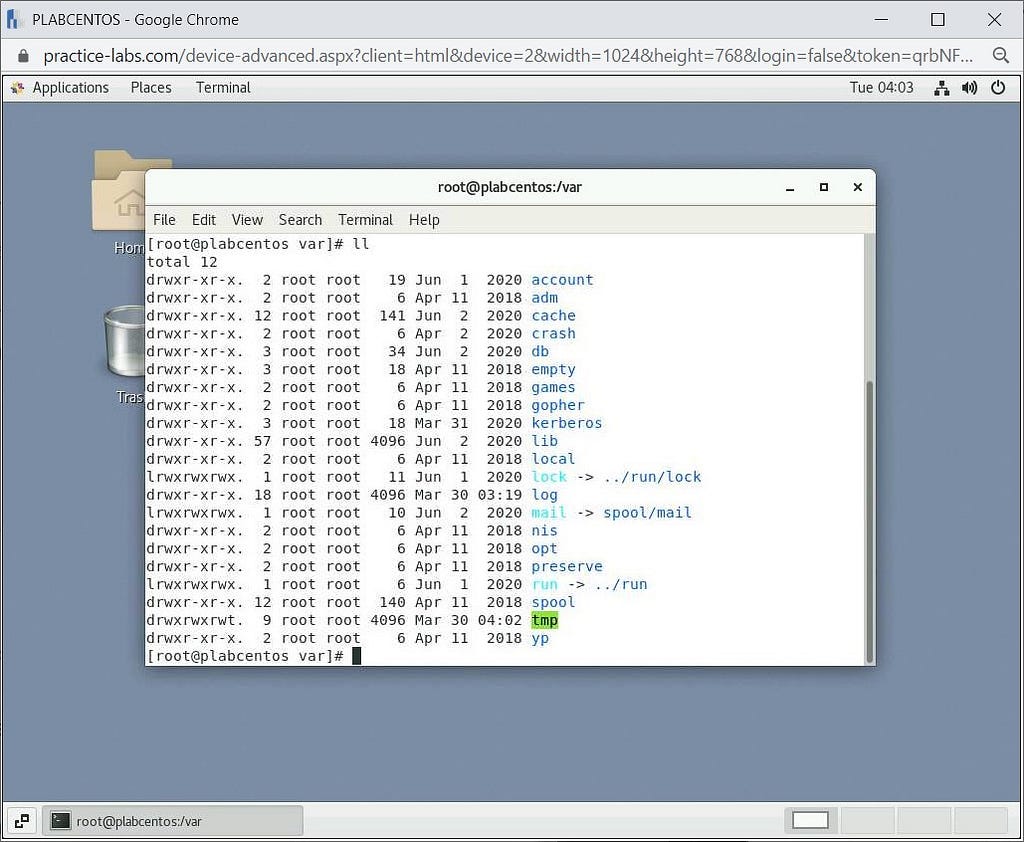
In the same way, we can use the ll command to display them in list form. Type the following to proceed:
ll
To return to the root directory, type the following command:
cd
To clear the screen, type the following:
clear
Step 5
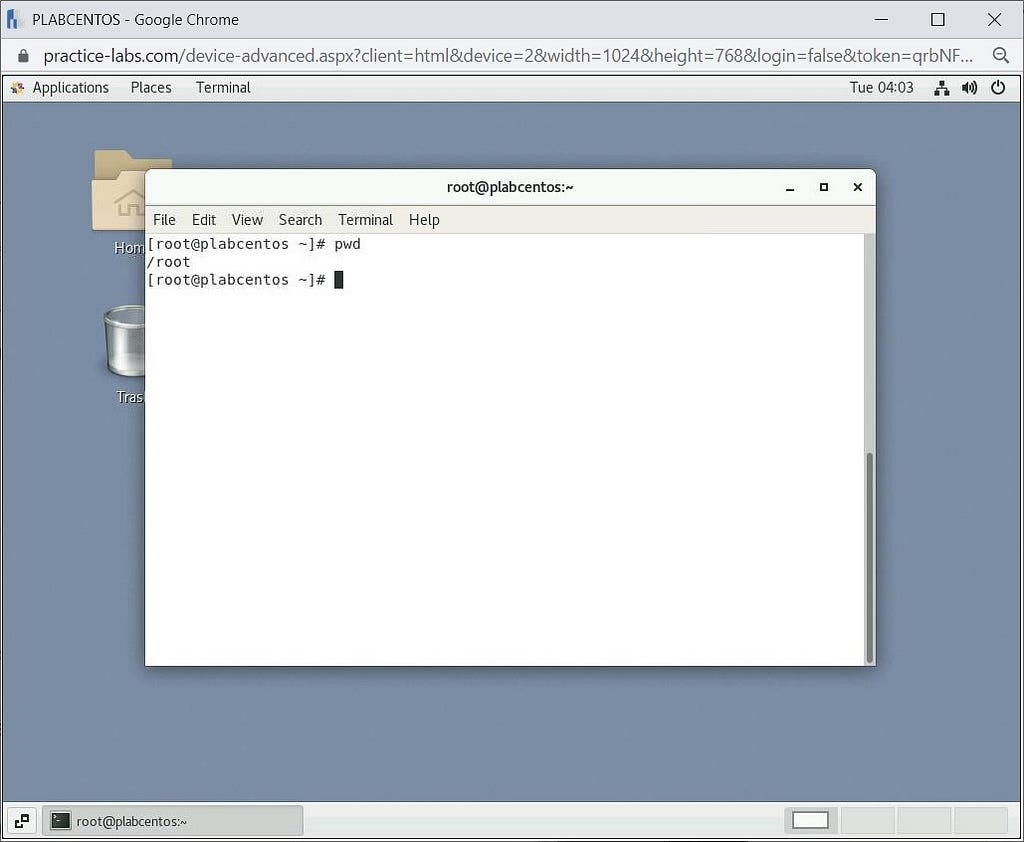
The next command to be used is pwd. This command will print the path of the current working directory. Type the following:
pwd
You can see the output is /root, which is the directory that we are currently in. This is useful while navigating a system.
Step 6
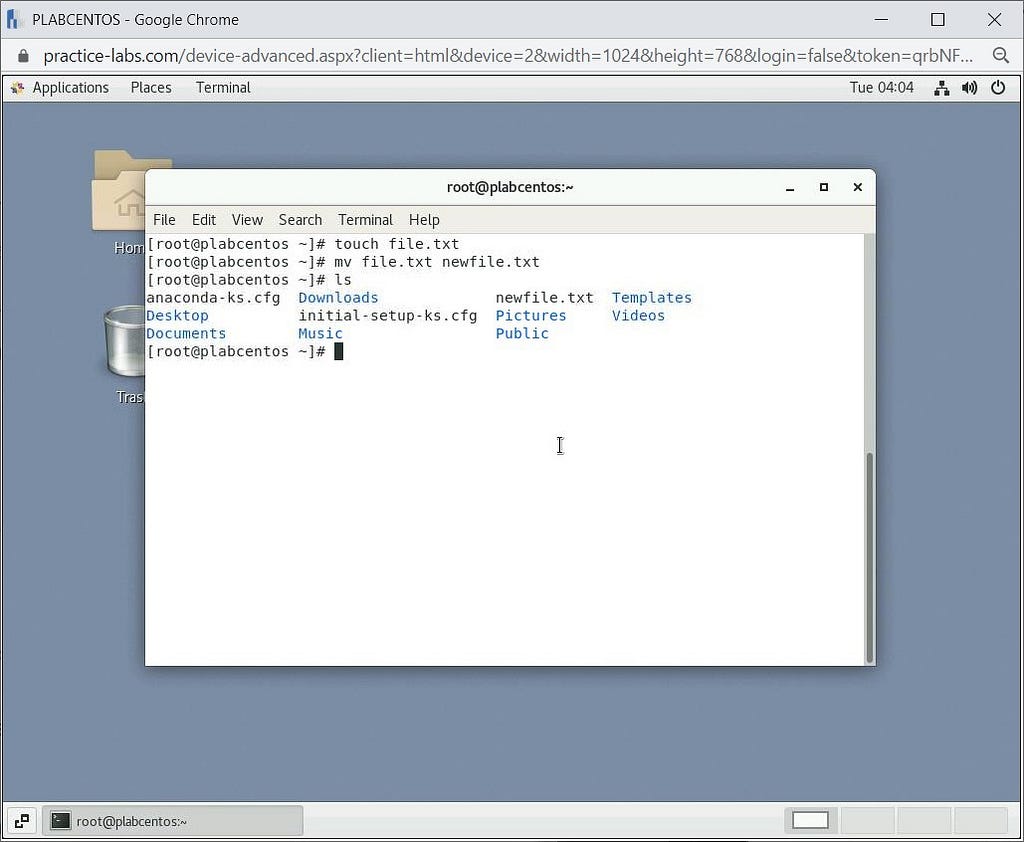
Next, let’s look at the are touch and mv commands. The touch command helps to create an empty file. In our case, we will create a file named file.txt using the touch command, and then we will use the mv command to rename that file to newfile.txt. Let us use the touch command first as follows:
touch file.txt
After using the touch command, type ls will notice a new file named file.txt under the root directory. Now next we will rename file.txt to newfile.txt using the command mv as follows:
mv file.txt newfile.txt
This will rename the file. To view this in the directory, type the following command again:
ls
Step 7
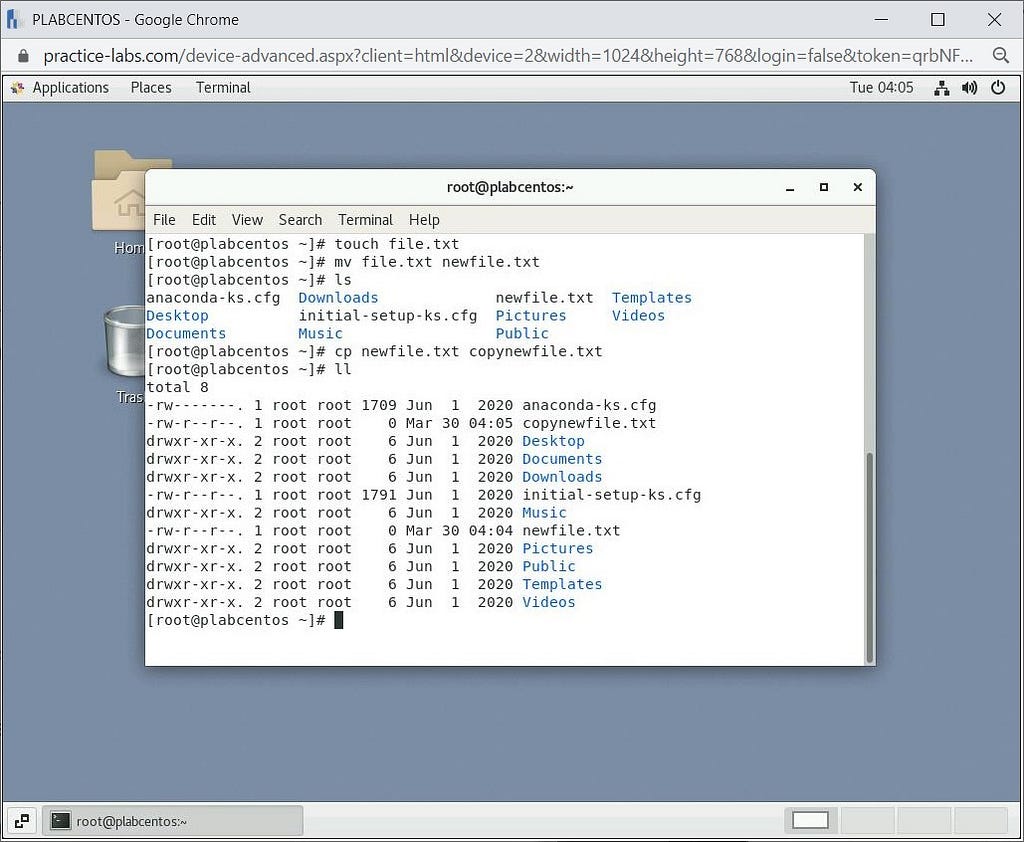
The next command that is related to the previous step is cp. This command will copy the entire file with your desired name and location. In our case, we will copy the previously created file newfile.txt to copynewfile.txt.
cp newfile.txt copynewfile.txt
Now let’s run the ll command:
ll
You will notice both the files in the same folder.
Step 8
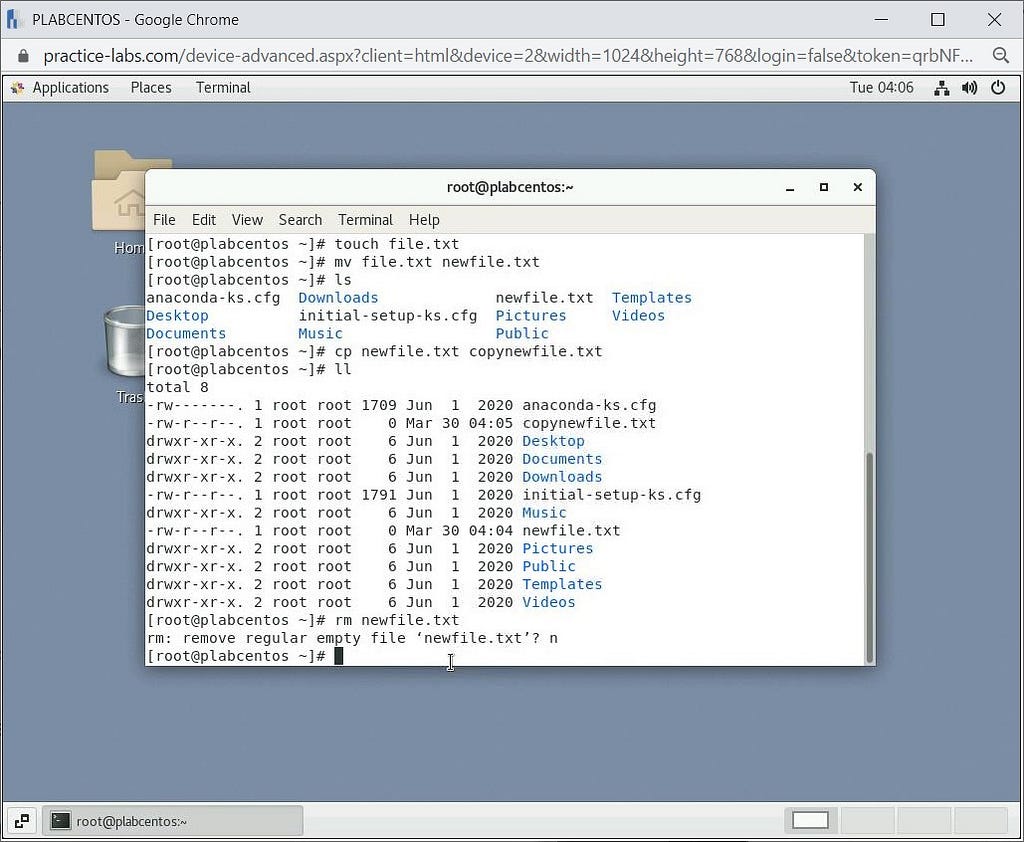
We will go over the rm command, which is used to delete a file or folder. In our case, we will delete the file created by us in the previous step by using the following command.
rm newfile.txt
It will ask for your permission to delete the file; for multiple files, you can use the -rf command to forcefully delete them and avoid confirmation on each file.
In order to not delete this file, type the following:
n
Press Enter.
Step 9
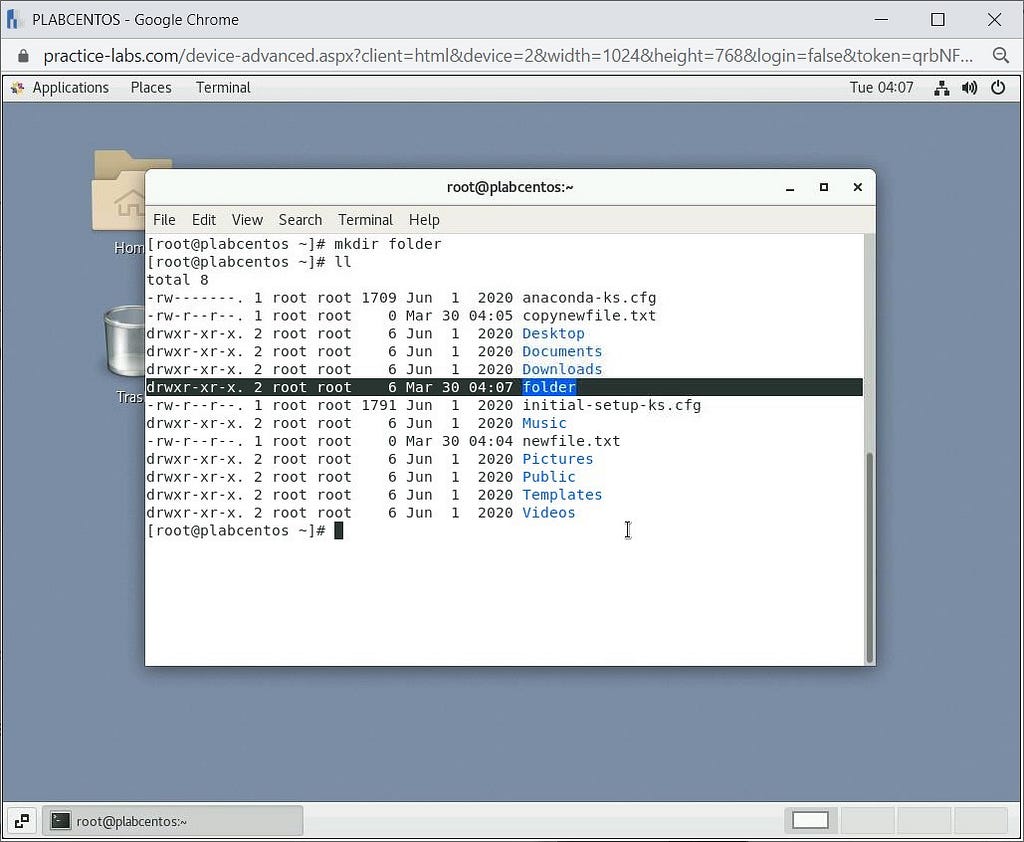
Next, we will see how to create a new directory using the mkdir command. In our case, we will keep its name as a ‘folder’. Here is the command to be used:
mkdir folder
This will create a folder in your current working directory. Again, we can see this if we then execute the following command:
ll
Step 10
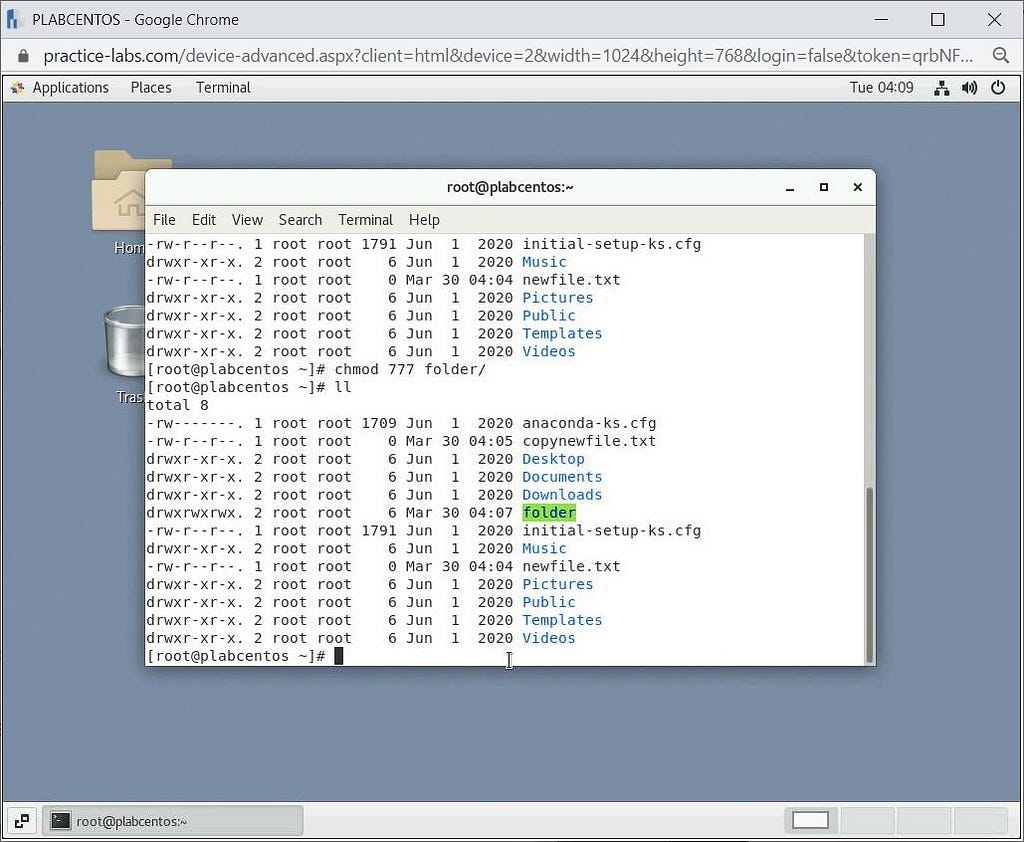
In this step, we will be changing permission to the folder that we just created In the previous step, the permissions are 644, and we will change them to 777, which means that the folder will be have the Read, Write and Execute permission.
chmod 777 folder/
Again, type the following:
ll
Step 11
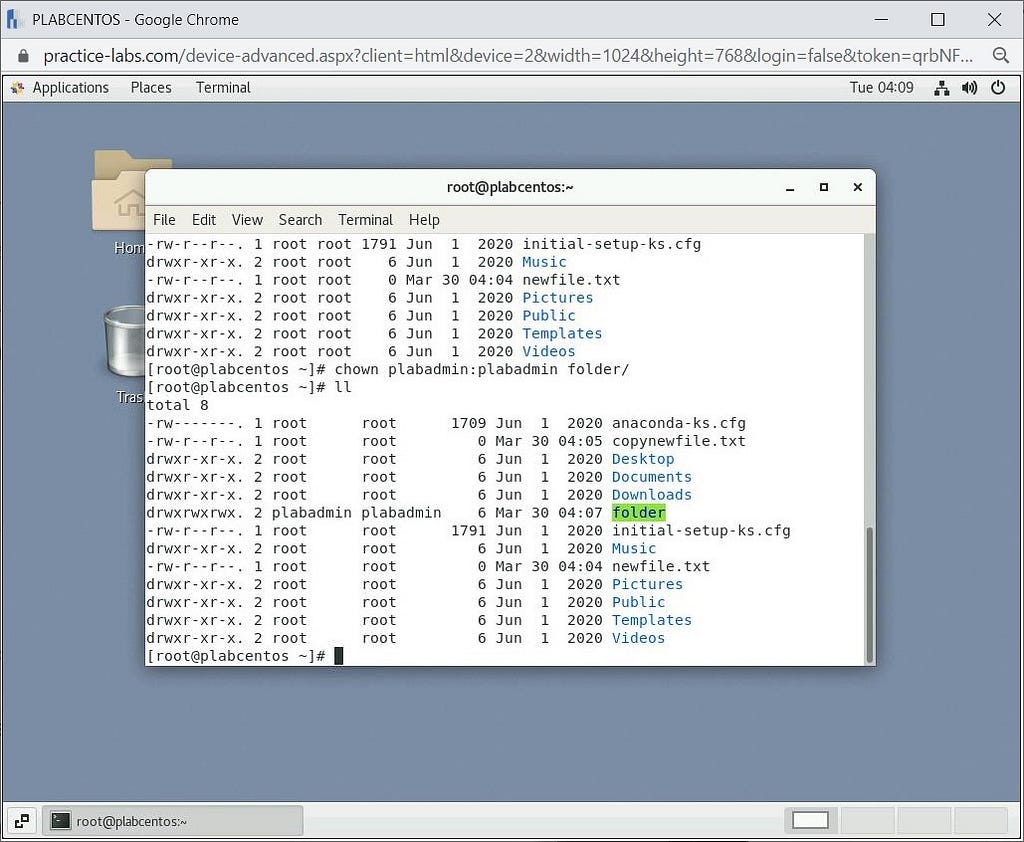
Now we will change ownership of this folder by using the chown command and set the ownership to our system`s users. Here is the command to do so:
chown plabadmin:plabadmin folder/
In step 7, the ownership was to the only root user, and now after running this command, the ownership will be changed to plabadmin. Type the following:
ll
Step 12
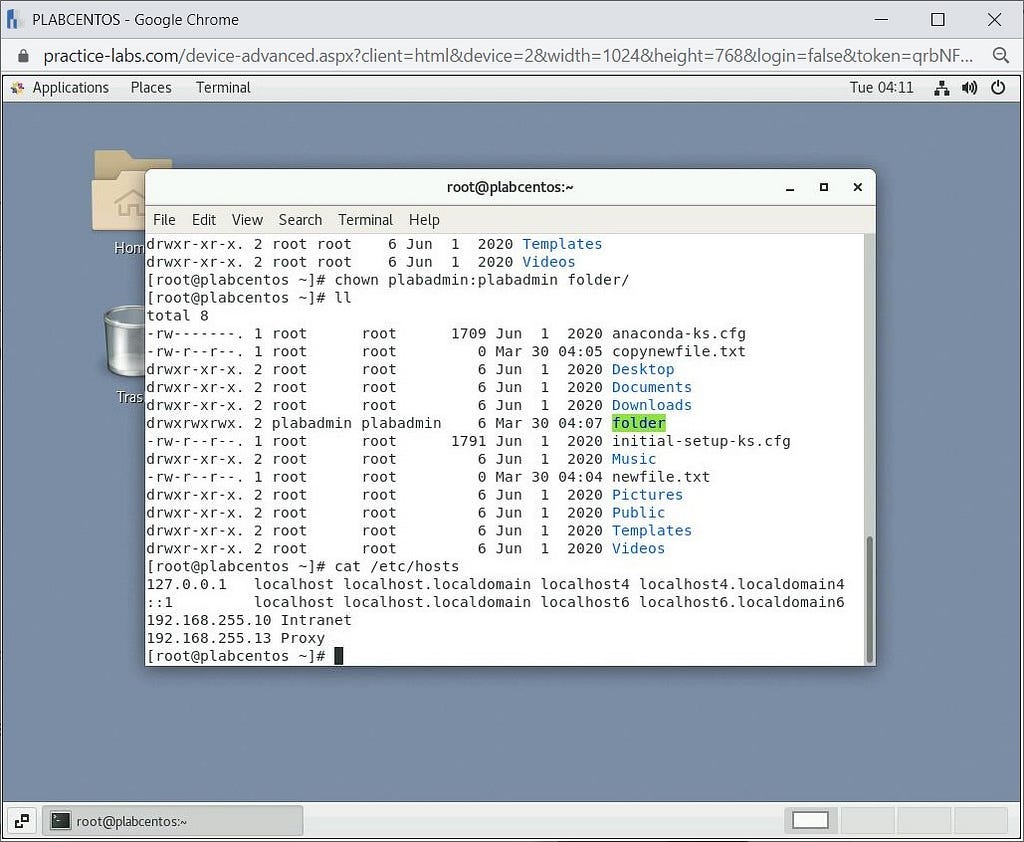
By using the cat command, we can display the content of a particular file. Let us take the example of the host file of our OS, and we will display the content of our host file using the following command:
cat /etc/hosts
Step 13
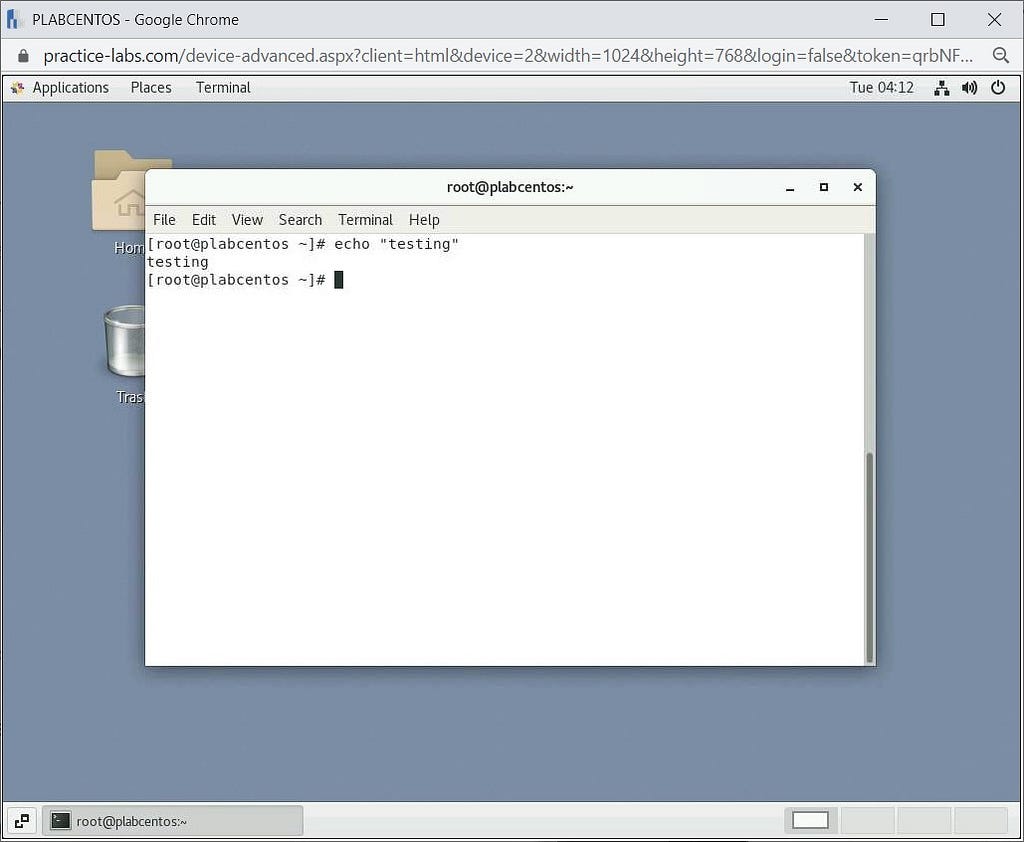
The command that is mostly used during programming to print a string is the echo command. This is not used much in day to day tasks, so we will print a simple string by running the following command:
echo “testing”
Step 14
Now we will use the wc command to display word count, bytes, new line count and characters in a file named passwd of our operating system. Run the following command:
wc /etc/passwd
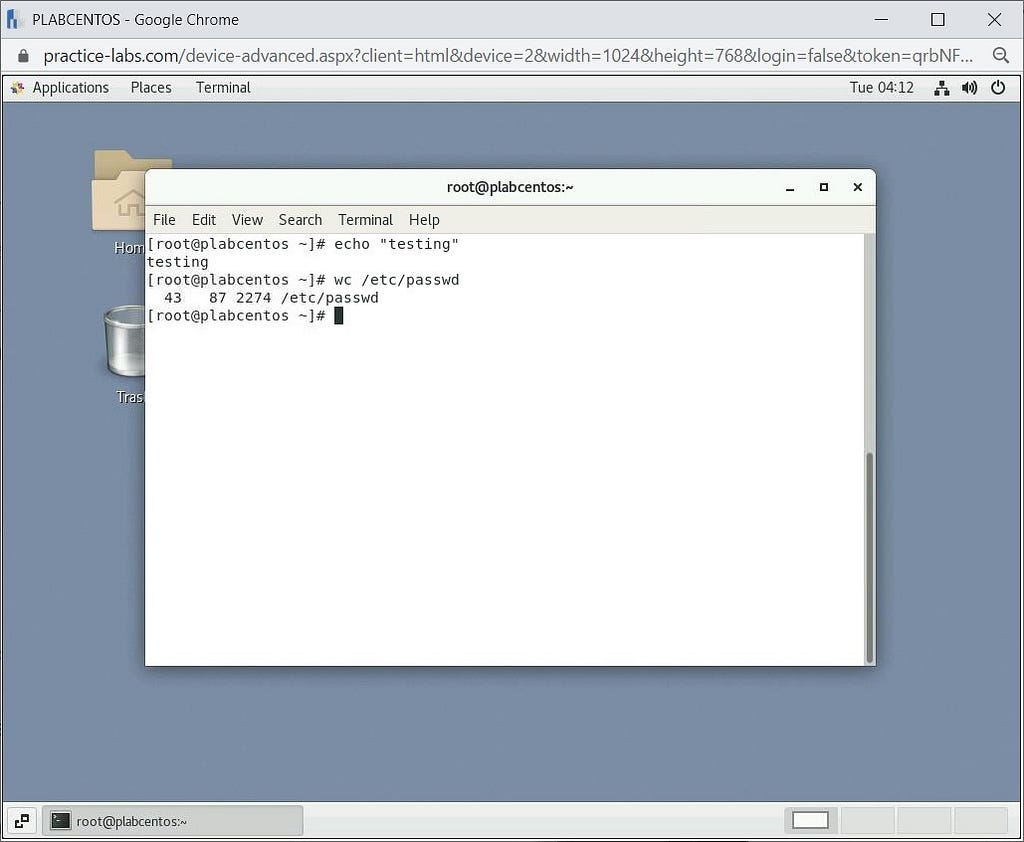
44 represents the number of passwd file lines, 88 represents the number of words in that file and 2315 represents the count of bytes in that file. You can get individual results by putting different switches in the wc command as follows:
- wc -l /etc/passwd — This will represent the number of lines.
- wc -w /etc/passwd — This will represent the number of words.
- wc -c /etc/passwd — This will represent the count of bytes in the passwd file.
Step 15
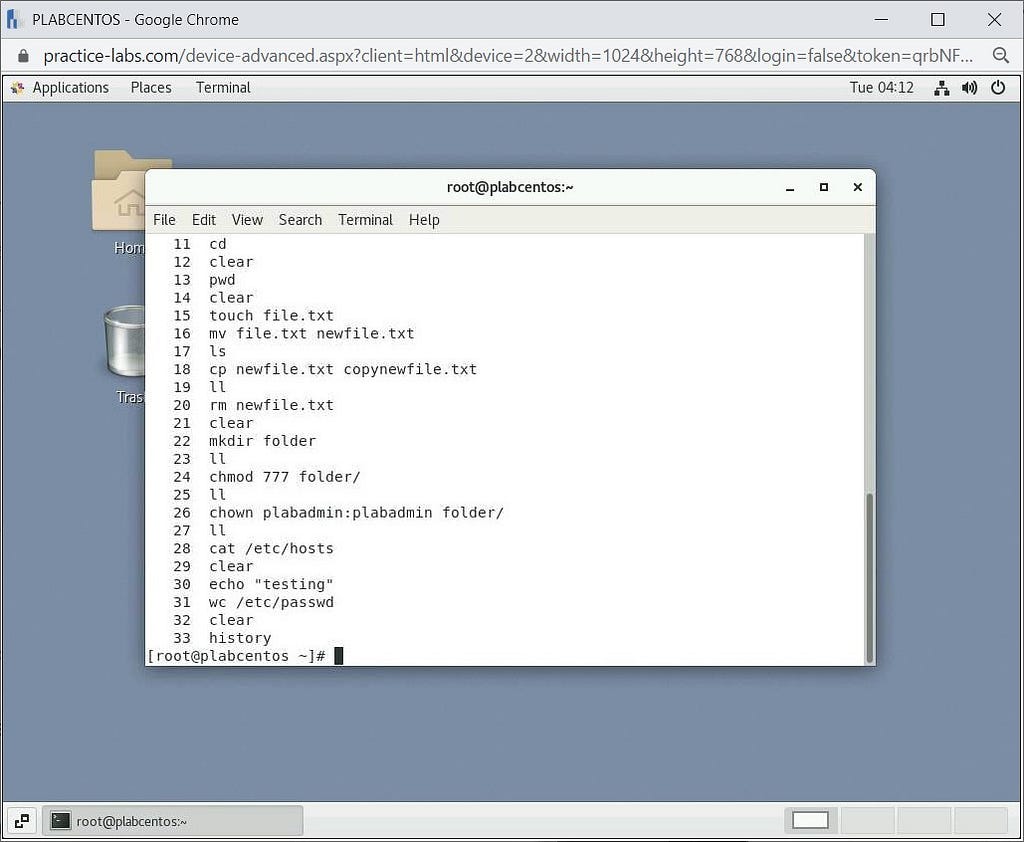
This step will use the history command to display all the commands we used in this operating system. Run the following command:
history
Step 16
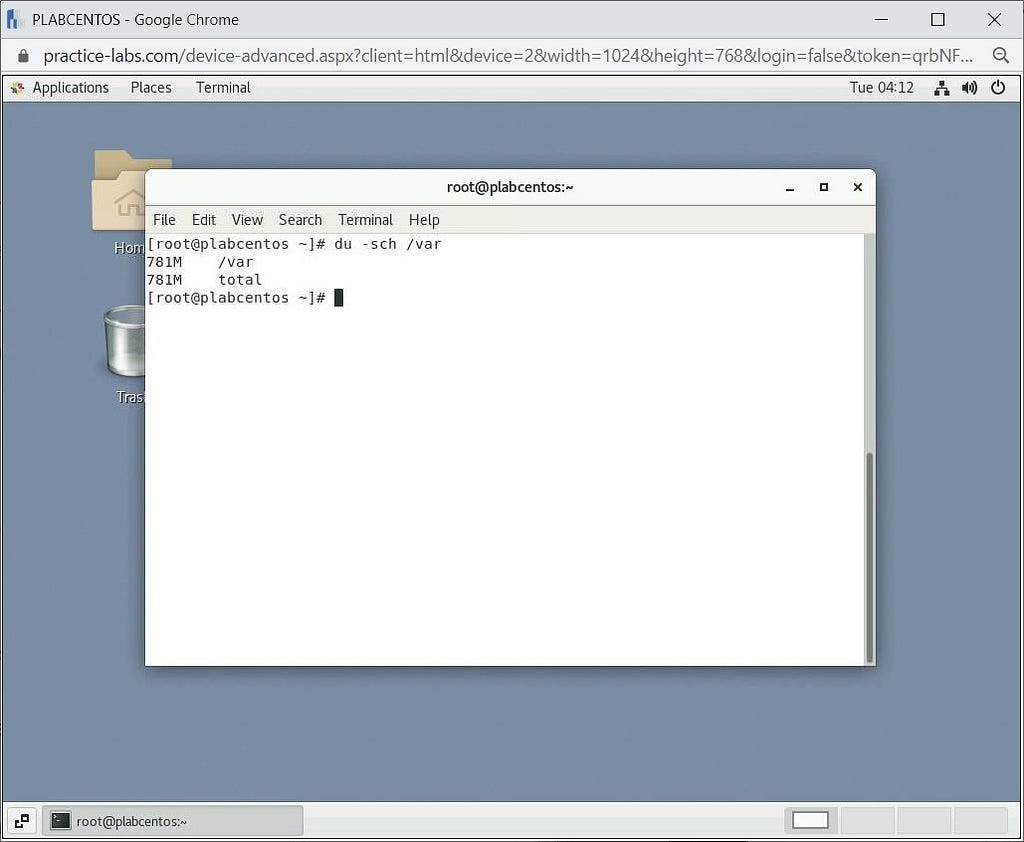
Let’s learn about how to find the size of a directory. For example, we will see the size of the/var directory. Please use the following command:
du -sch /var
Step 17
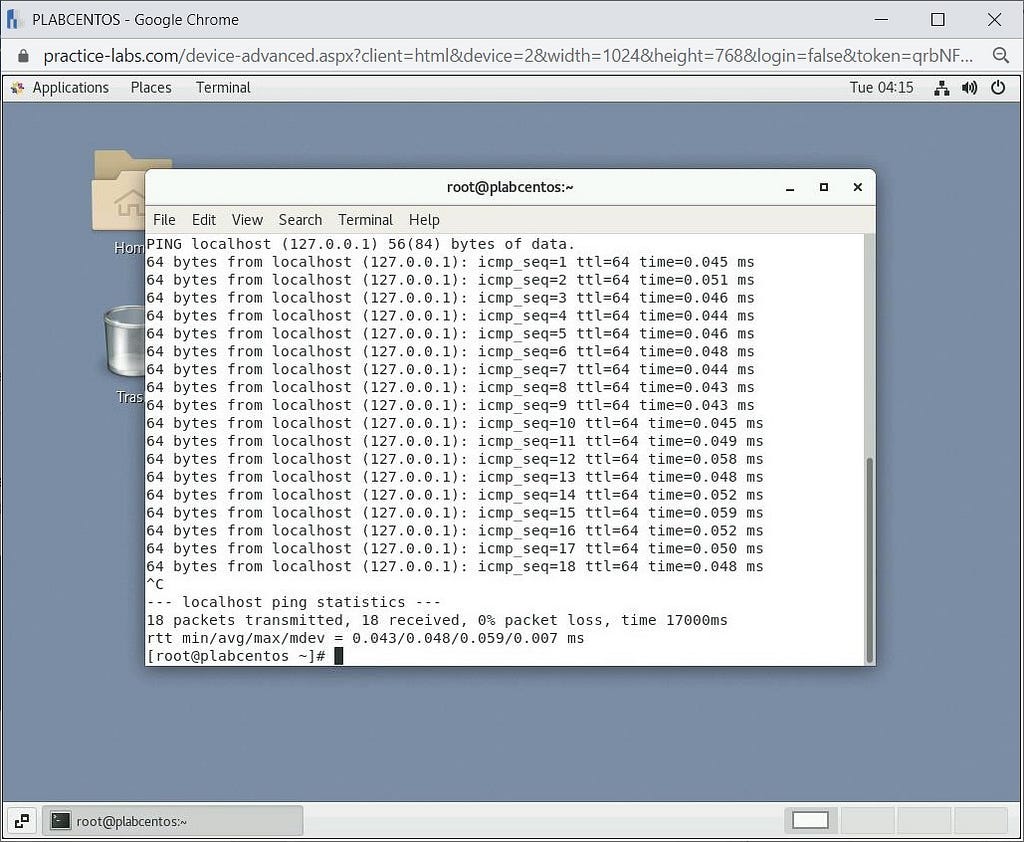
In this step, we will learn about two commands, ping and top. The ping command is used to check if the source system can reach the destination address. For example, we will ping localhost in our machine. Secondly, the top command is used to analyze and monitor that particular operating system’s processor activity. It also displays real-time tasks managed by the kernel.
ping localhost
Let this run for a few seconds, and then press Ctrl & C to cancel the ping.
Step 18
Now type the following command:
top
This will give you a live feed of current system resource utilization.
Review
Well done, you have completed the Introduction to Bash Practice lab.
Article posted by: https://certmaster.me/linux-fundamentals-lesson-4-introduction-to-bash-4d3c830cfbdb?source=rss-d9e5f258a4e8——2
——————————————————————————————————————–
Infocerts, 5B 306 Riverside Greens, Panvel, Raigad 410206 Maharashtra, India
Contact us – https://www.infocerts.com
