November 1, 2022
Linux Fundamentals Lesson 2 : Different Linux flavors
Exercises
Introduction
Lab Topology
Exercise 1 — Exploring Ubuntu
Exercise 2 — Exploring CentOS
Review
Learning Outcomes
In this module, you will complete the following exercises:
- Exercise 1 — Exploring Ubuntu
- Exercise 2 — Exploring CentOS
After completing this lab, you will be able to:
- Install Updates and Applications Both Graphically and via the Command Line on Ubuntu and CentOS.
- Distinguish Between Basic Commands
Lab Duration
It will take approximately 60 minutes to complete this
Lab Topology
During your session, you will have access to the following lab configuration.
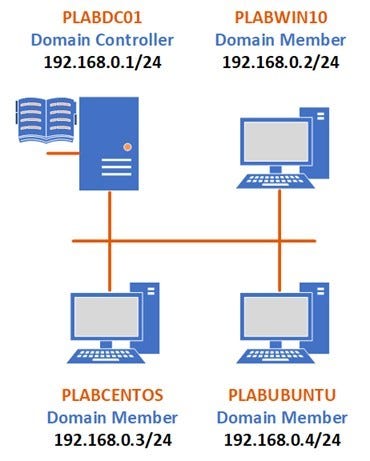
Depending on the exercises, you may or may not use all of the devices, but they are shown here in the layout to get an overall understanding of the topology of the lab.
- PLABDC01 — Windows Server 2019 (1809) (Domain Controller)
- PLABWIN10 — Windows 10 (1903) (Domain Member)
- PLABCENTOS — Centos 7 (Domain Member)
- PLABUBUNTU — Ubuntu 19.04 (Domain Member)
Exercise 1 — Exploring Ubuntu
Ubuntu, originally released in October of 2004, is known as the coolest distros of all, and in this exercise, we will be exploring its inner components and how it differs from other distros. You will notice that 90% of all Linux distros’ commands are the same, and the other 10% we will try to cover in the coming exercises.
Learning Outcomes
After completing this exercise, you will be able to:
- How to Add/Remove Applications in Ubuntu through GUI and Command Line
- How to use text editor Graphically and Command Line
Your Devices
During your session, you will have access to the following lab configuration.
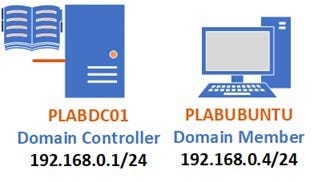
Depending on the exercises, you may or may not use all of the devices, but they are shown here in the layout to get an overall understanding of the topology of the lab.
- PLABDC01 — Windows Server 2019 (1809) (Domain Controller)
- PLABUBUNTU — Ubuntu 19.04 (Domain Member)
Task 1 — How to Install System Updates in Ubuntu through the command line
When administering a Linux machine, it is pivotal that the system is kept up to date with the most recent system and kernel updates available. This is to ensure that the machine has no security vulnerabilities and keeps the operating system bug free. In this task, we will perform a system update through the command line using the Terminal.
Step 1
Power on PLABUBUNTU and log in using the following credentials:
Username:
Admin
Password:
Passw0rd
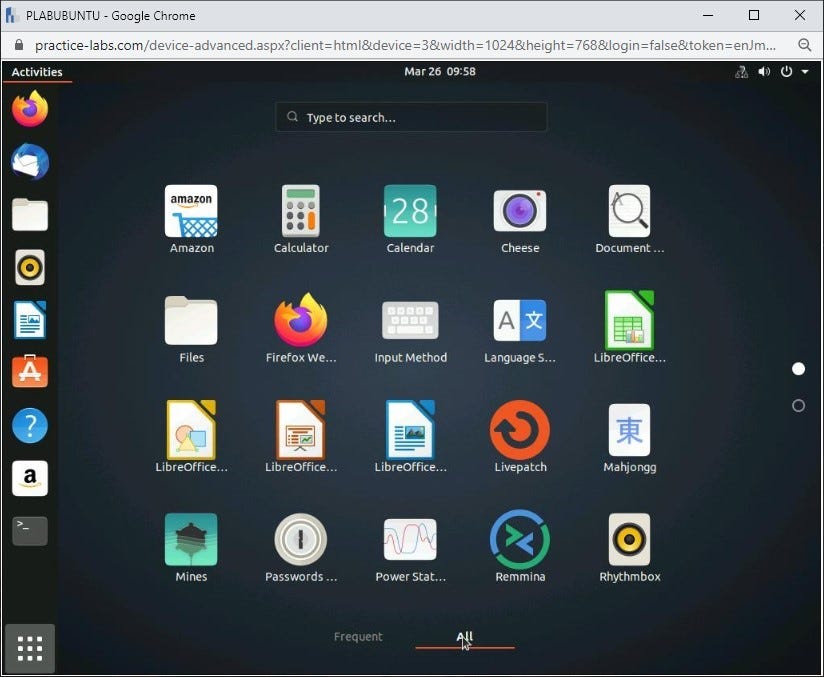
Once logged in, navigate to Show Applications on the bottom left-hand side of the window.
Step 2
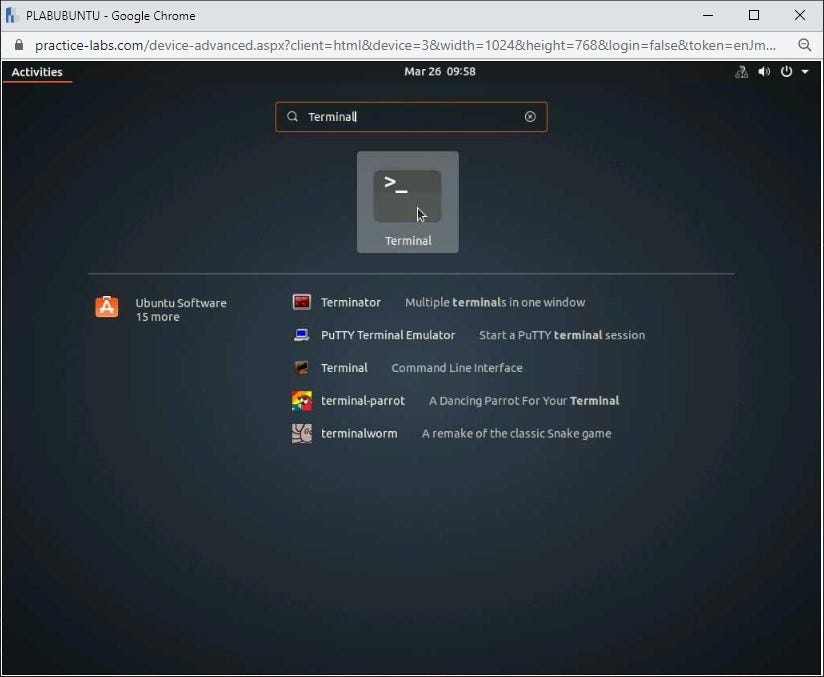
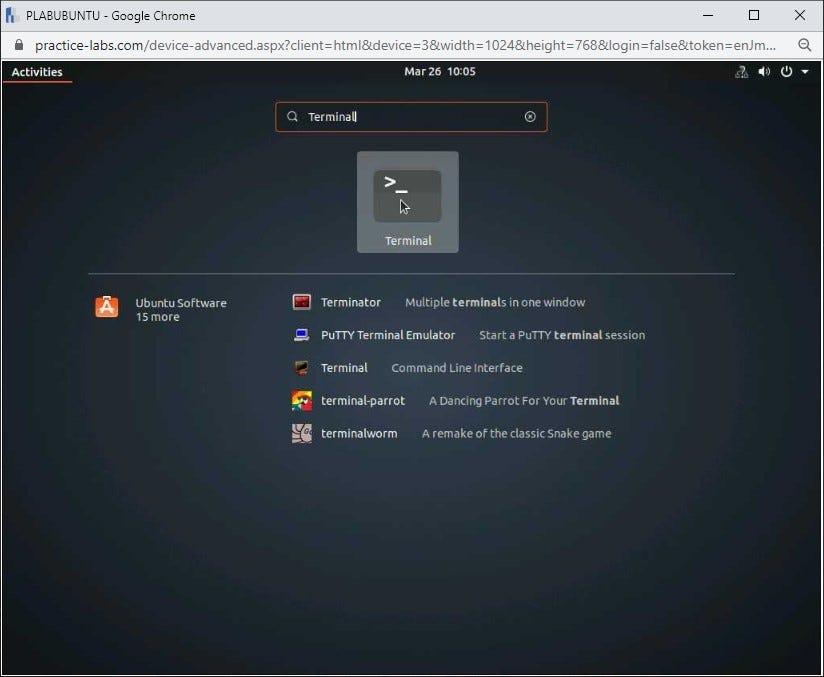
Start typing terminal in the search bar, and click the Terminal application.
Step 3
Once Terminal has opened, the next step is to type the command, which will update all available packages and repositories. Please note the update command is different in every distro, which we will discuss as we move to other exercises.
To perform this task, you need to first log in as a root user by typing the following command:
sudo su -
Fill in the root password:
Passw0rd
and hit Enter.
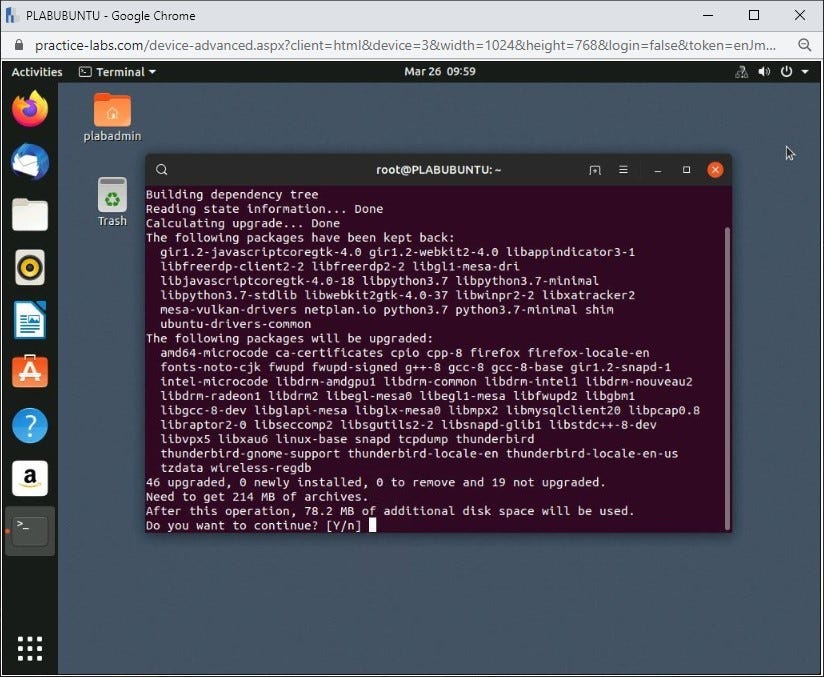
Once logged in as the root account, type the following command:
apt-get upgrade
Step 4
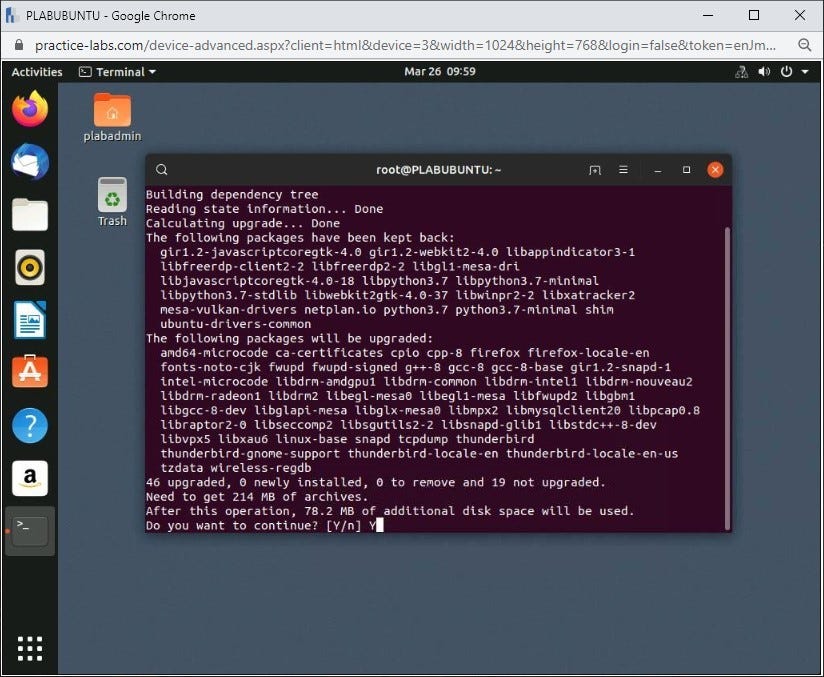
Once the process has begun, you will be presented with a question asking if you wish to continue. Please type:
Y
And hit Enter to proceed.
Step 5
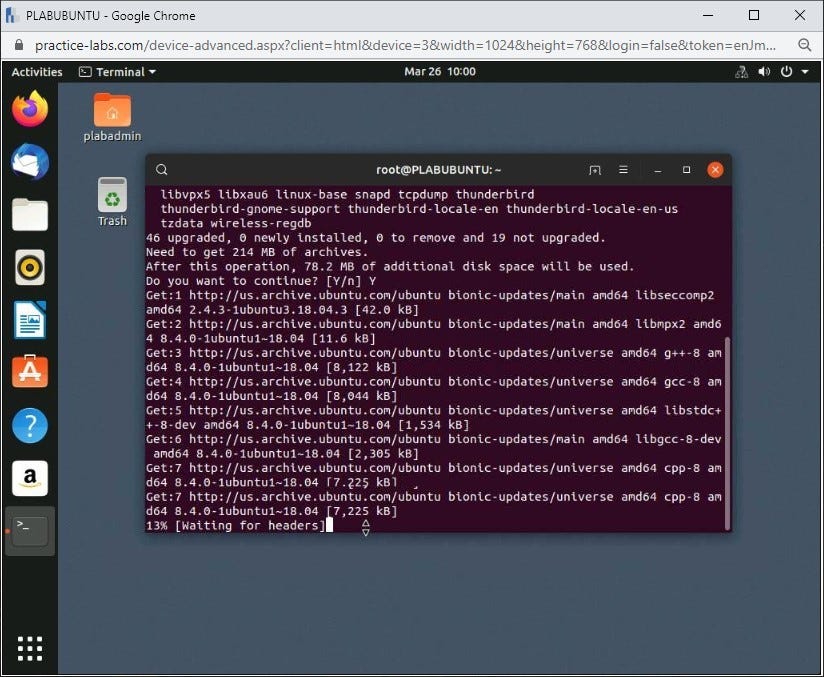
Please wait for the process to complete.
Step 6
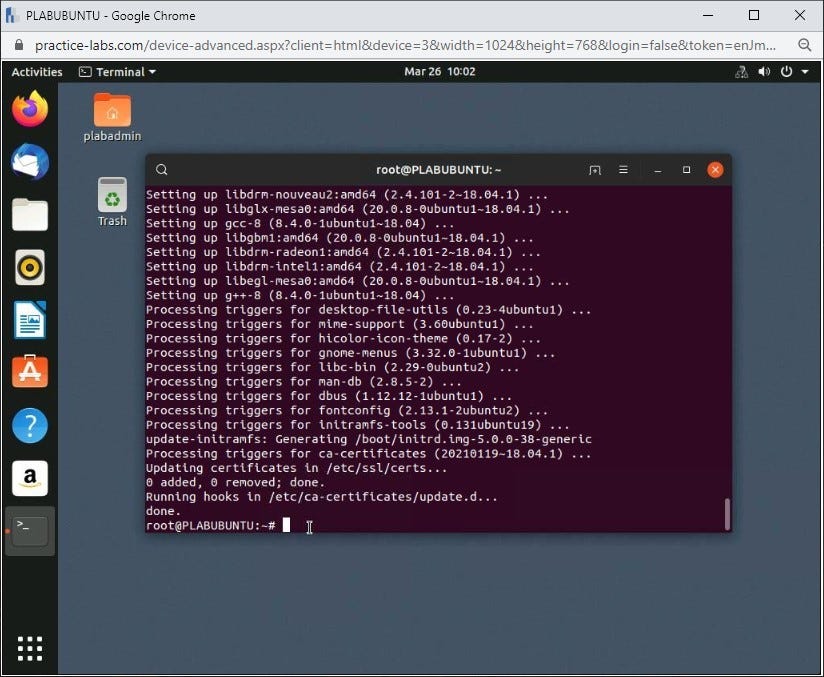
To check everything is updated successfully, just run the following command again:
apt-get upgrade
Ubuntu will check again for the updates. This time, the process completes near-instantly, meaning that the updates were successful.
Please close the Terminal window and proceed to the next task.
Task 2 — How to Install an Application Through the Command Line
Now we have updated our system, let’s now run through an installation of a Linux daemon. The Very Secure File Transfer Protocol (vsftpd) is a daemon used as the default FTP server in multiple Linux distros. Let’s look to see how we would install this via the command line.
Step 1
Again, navigate to the Show Applications menu and open the terminal as we did in our previous task.
Step 2
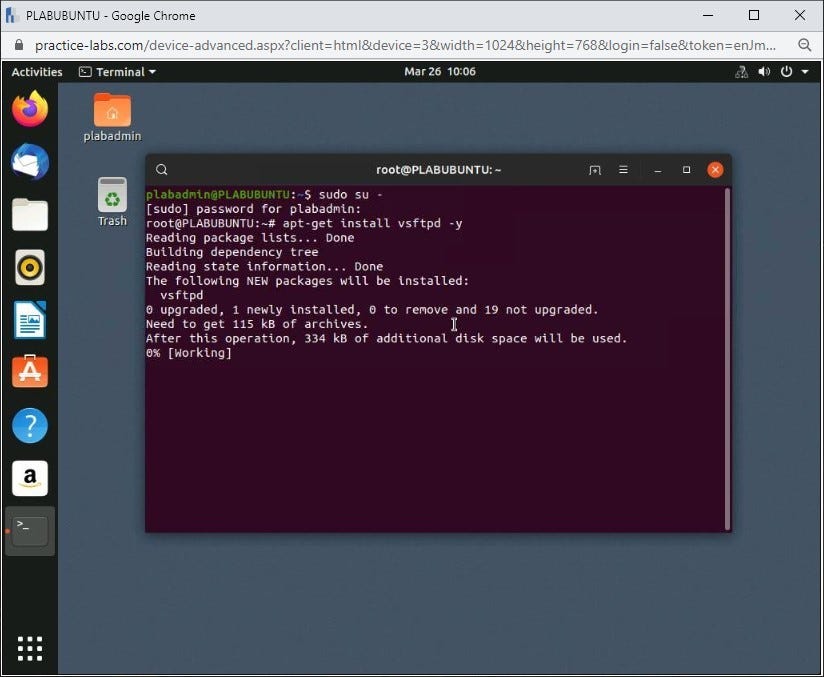
As in the previous task, the first login as the root user using the command:
sudo su -
and accordingly, enter the password for the root user:
Passw0rd
Once logged in, run the following command to install vsftpd:
apt-get install vsftpd -y
Step 3
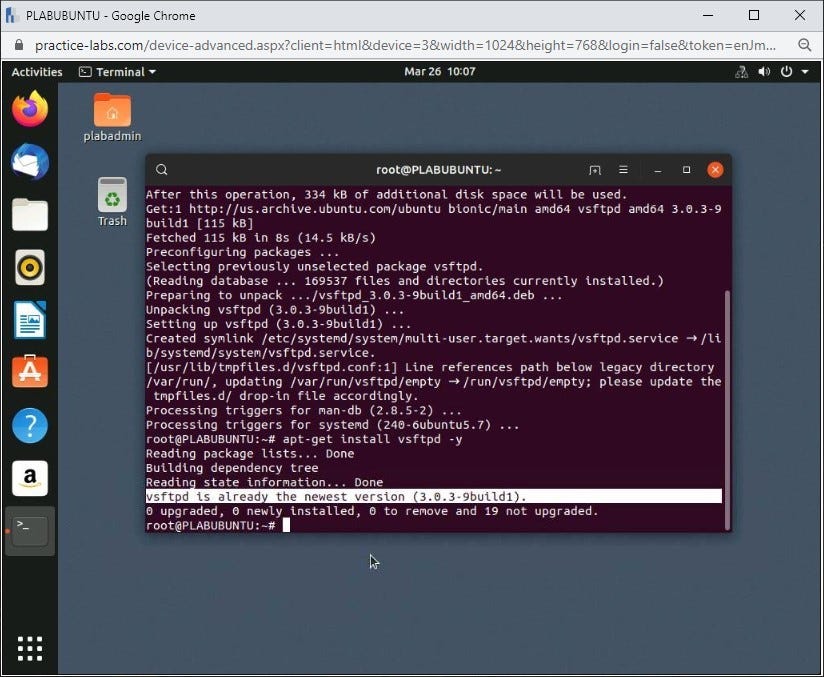
Once complete, we will check if vfstpd is installed successfully by running the same command again:
apt-get install vsftpd -y
The output will say which will say vsftpd is already installed. This will show that vsftpd is successfully installed. The same process will be followed for other applications as well for installation.
Exercise 2 — Exploring CentOS
CentOS, released slightly earlier than Ubuntu in May of 2004, is another key and one of the most used Linux distros, is developed from the source code of another Linux distro, Red Hat. The developers state that CentOS is a stable, predictable, manageable and reproducible operating system that is fully open source. Used across multiple industries in different forms, CentOS is another great example of a common distribution that you will encounter in a professional environment.
Learning Outcomes
After completing this exercise, you will be able to:
- How to Update your system graphically and command line
- How to Add/Remove Applications in CentOS through GUI and Command Line
Your Devices
During your session, you will have access to the following lab configuration.
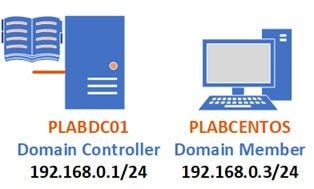
Depending on the exercises, you may or may not use all of the devices, but they are shown here in the layout to get an overall understanding of the topology of the lab.
- PLABDC01 — Windows Server 2019 (1809) (Domain Controller)
- PLABCENTOS — Centos 7 (Domain Member)
Task 1 — How to Install System Updates in CentOS Graphically
In this task, we will learn how to perform updates on CentOS graphically. You will perform this task on the first-time login. You can do this either graphically or through the command line. In task 2, we have explained the command line process so you can try either of them.
Step 1
Power on PLABCENTOS and log in using the following credentials:
Username:
Plabadmin
Password:
Passw0rd
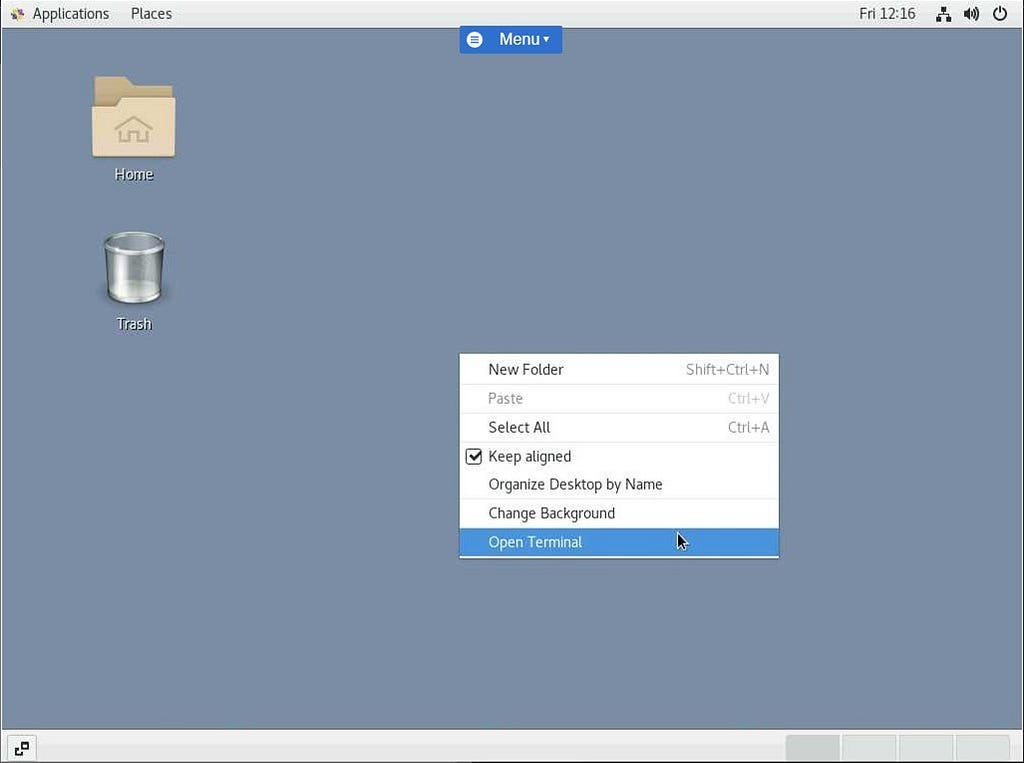
Once logged in, right-click the desktop and select Open Terminal
Step 2
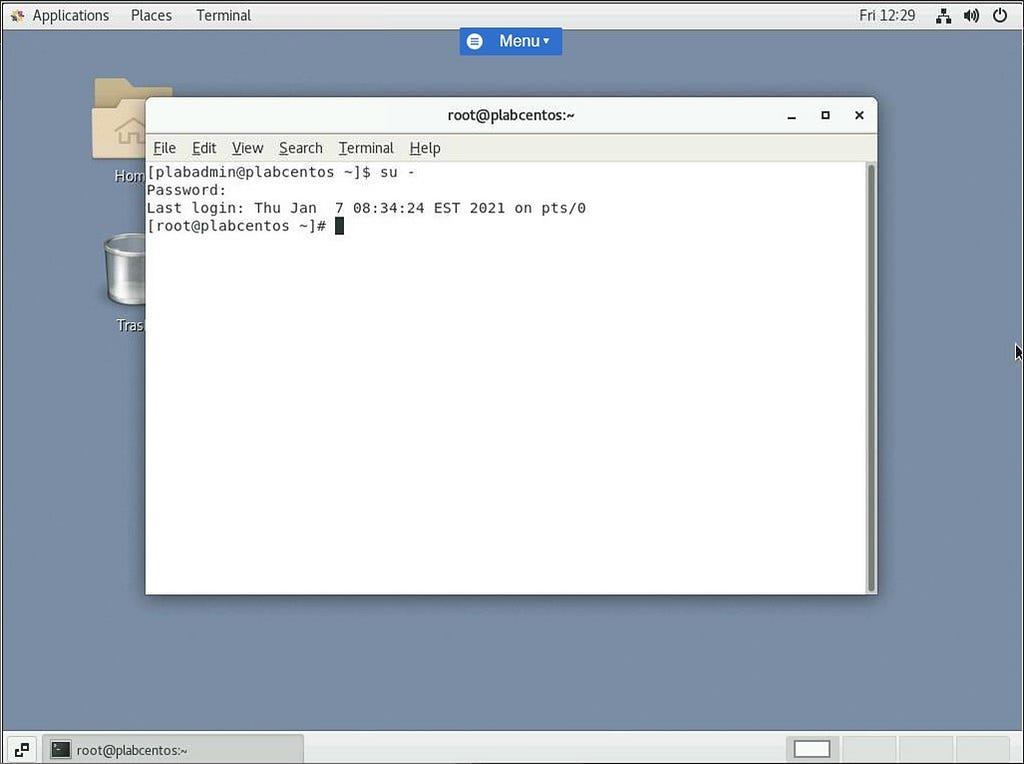
In the terminal window, type:
su -
Press Enter
When it asks you for a password type:
Passw0rd
Press Enter to proceed
Step 3
Now you are logged in as the root user, type:
yum clean all
Then press Enter
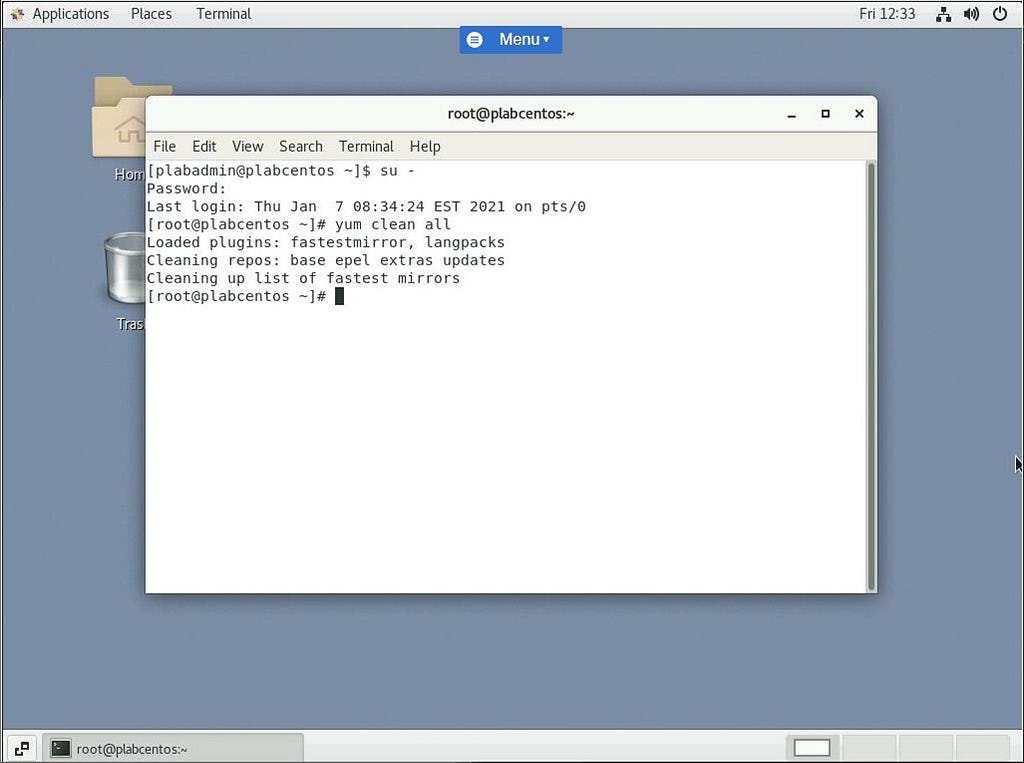
Once the cleaning process is completed, close the terminal window.
Step 4
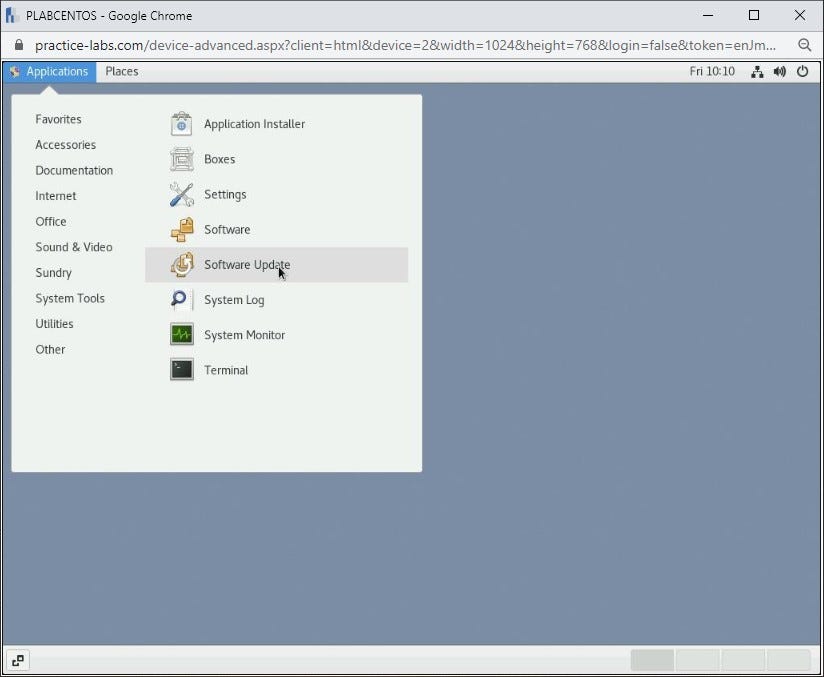
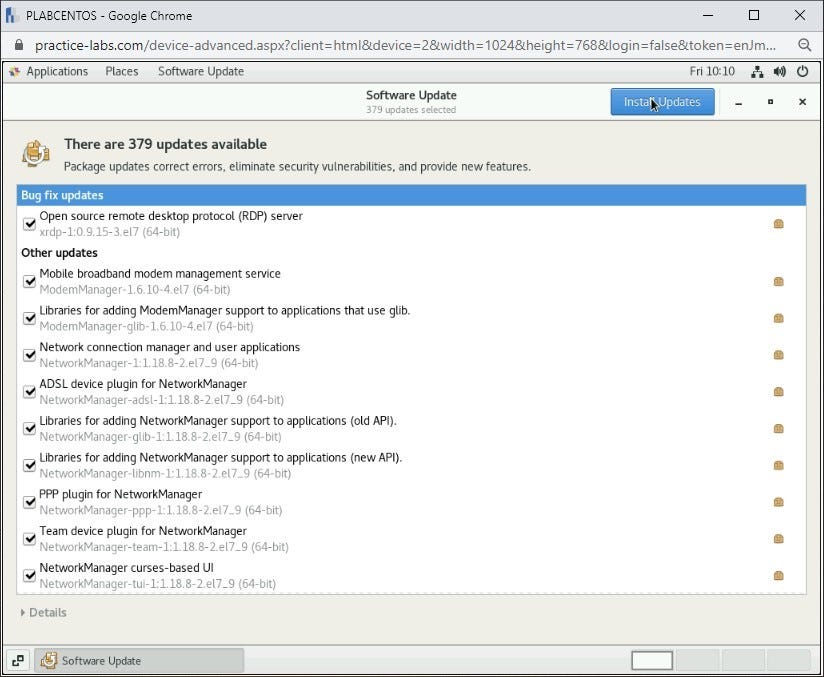
Navigate to Applications >System Tools >Software Update.
Step 5
The next screen will display all the available updates with the option to Select / Deselect them and then further install them accordingly. In our case, we will keep all of them selected and click on Install Updates on the top bar.
Step 6
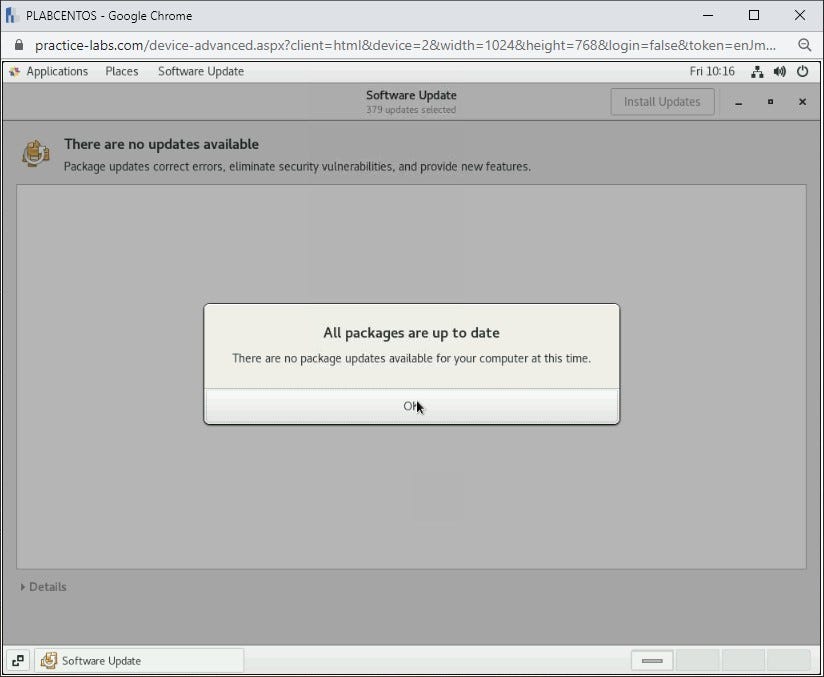
The update process will begin. Please wait for this to complete.
Once done, you will receive a notification stating that all packages are up to date. Click OK to close this window.
Task 2 — How to Install System Updates in CentOS through the Command Line
Now we have installed updates via the GUI, let’s also see how we would perform the same task using the command line via Terminal.
Step 1
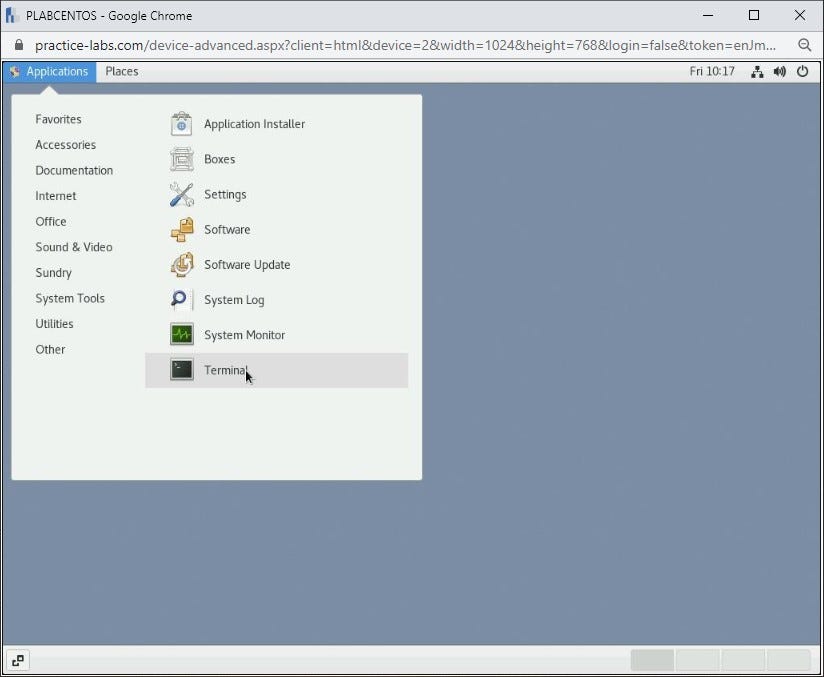
Again, navigate to Applications >System Tools, but instead click on Terminal.
Step 2
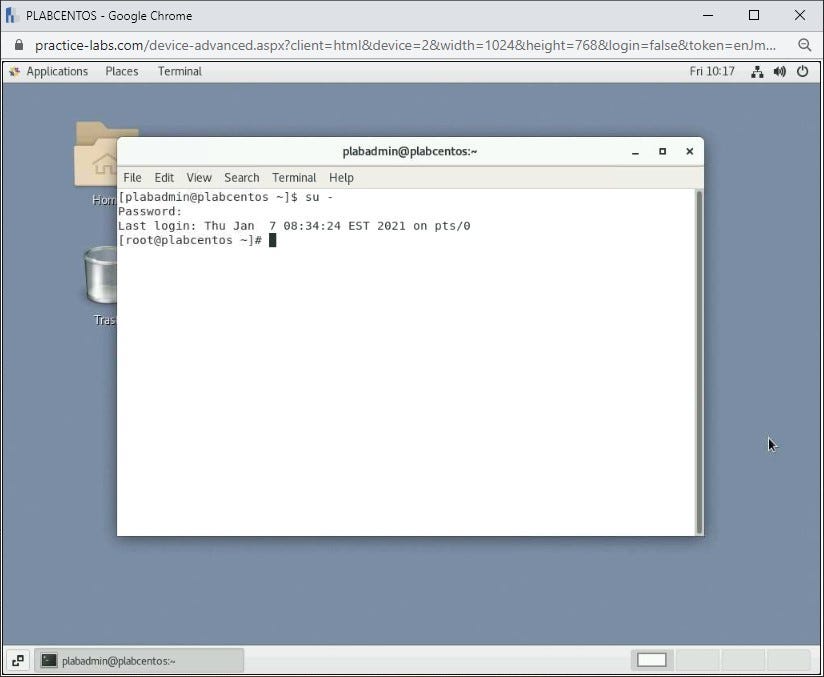
The next step is to type the command, which will update all the available packages and repositories. Please note the update command is different in every distro. As in Ubuntu, we used apt-get; we will use yum update instead.
To perform this task, you need to first log in as a root user by typing the following command:
su -
Type the following password:
Passw0rd
Hit Enter to proceed.
Step 3
Run the following command once you are logged in as the root user:
yum update
You may be prompted to see if you wish to continue again, so if so, type:
Y
Press Enter.
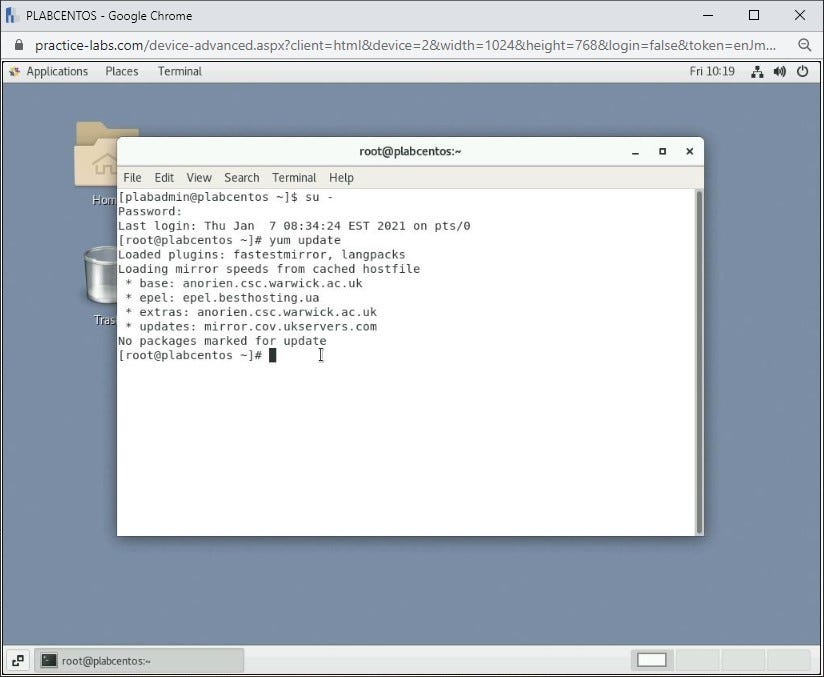
Note: As you can see, because we have already updated the machine there are no packages marked for updates.
Please close the Terminal window and proceed to the next task.
Task 3 — How to Install an Application Graphically
As discussed previously, the Very Secure File Transfer Protocol Deamon (vsftpd) is the default FTP server using in multiple distros, CentOS also being one. Let’s see how we would perform this via the GUI.
Step 1
On PLABCENTOS, navigate to Applications >System Tools >Software.
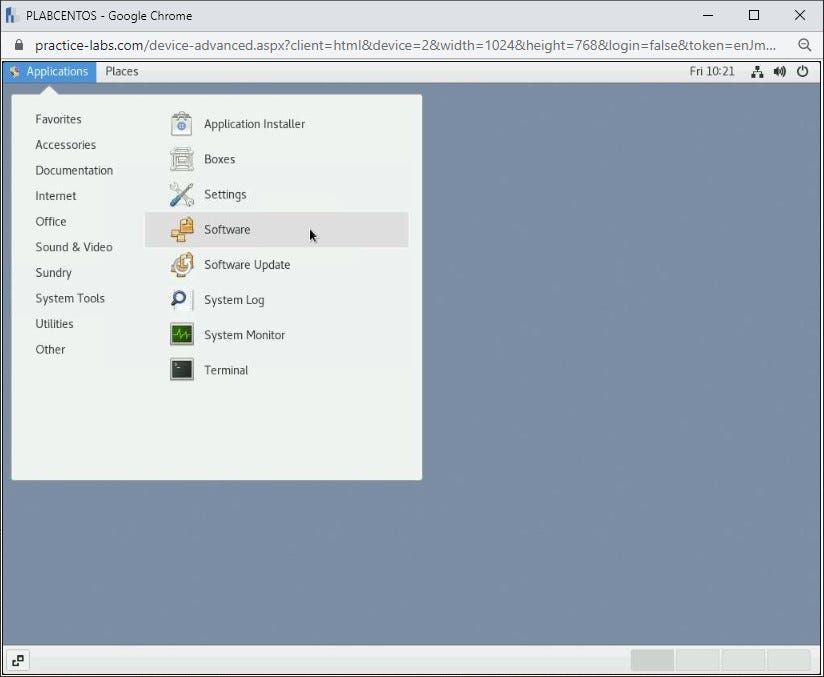
Step 2
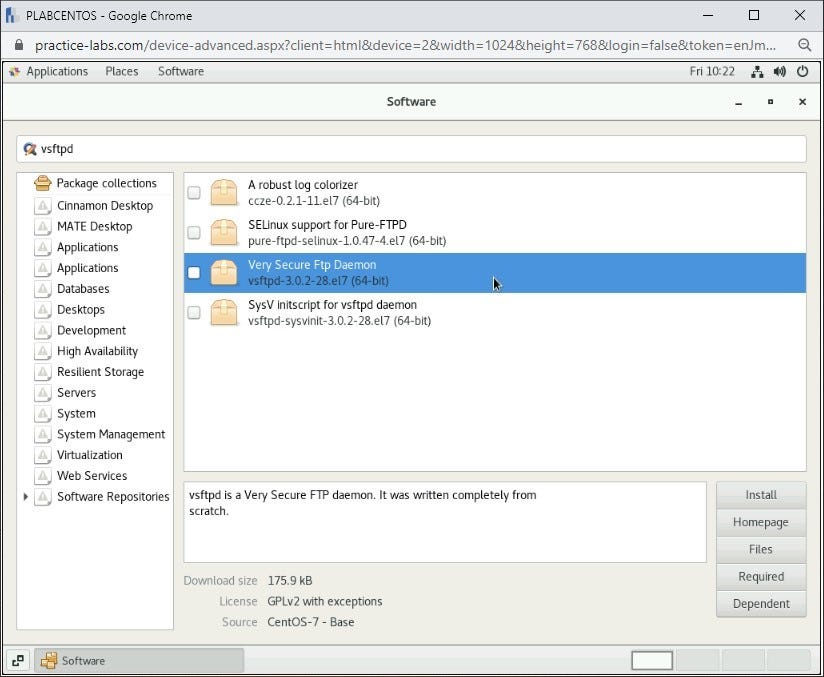
After opening the software, search the application name, for example, vsftpd (shown here as it’s full name, Very Secure Ftp Daemon) in our case, which will show the available packages of that name:
Step 3
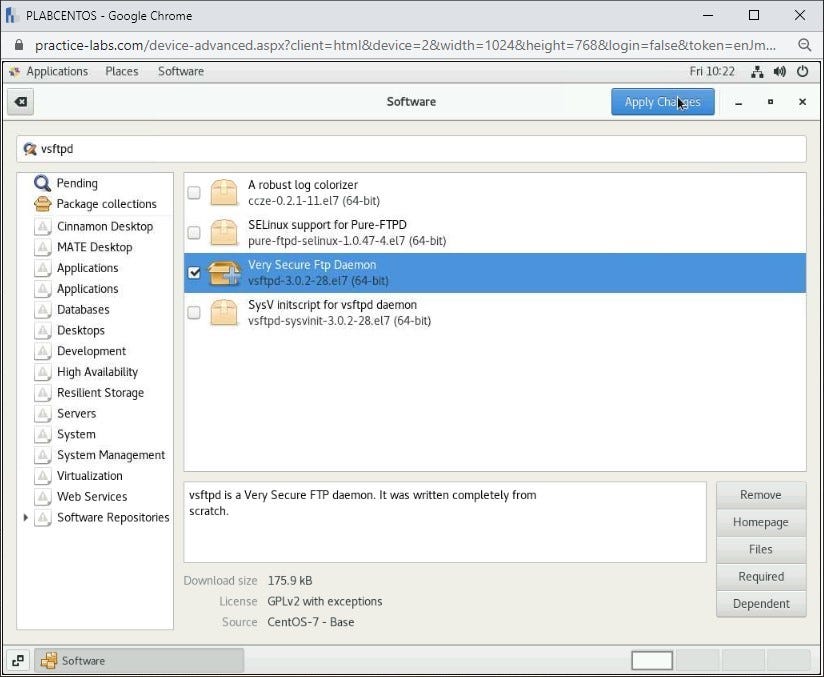
Select the first package, and click on Apply Changes on the top bar to begin the installation.
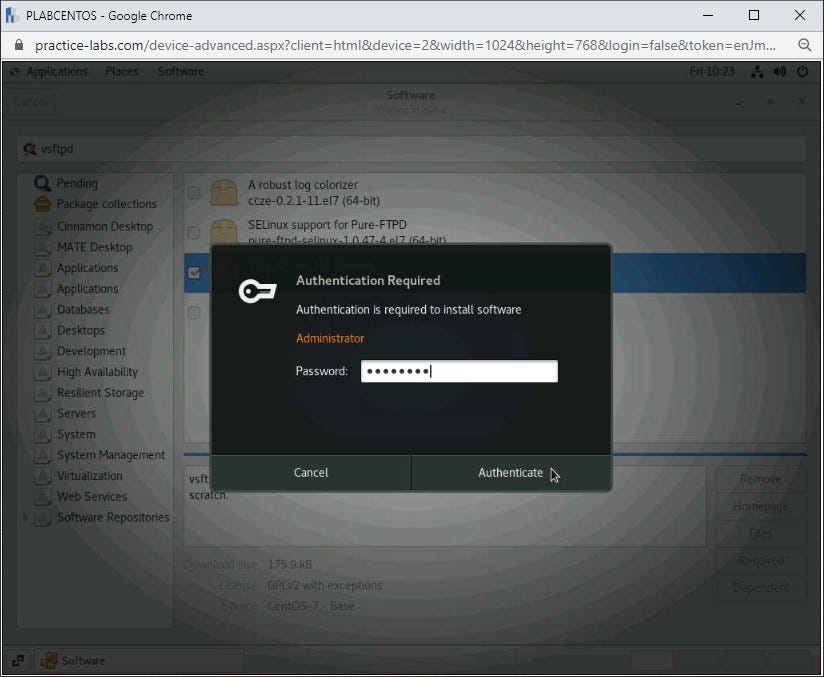
Step 4
You will get a prompt asking your permission to authenticate the installation by adding the root password:
Passw0rd
Step 5
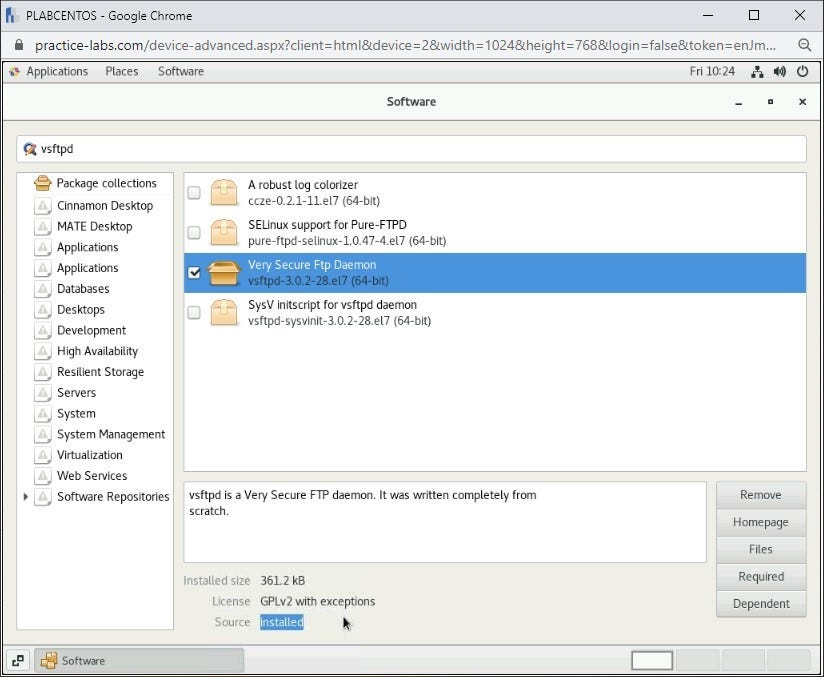
Once successfully authenticated vsftpd is successfully installed on the system, its status will change to Installed.
Close the Software window and proceed to the next task.
Task 4 — How to Install an Application Through the Command Line
Now we have learned how to install vsftpd via the GUI, let’s discover how to do the same via the command line using Terminal.
Step 1
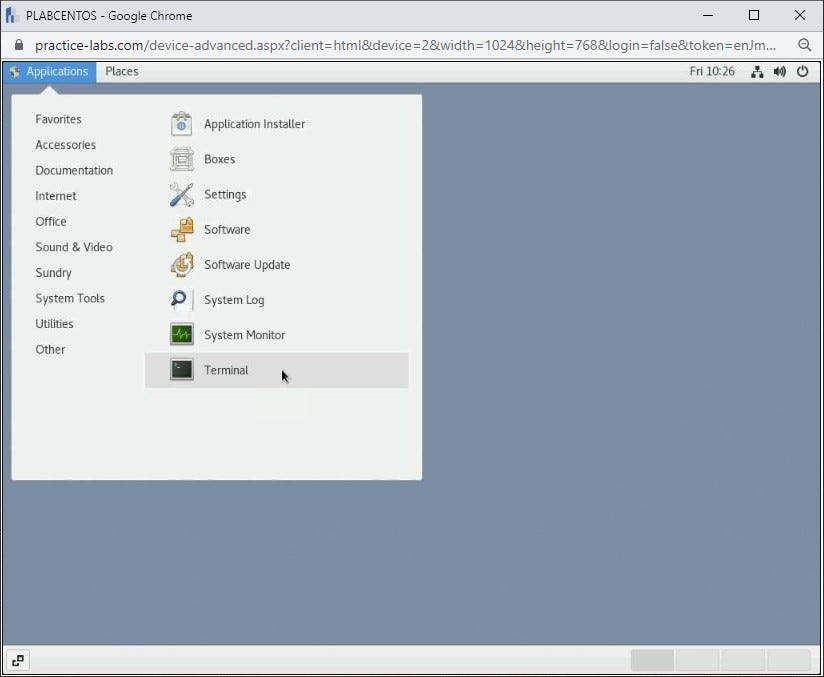
On PLABCENTOS, navigate to Applications >System Tools>Terminal.
Step 2
As in the previous terminal task, first login as the root user using the command:
su -
and accordingly, enter the password for the root user, which is:
Passw0rd
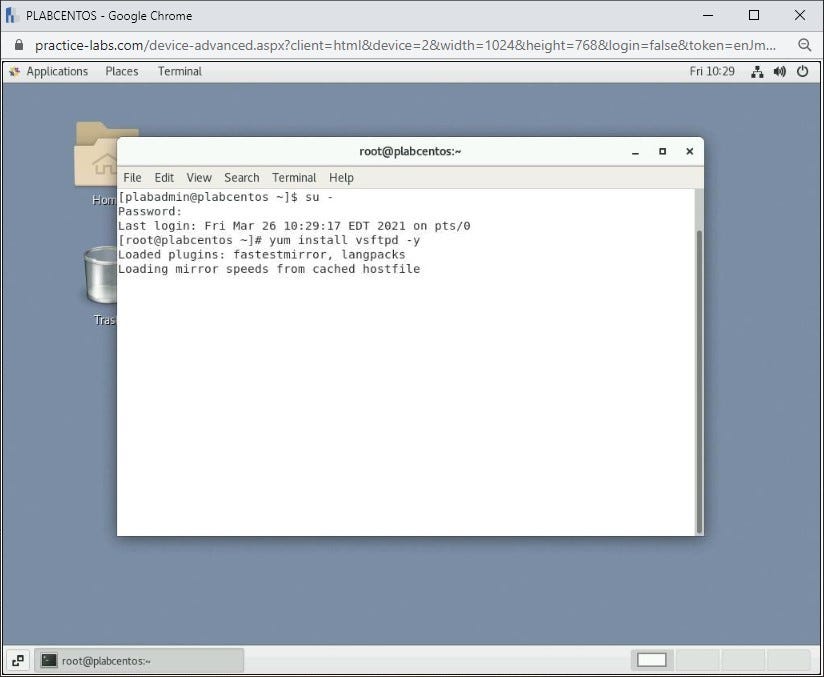
Once done, run the following command to install vsftpd:
yum install vsftpd -y
Step 3
Again, as we have already installed the daemon it will say that there is nothing to do.
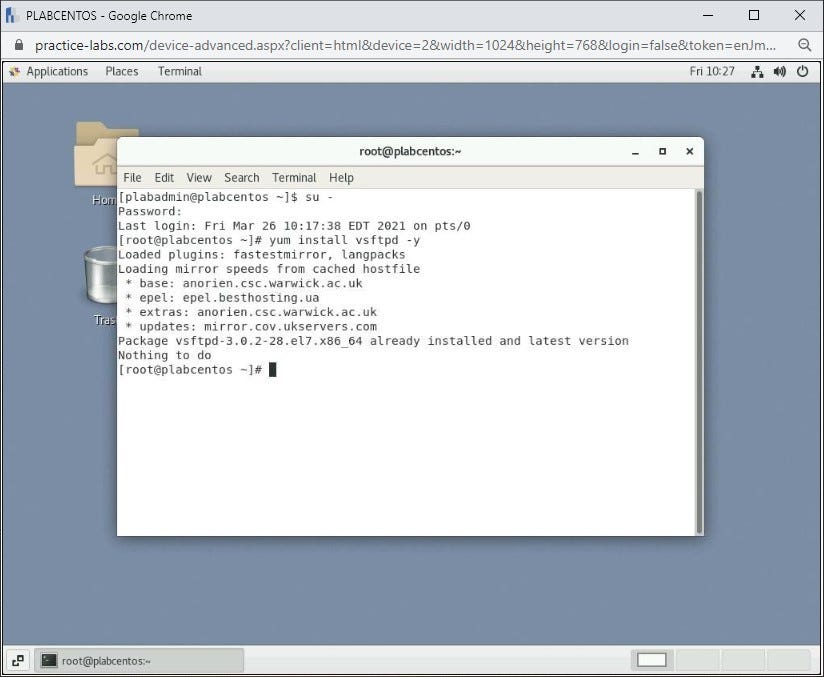
Note: you can successfully install vfstpd by resetting the lab before you complete this task, which in this case, will complete the install.
Review
Well done, you have completed the Different Linux Flavors Practice Lab.
Article posted by: https://certmaster.me/linux-fundamentals-lesson-2-different-linux-flavors-889320870fe0?source=rss-d9e5f258a4e8——2
——————————————————————————————————————–
Infocerts, 5B 306 Riverside Greens, Panvel, Raigad 410206 Maharashtra, India
Contact us – https://www.infocerts.com
