August 19, 2024
Before we go on a road trip on any adventure, what’s the first thing we do? We do a proper plan! We check the maps (Nowadays on a phone Map), look for the best routes, and maybe even scout out a few interesting stops along the way. Or we watch any YouTube video of that trip to know about various things. Skipping this step would leave us wandering aimlessly, and nobody wants that. The same goes for cybersecurity spaces.
Reconnaissance, or recon in short, is that essential planning phase in our cybersecurity world. It’s like doing a bit of homework before doing the attack. Whether we’re looking to fortify your defenses or test them, understanding what we’re up against is half the battle. Without good recon, it’s like trying to find “One Piece” without a road poneglyphs—pretty much impossible!
In this article, We’re excited to introduce to Ashok, a tool that’s as reliable as our favorite road trip song playlist. Whether we’re just curious or looking to add a new skill to our cybersecurity toolkit, We hope this journey as enjoyable as discovering a new vulnerabilities on the test target. Let’s get started.
As written on Ashok’s GitHub Page:
Before any real attacks are planned So Ashok is an Incredible fast recon tool for penetration tester which is specially designed for Reconnaissance phase. And in Ashok-v1.1 you can find the advanced google dorker and wayback crawling machine.
Main Features of Ashok
- Wayback Crawler Machine
- Google Dorking without limits
- Github Information Grabbing
- Subdomain Identifier
- Cms/Technology Detector With Custom Headers
Install Ashok on Kali Linux
Installing Ashok on our Kali Linux system is very easy. We just need to open our terminal window and apply the following command to clone it from GitHub:
After that we can see the output in the following screenshot:
In the above screenshot we can see the output of above command. Now Ashok is on our system. So we just need to change our current working directory to Ashok by using the following command:
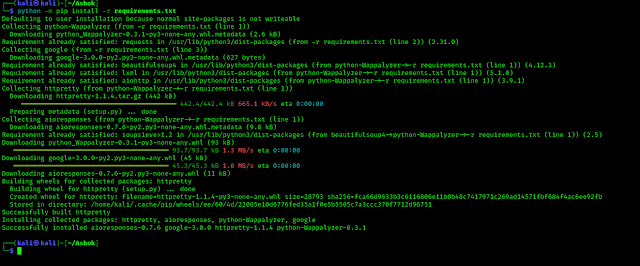
Now we need to install requirements by applying following command:
This command will install all the necessary things to run on our Kali Linux system. As we can see in the following screenshot.
Now we can run Ashok tool on our Kali Linux system.
Running Ashok on Kali Linux
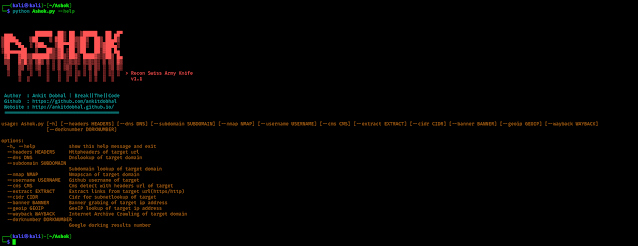
Now the time has come that we run Ashok on our system. Before running it on a target we check Ashok’s help section. To do that we need to run following command:
In the following screenshot we can see the output of the above command:
In the above screenshot we can see that how to use Ashok for different recons. In the following list we shows the uses of Ashok:
HTTP headers using –headers
DNS lookup using –dns
Sub-domain lookup using –subdomain
NMAP scan using –nmap
Extract data using Github username of target –username
CMS (Content Management System like WordPress and other) Detection using –cms
Extract links from target domain using –extract
CIDR (Classless Inter-Domain Routing) subnet lookup using –cidr
Banner grabbing using –banner
GeoIP of target IP address using –geoip
Internet archive crawling of target domain using –wayback
Google dorking using number of results as dork number using –dorknumber
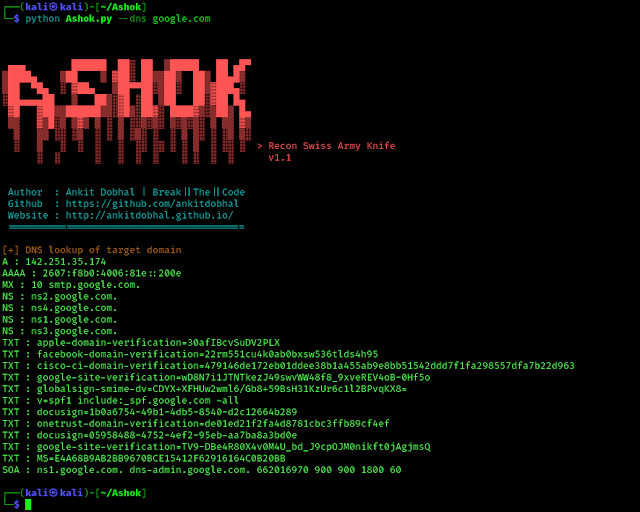
For more details we can head over to Ashok’s WiKi Page. Let’s do a DNS scan of google.com. To do this we need to run following command:
We can see the output on the following screenshot:
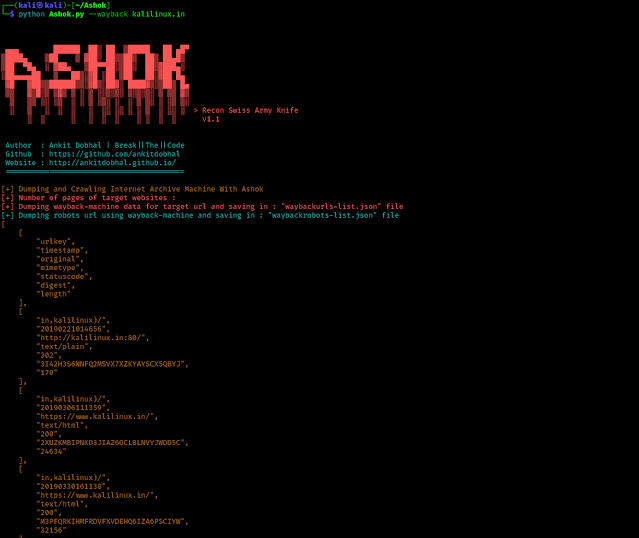
We also search for Internet archive (Wayback Machine) crawling on Ashok on our domain by using following command:
We can see the result on the following screenshot:
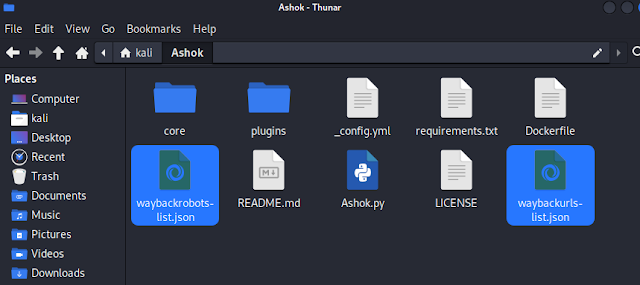
The outputs of this scan also saved in Ashok’s directory as we can see in the screenshot below.
This is the uses of Ashok as our recon tool. Here just for example we show two use cases. But it is capable to do more. We can check it’s Wiki page to learn more uses of it.
This is how we can install and use Ashok and do our reconnaissance works easily on our Kali Linux system. Love our article? Make sure to follow us on Twitter and GitHub, we post article updates there. To join our KaliLinuxIn family, join our Telegram Group & Whatsapp Channel. We are striving to build a community for Linux and cybersecurity. For anything we always happy to help everyone on the comment section. As we know our comment section is always open to everyone. We read each and every comment and we always reply.
Article posted by: https://www.kalilinux.in/2024/08/ashok.html
——————————————————————————————————————–
Infocerts, 5B 306 Riverside Greens, Panvel, Raigad 410206 Maharashtra, India
Contact us – https://www.infocerts.com
This is the article generated by feed coming from KaliLinux.in and Infocerts is only displaying the content.


