November 1, 2022
Linux Fundamentals Lesson 3 : Installation Of Linux OS
Exercises
Introduction
Lab Topology
Exercise 1 — Installing CentOS Operating System.
Review
Learning Outcomes
In this module, you will complete the following exercises:
- Exercise 1 — Installing CentOS Operating System
After completing this lab, you will be able to:
- Create a Virtual machine on a Windows Machine
- Install the CentOS operating system on a Virtual Machine
Lab Duration
It will take approximately 1 hours and 30 minutes to complete this lab.
Lab Topology
During your session, you will have access to the following lab configuration.
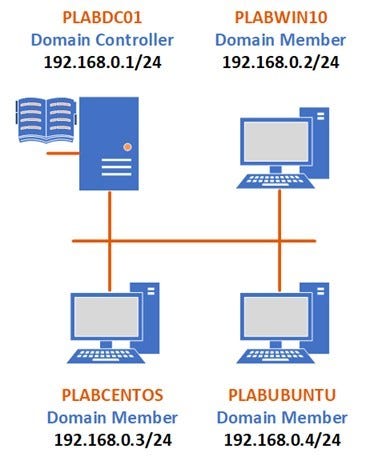
Depending on the exercises, you may or may not use all of the devices, but they are shown here in the layout to get an overall understanding of the topology of the lab.
- PLABDC01 — Windows Server 2019 (1809) (Domain Controller)
- PLABWIN10 — Windows 10 (1903) (Domain Member)
- PLABCENTOS — Centos 7 (Domain Member)
- PLABUBUNTU — Ubuntu 19.04 (Domain Member)
Exercise 1 — Installing CentOS Operating System.
From installing and navigating Linux operating systems, it is also pivotal for anyone administering Linux systems to be able to complete a fresh install of an operating system. This can be completed in multiple ways, although for the purposes of the lab we will be creating them using Microsoft Hyper-V, software that allows users to create Virtual Machines easily and efficiently.
Although the process would mainly be the same when installing an operating system on real hardware, it is still useful to know how to operate Hyper-V as it can be a key sandbox testing tool.
Learning Outcomes
After completing this exercise, you will be able to:
- Install the CentOS Operating System on a Virtual Machine
Your Devices
During your session, you will have access to the following lab configuration.
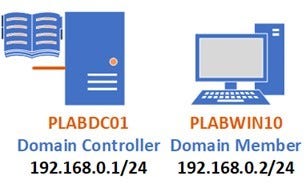
Depending on the exercises, you may or may not use all of the devices, but they are shown here in the layout to get an overall understanding of the topology of the lab.
- PLABDC01 — Windows Server 2019 (1809) (Domain Controller)
- PLABWIN10 — Windows 10 (1903) (Domain Member)
Task 1 — Creating a Virtual Machine
In this task, we will be running through how to create and install a Virtual Machine running the CentOS operating system. Although VM’s are used extensively for security & testing purposes in real life environments, this task will also take you through a typical CentOS installation as if you were doing it on a physical PC.
Step 1
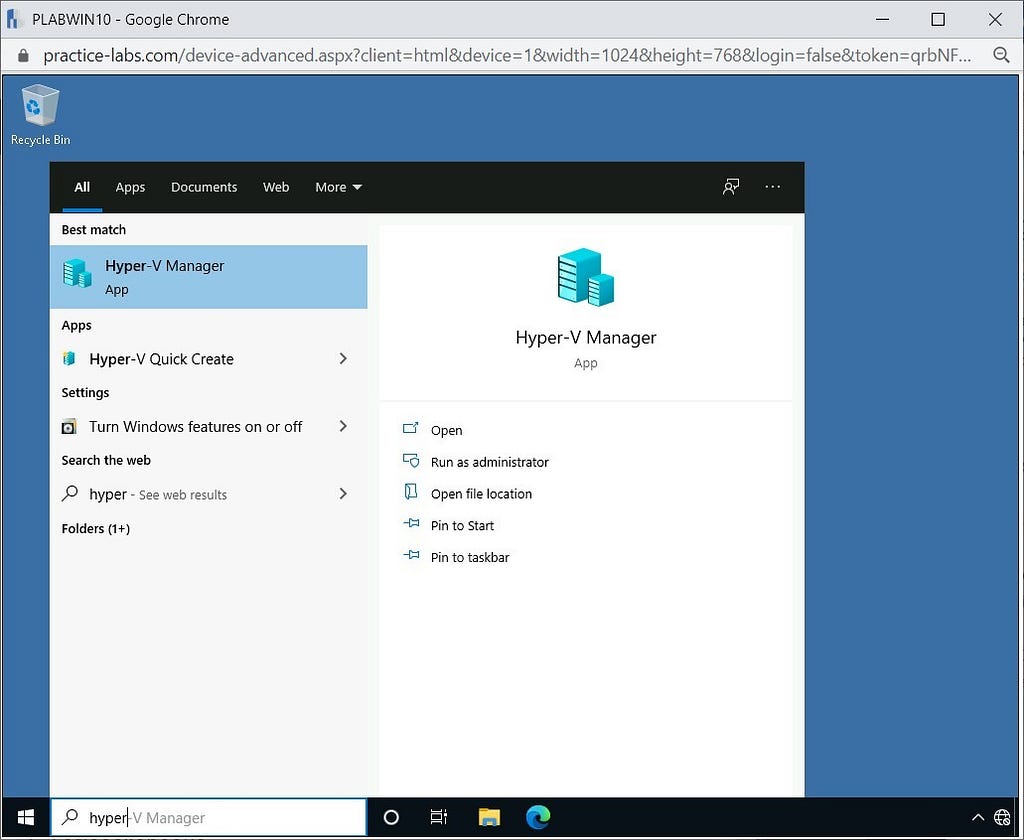
Connect to PLABWIN10, and click on the Search Bar located on the Taskbar. Type the following:
Hyper-V Manager
Hyper-V is a built-in virtual machine creation, configuration and management tool in Windows 10 and Windows Server. Click Hyper-V Manager to open the program.
Note: You may not have to type the full name before the option becomes available, as shown in the following screenshot.
Step 2
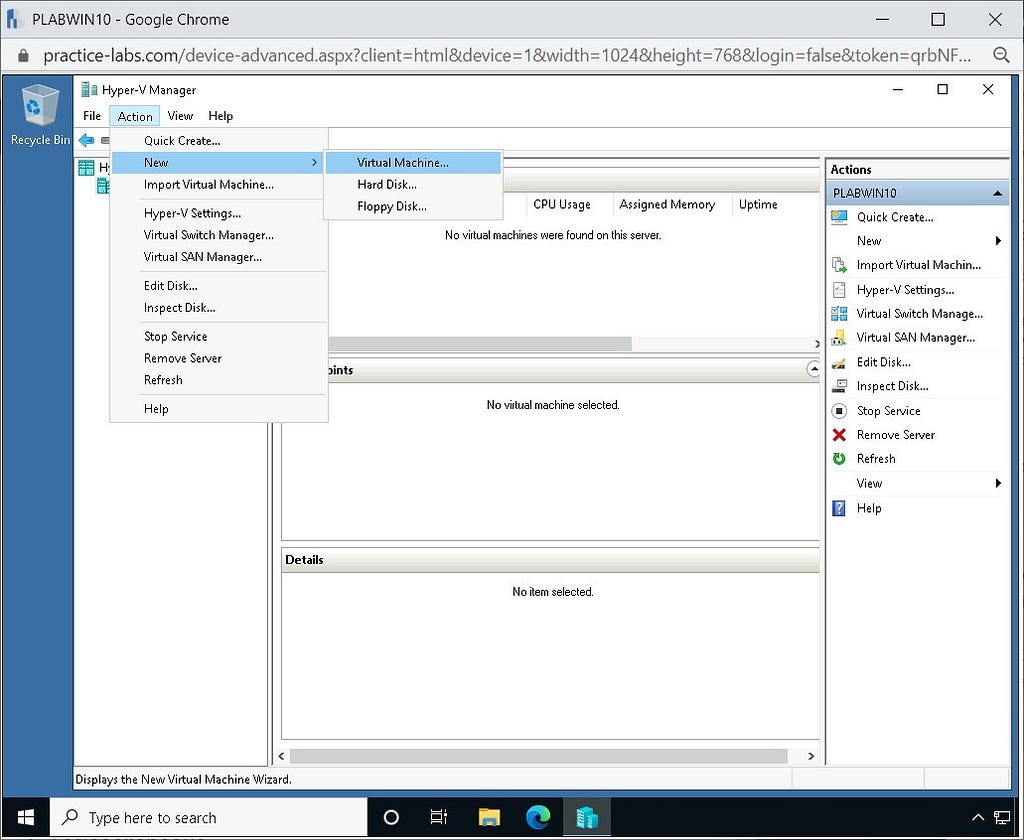
Click on Hyper-V and once it opens, navigate to Action > New > Virtual Machine.
Step 3
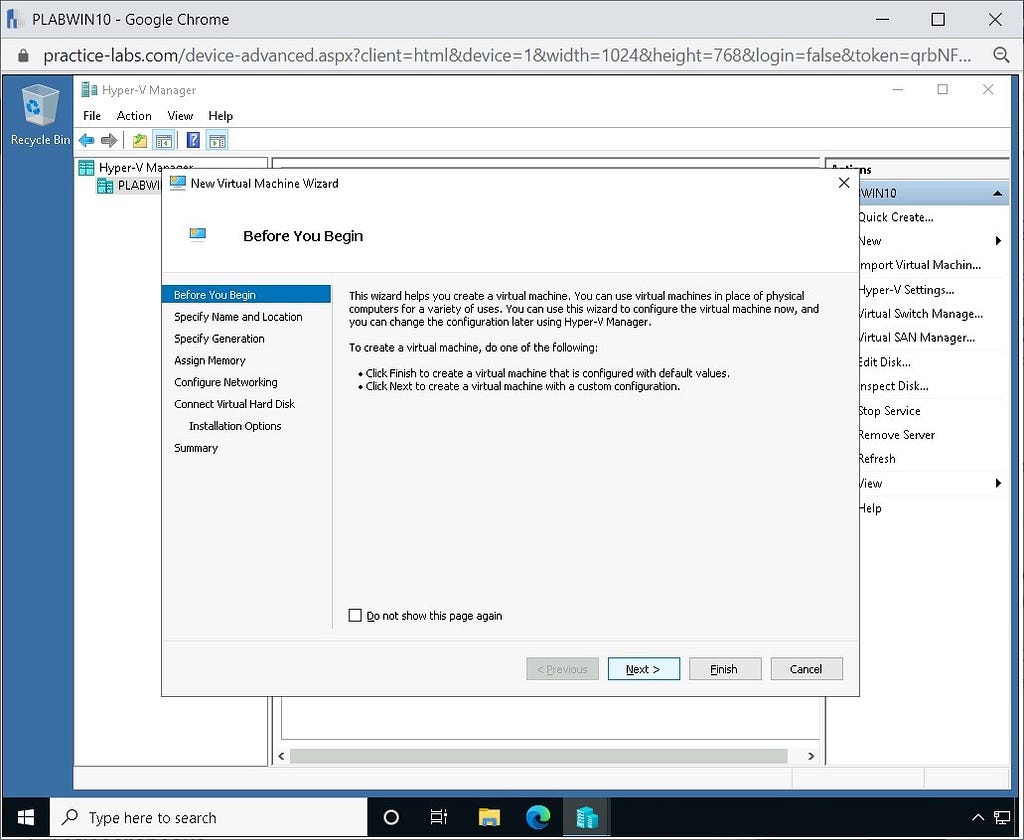
We will start by configuring the new virtual machine, in which we will install the CentOS operating system. Click on Next to specify the name and location of the virtual machine that we are creating.
Step 4
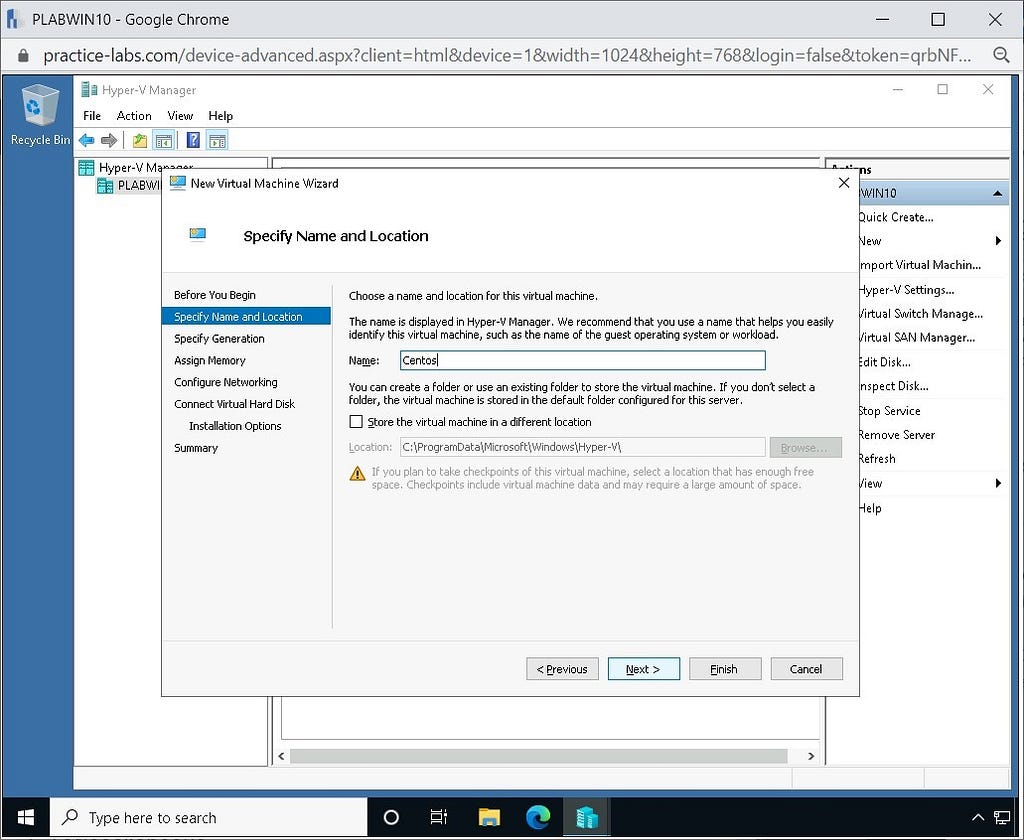
In the name field, type CentOS, and let the location be set to default as we have enough device space on it.
Step 5
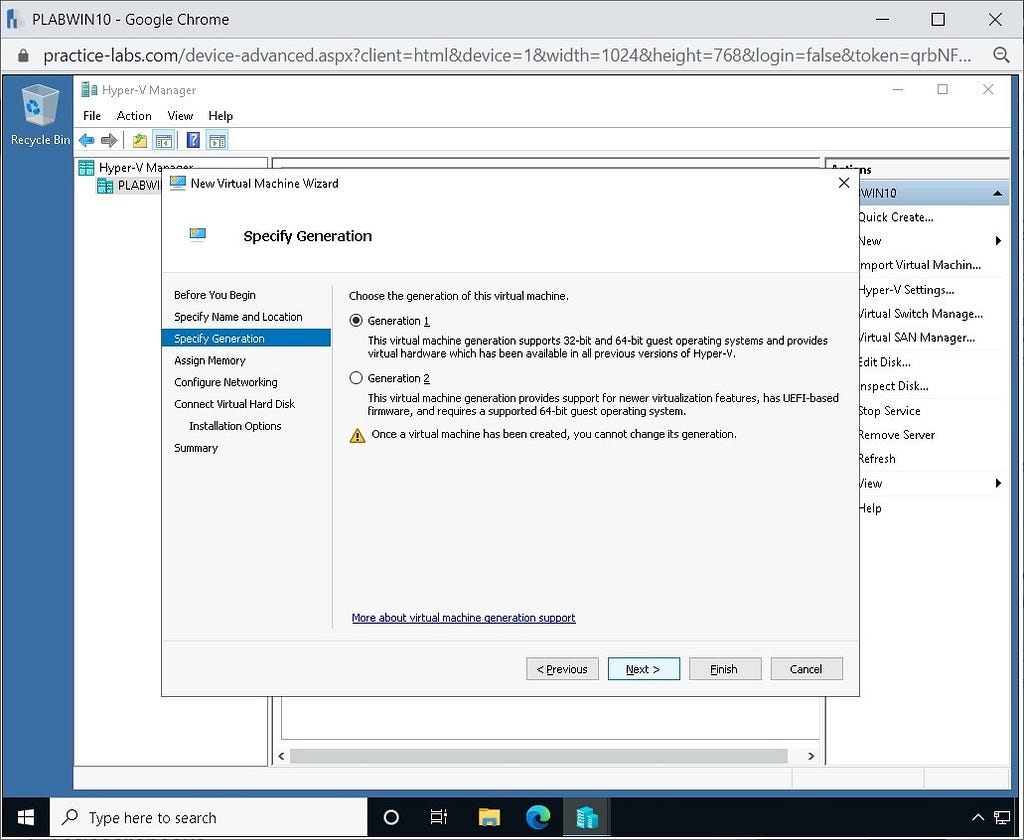
We will select Generation 1 to proceed.
Click Next.
Step 6
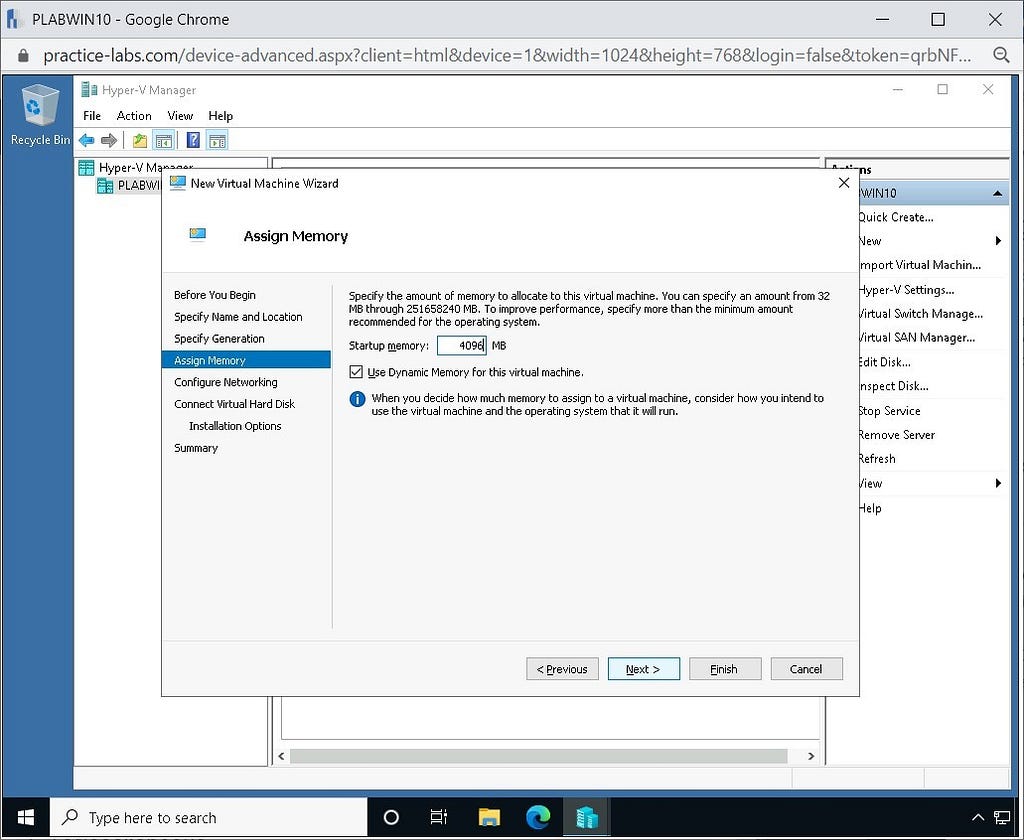
We will now assign memory to the machine, 4096mb in our case.
Click Next.
Step 7
We will now configure the network and select the Default switch, instead of Non-Connected.
Click Next.
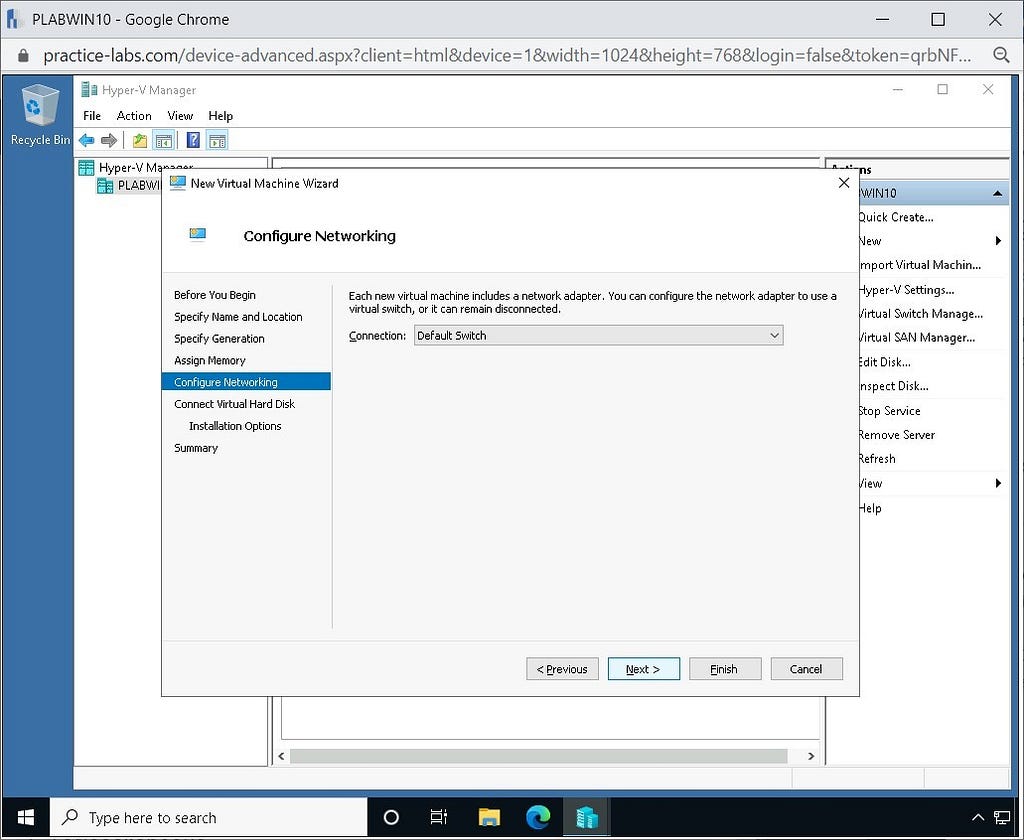
Step 8
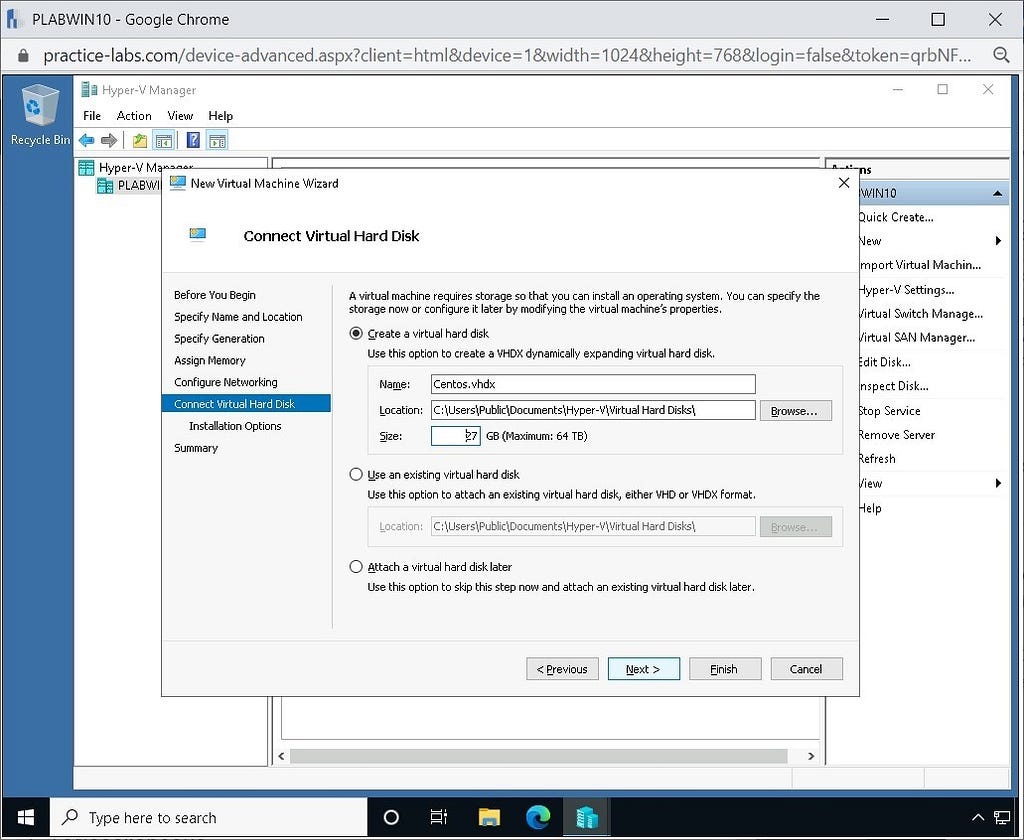
We will now configure the virtual Hard Disk.
Under the Name field of the Create a virtual hard disk option, type:
Centos.vhdx
Click the Browse… button under Location and navigate to:
C:UsersPublicDocumentsHyper-VVirtual Hard Disks
Click on to select this as our OS.
Ensure that Size is set to 27GB and click Next.
Step 9
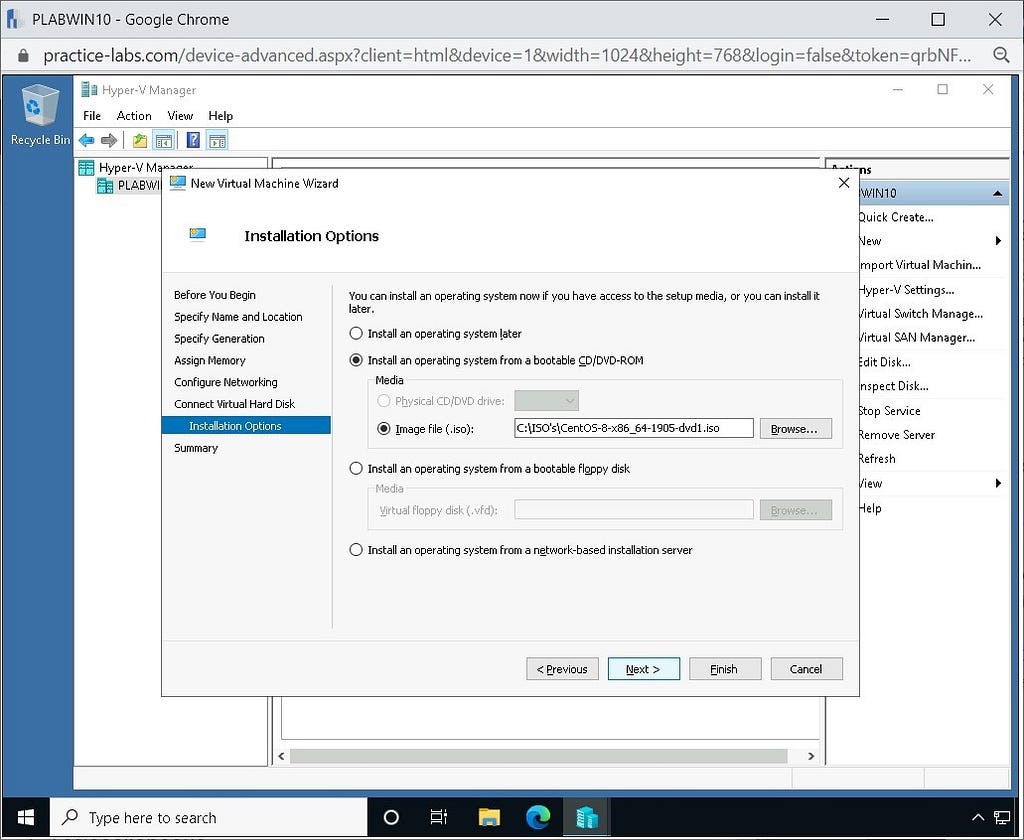
You will now be taken to the Installation Options page. From here, we can select the ISO file that we will use to install CentOS on our virtual machine.
Click the Install an Operating System from a bootable CD/DVD-ROM checkbox, and click Browse. Navigate to:
C:ISO’s
Click on CentOs-8-x86_64–1905-dvd1.ISO and click Open.
Step 10
With the correct ISO selected, click the Next button to proceed.
Step 11
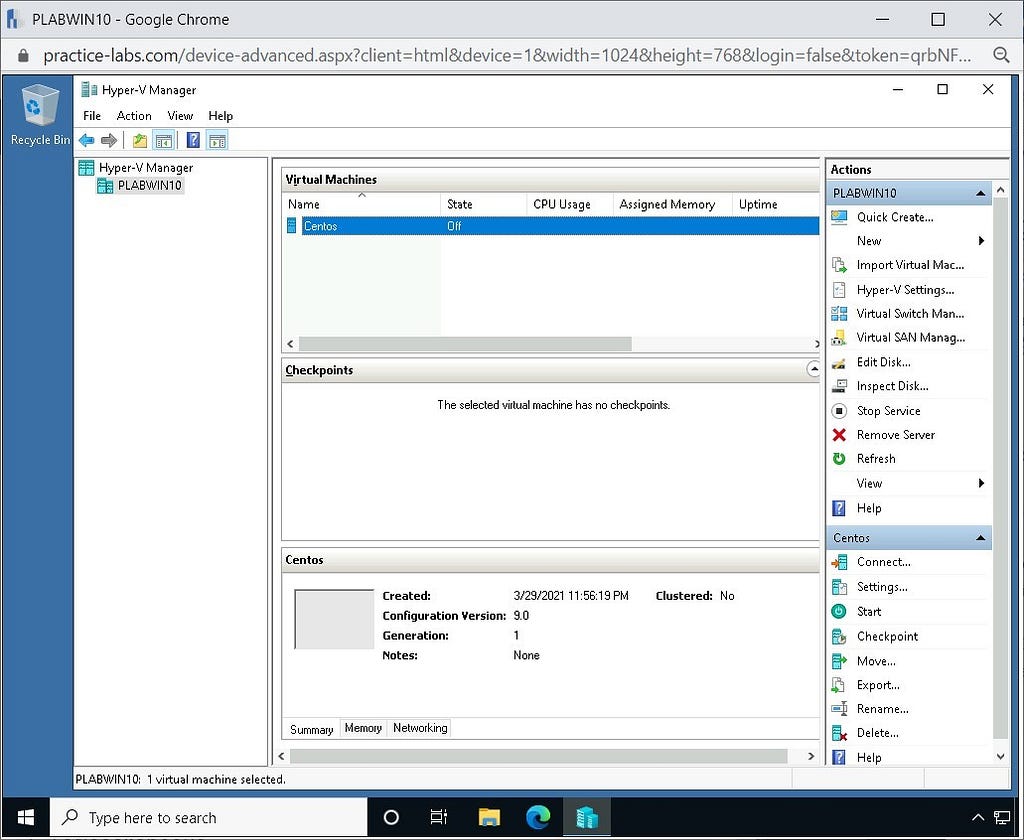
Under summary, click Finish, and our virtual machine has been created! You will see it listed under the Virtual Machines tab, with the state set to Off.
Task 2 — Installing CentOS operating system on a Virtual Machine
Now we have created our CentOS virtual machine, the next step would be to configure the new operating system. Although we will run through a typical installation in this task, please be aware that you further configure this as necessary in a real-world environment.
Step 1
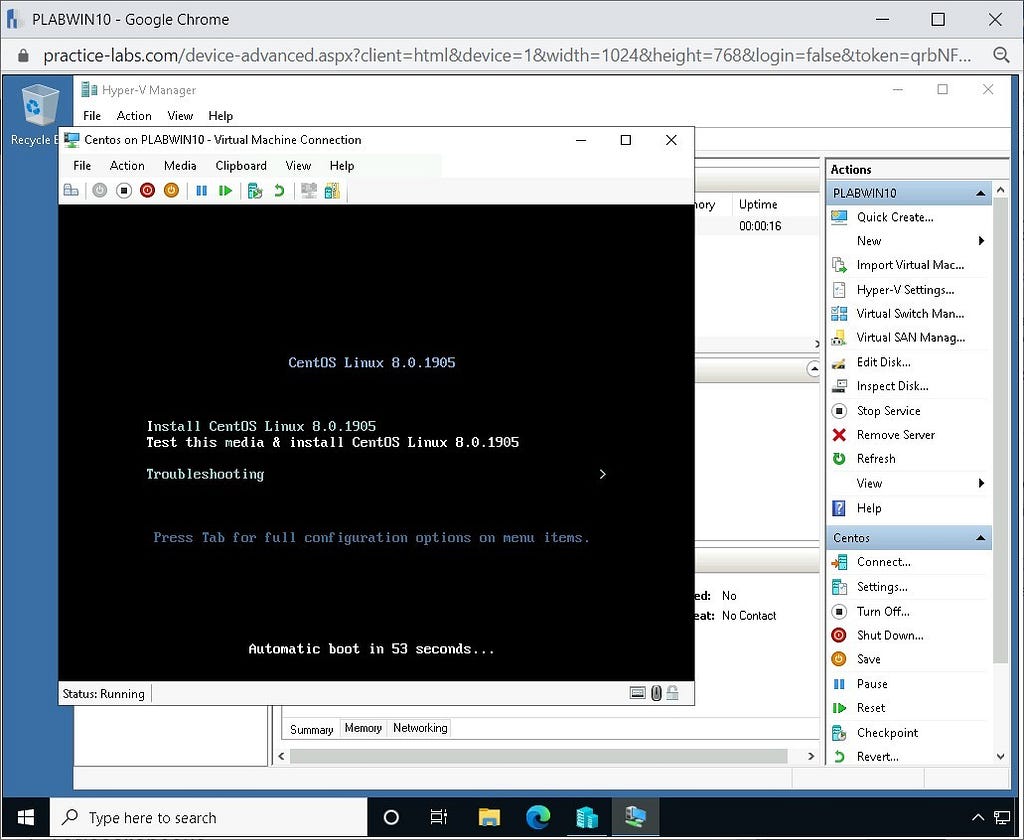
Double-click our new VM to open a new connection window. Click on the Start icon on the action pane. This will show us a virtual GUI to install our OS.
Press Enter after selecting Install CentOS Linux 8.0.1905.
Step 2
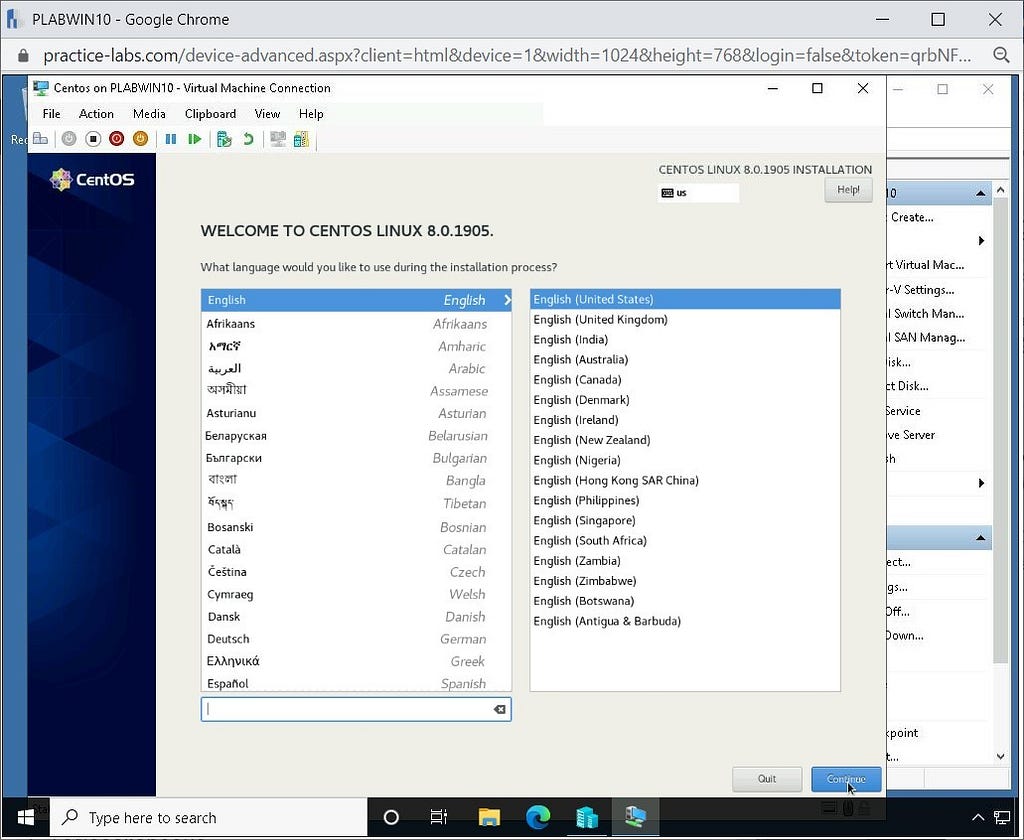
Select Language, and navigate to English > English (United States) and click on Continue.
Note: If you would like to scale the Centos window, please click View > Zoom Level and set a view as necessary.
Step 3
We will go through configuration options before moving further with the installation.
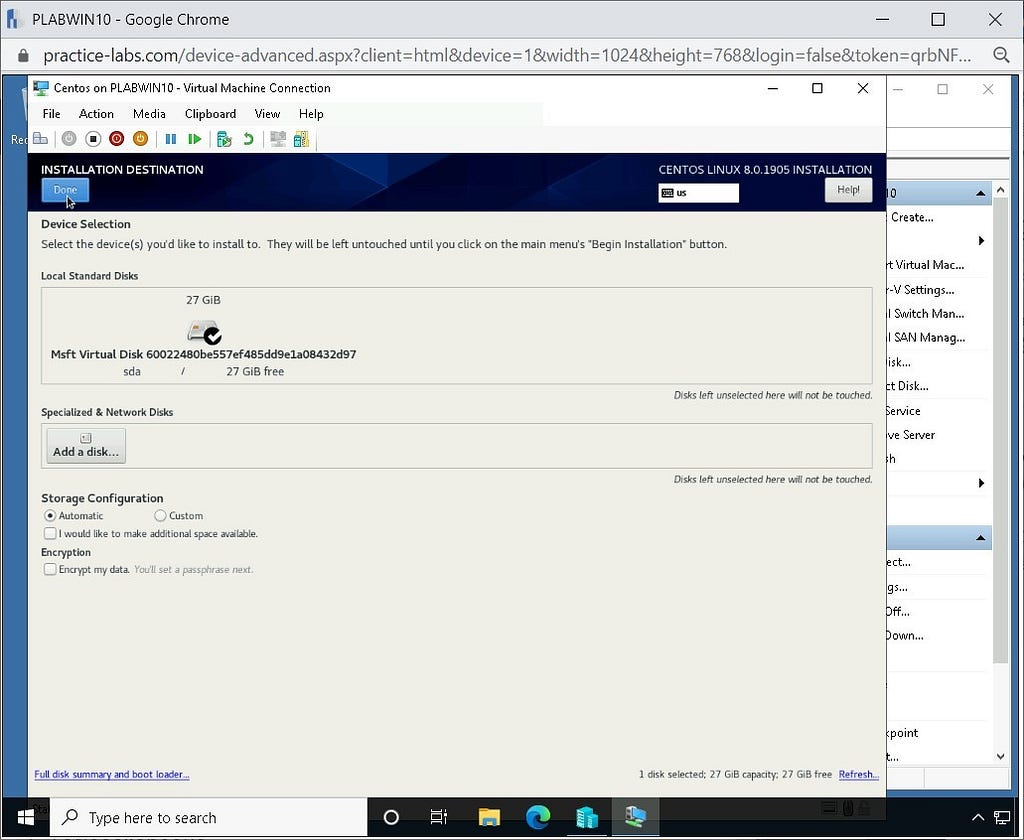
Notice that there is a warning sign under the Installation Destination option, so we will click on that and select Automatic as our option.
Click on Done on the top left-hand side.
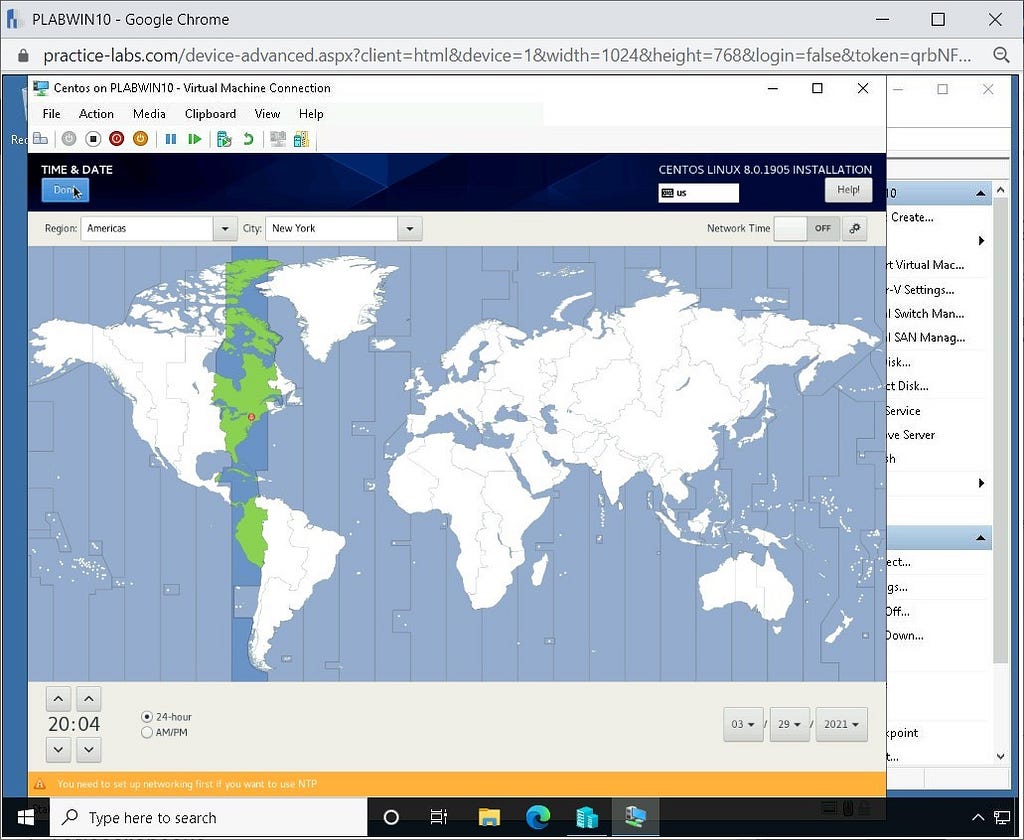
On the next screen, we can configure the date and time. Click on Done to accept the default option and continue.
Step 4
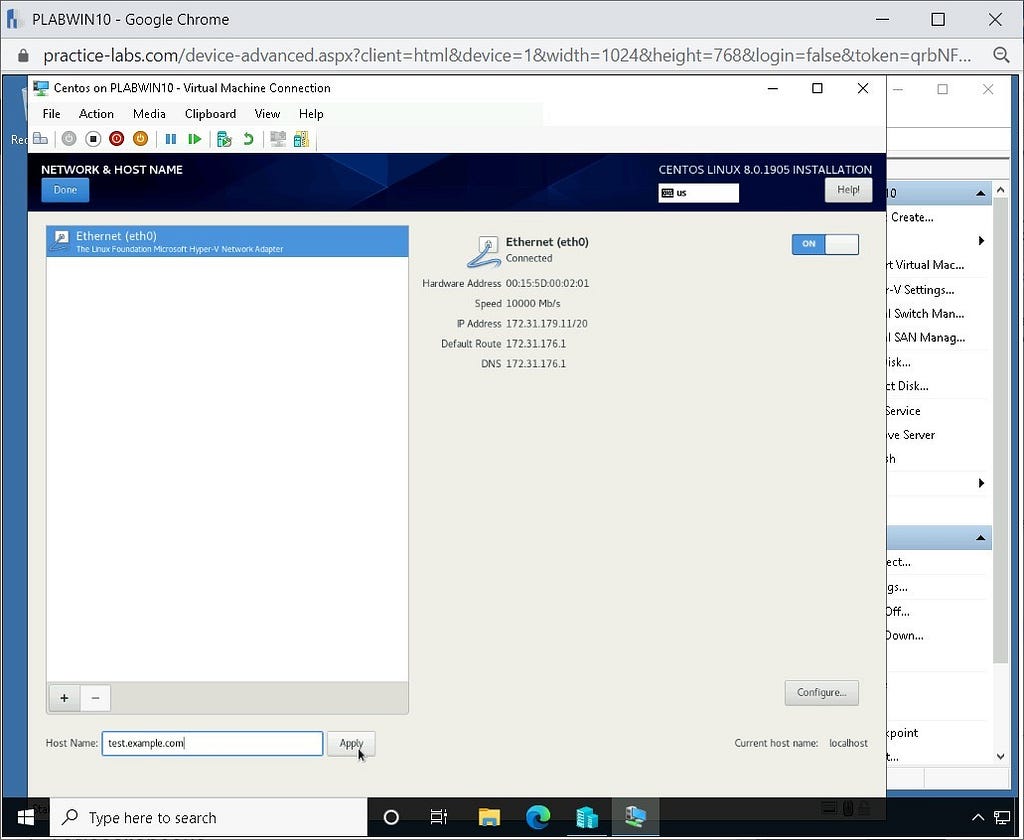
In this step, we will configure the network and hostname of our system. First, we will Turn ON the ethernet and then we will change the hostname to:
test.example.com
Click on Apply. Once we are done with these two options, we can click on Done just like our previous step.
Step 5
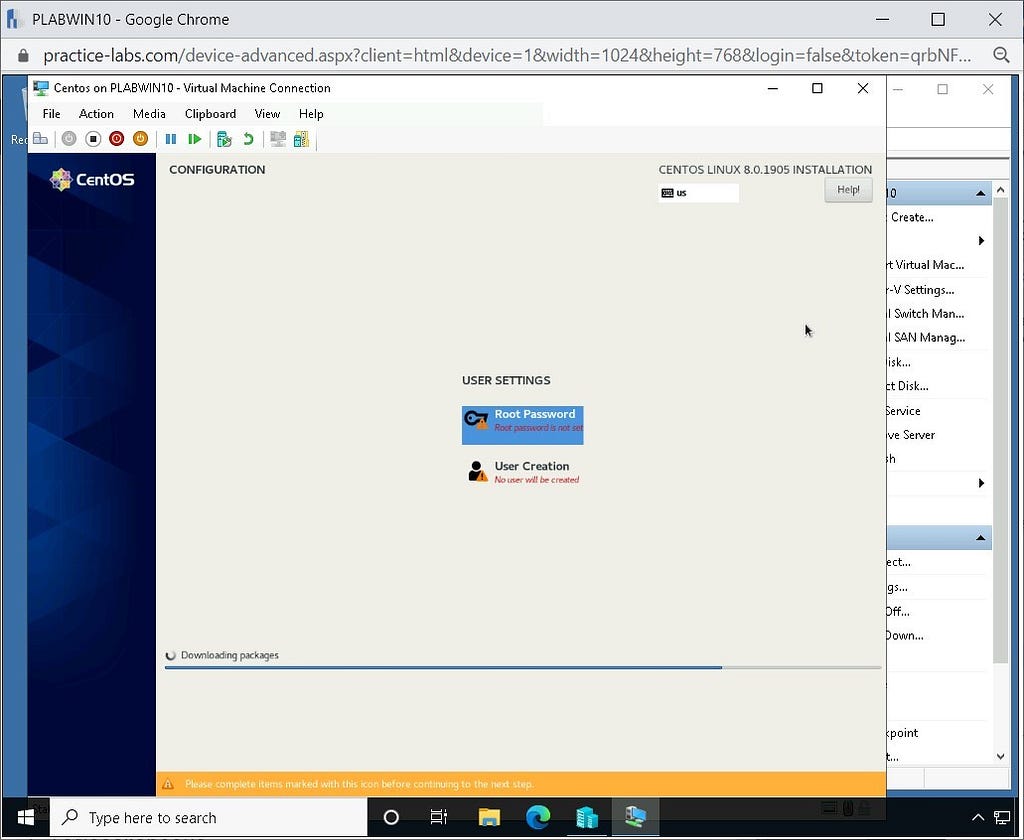
After doing this configuration, let’s click on Begin Installation.
While the files are being installed, we will set the Root Password and create a user for our operating system.
Step 6
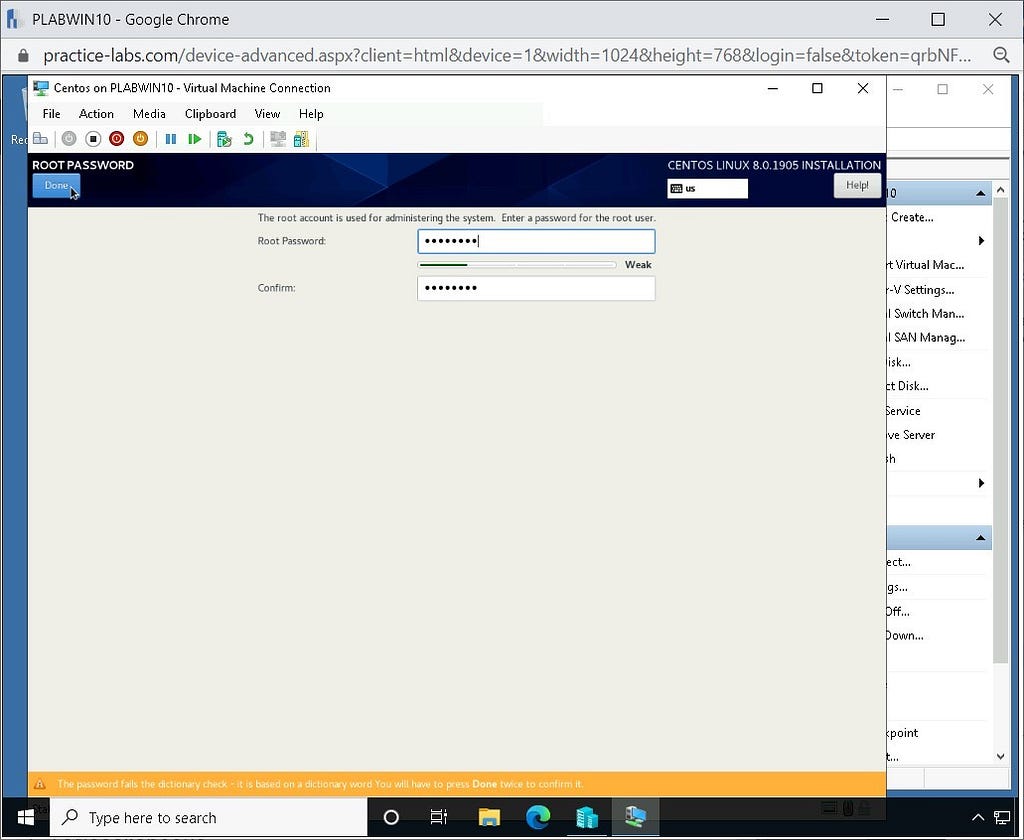
Type the following password in the Root Password and Confirm boxes:
Passw0rd
As this is not a secure password, we will need to click the Done button twice to proceed. In a real-world scenario, you would use a more secure password.
Step 7
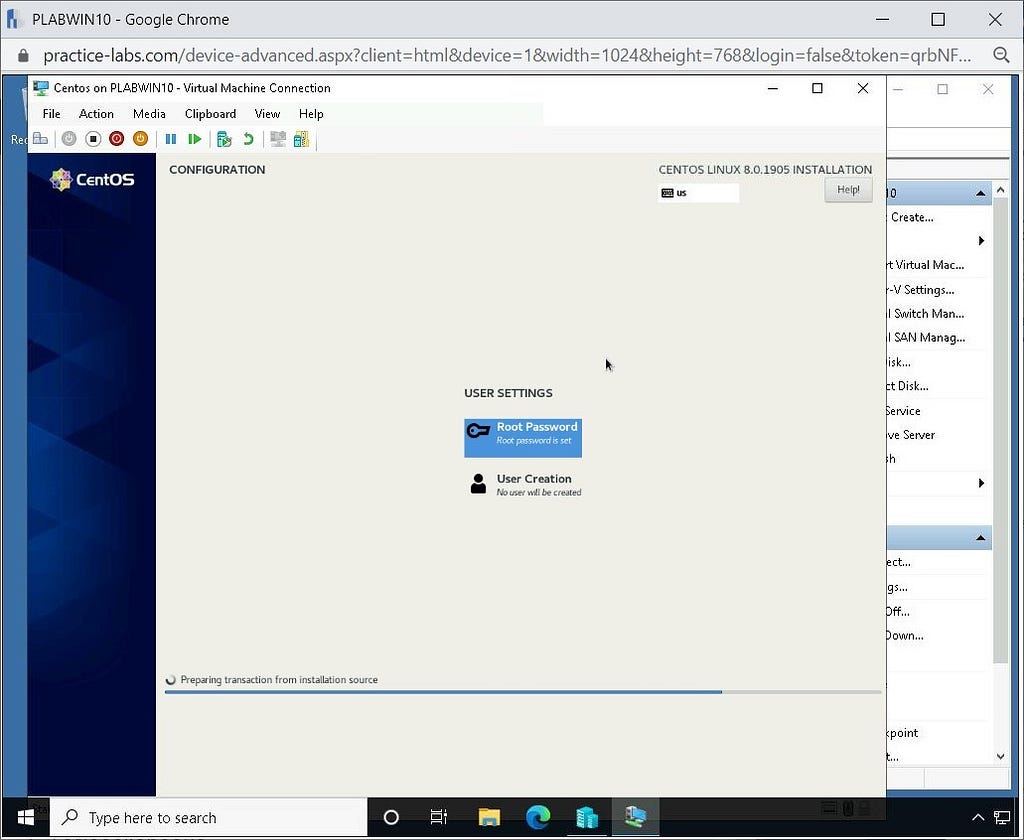
This will bring you back to the configuration window. We will not need to set a new user, and this will default to Root being the only user.
Please allow 5 minutes for the installation to complete.
Step 8
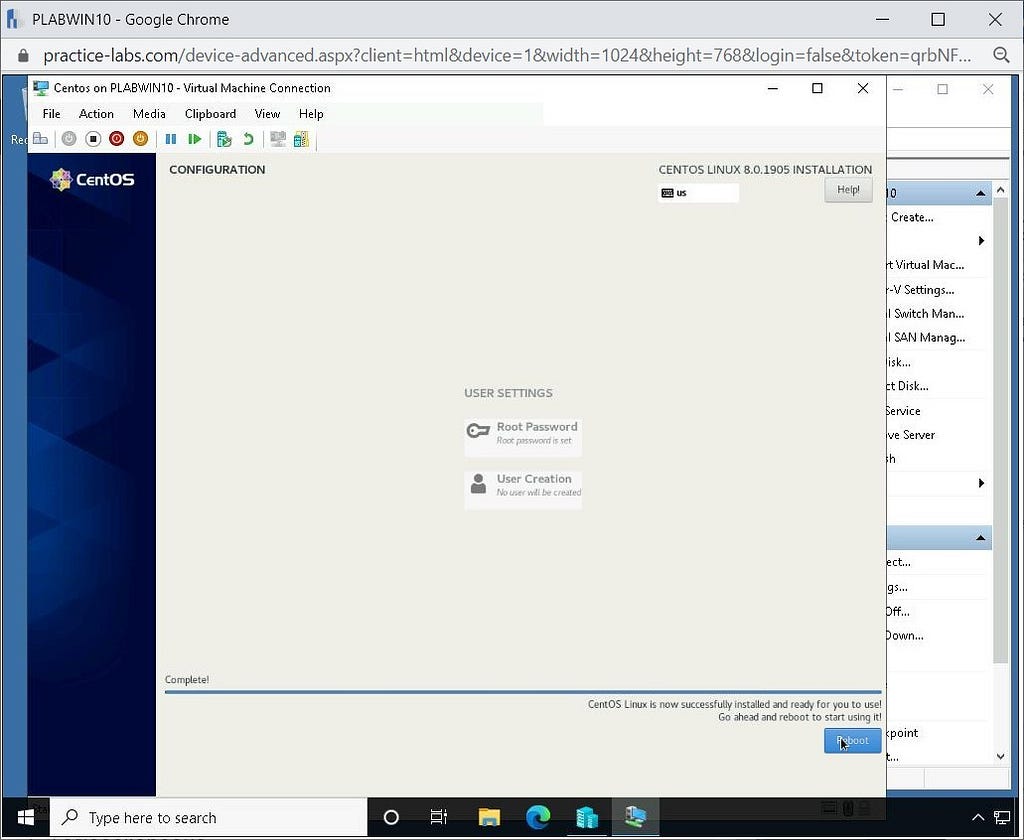
Once the installation is complete and other settings are done, click Reboot to complete our installation.
Step 9
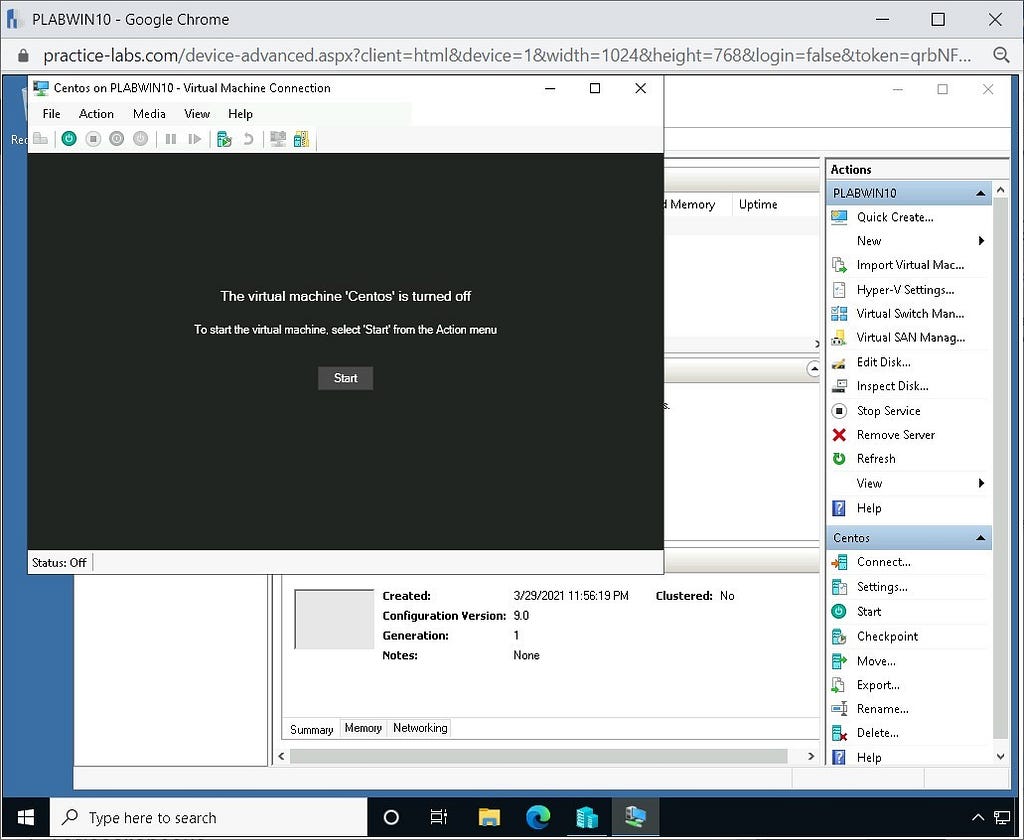
Before the machine restarts, click the Turn Off icon on the action pane. We need to eject the ISO disk to avoid getting the installation option again on connecting to the virtual machine.
To do this, on the Hyper-V navigation pane, click on Media > DVD Drive > Eject CentOS-8x86_641905-dvd1.iso.
Review
Well done, you have completed the Installation of Linux OS Practice Lab.
Article posted by: https://certmaster.me/linux-fundamentals-lesson-3-installation-of-linux-os-42f2783db5b?source=rss-d9e5f258a4e8——2
——————————————————————————————————————–
Infocerts, 5B 306 Riverside Greens, Panvel, Raigad 410206 Maharashtra, India
Contact us – https://www.infocerts.com
