November 1, 2022
Linux Fundamentals Lesson 7 : Managing Storage In Linux
Exercises
Introduction
Lab Topology
Exercise 1 — Managing Storage in Linux
Review
Learning Outcomes
In this module, you will complete the following exercises:
- Exercise 1 — Managing Storage in Linux
After completing this lab, you will be able to:
- Create a Partition in the Current Operating System
- Check the Status of the Hard Disk
- Save Changes Made to the Current Hard Disk
- Apply Permanent and Temporary Mounting
- Differentiate between Different Formats and Extensions of Storage
- Remove and Delete Partitions
Note: Our main focus is to cover the practical, hands-on aspects of the exam objectives. We recommend referring to course material or a search engine to research theoretical topics in more detail.
Lab Duration
It will take approximately 60 minutes to complete this lab.
Lab Topology
During your session, you will have access to the following lab configuration.
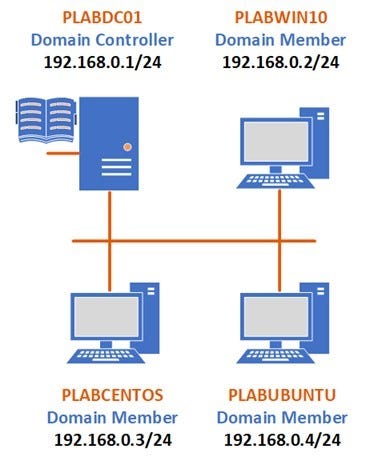
Depending on the exercises, you may or may not use all of the devices, but they are shown here in the layout to get an overall understanding of the topology of the lab.
- PLABDC01 — Windows Server 2019 (1809) (Domain Controller)
- PLABWIN10 — Windows 10 (1903) (Domain Member)
- PLABCENTOS — Centos 7 (Domain Member)
- PLABUBUNTU — Ubuntu 19.04 (Domain Member)
Exercise 1 — Managing Storage in Linux
In this exercise, we will discuss how to log into the current hard disk and create a partition. We will talk about different disk formats used in our current operating system, and we will learn how to mount that partition to the desired path. Managing storage is important when it comes to virtualization of an Operating system.
Learning Outcomes
After completing this exercise, you will be able to:
- Create a Partition in the Current Operating System
- Check the Status of the Hard Disk
- Save Changes Made to the Current Hard Disk
- Apply Permanent and Temporary Mounting
- Differentiate between Different Formats and Extensions of Storage
- Remove and Delete Partitions
Your Devices
During your session, you will have access to the following lab configuration.
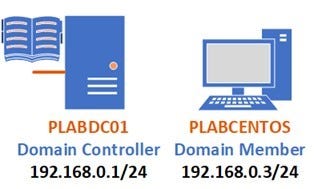
Depending on the exercises, you may or may not use all of the devices, but they are shown here in the layout to get an overall understanding of the topology of the lab.
- PLABDC01 — Windows Server 2019 (1809) (Domain Controller)
- PLABCENTOS — Centos 7 (Domain Member)
Task 1 — Creating a Partition
In this task, we learn how to enter into the current Hard disk and then create a partition. We will also learn about the procedure to check the number of disks added to our operating system.
Step 1
Open PLABCENTOS, logging in to the administrator account using the following credentials:
Username:
Plabadmin
Password:
Passw0rd
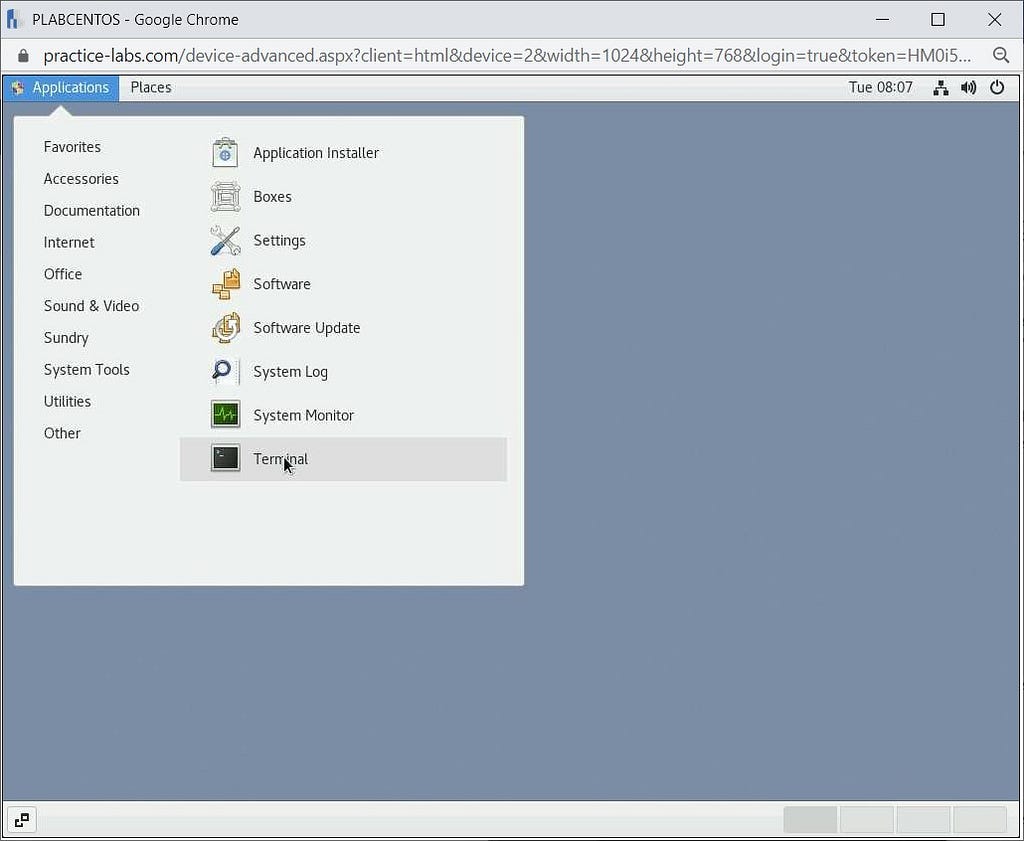
Once logged in, navigate to Applications > Terminal to start using bash commands.
Step 2
Once Terminal is open, type the following to log in as the root user.
su -
Passw0rd
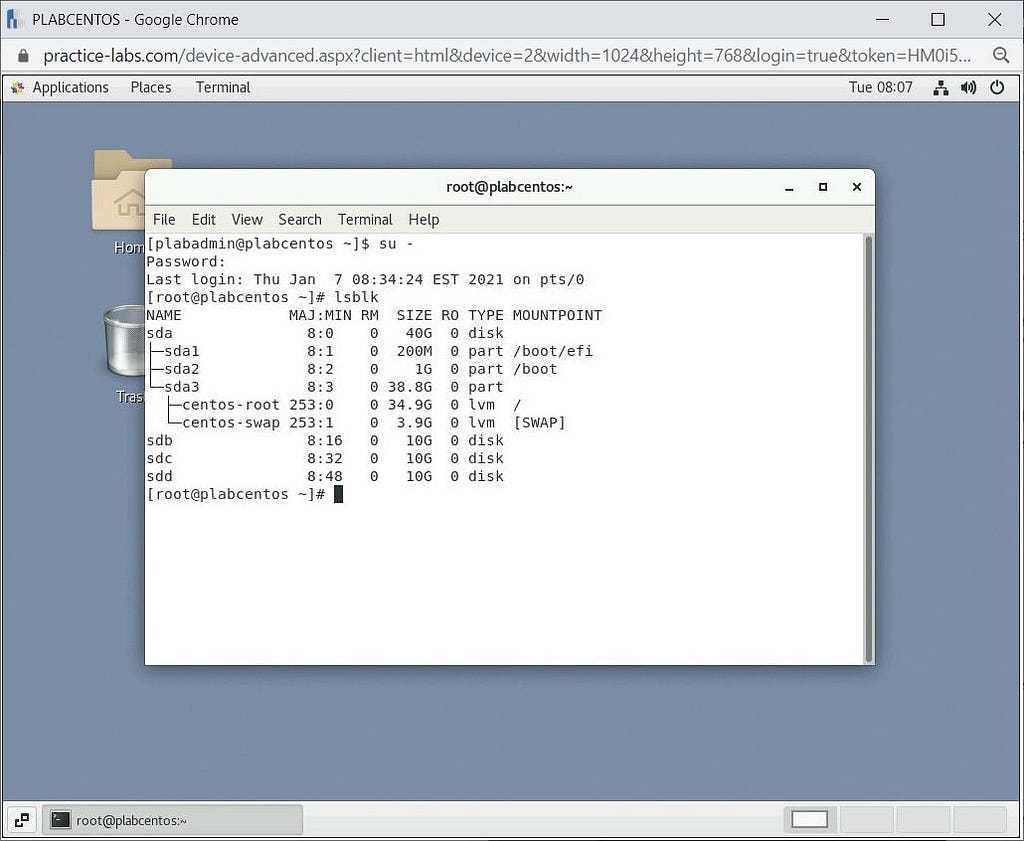
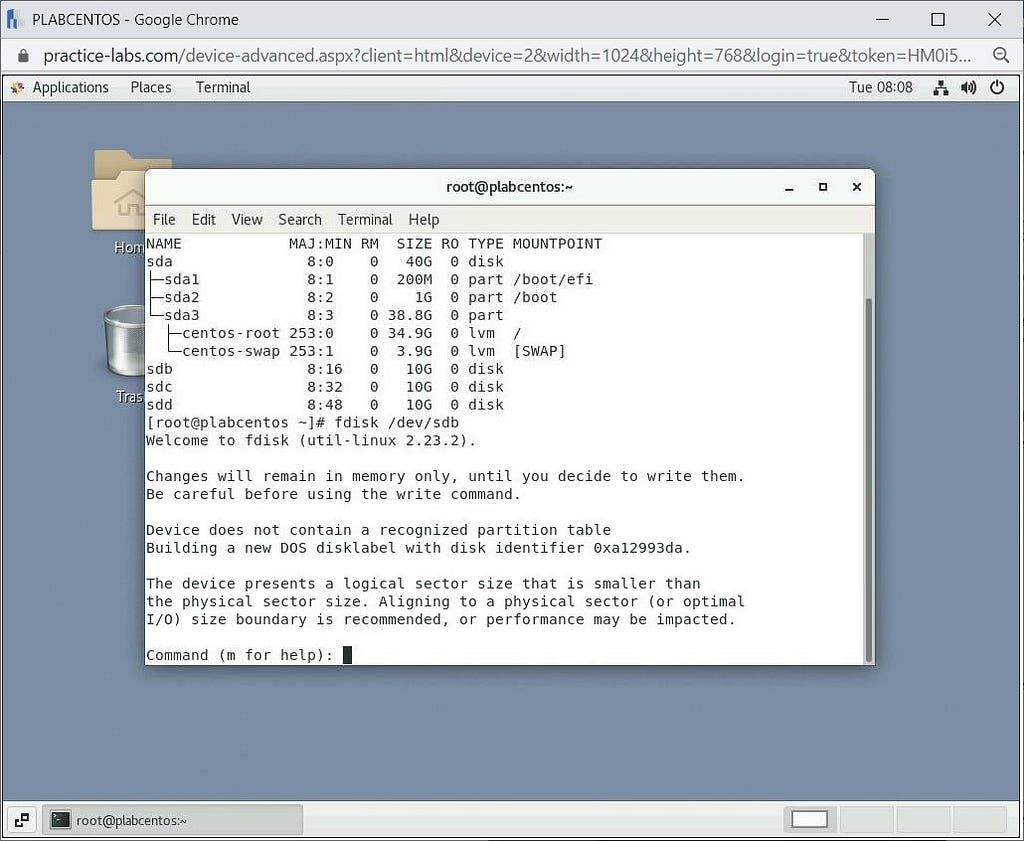
Once done, we will check how many hard disks are currently present on our operating system (along with their formats) by using the following command:
lsblk
We can see sdb, sdc and sdd are the new hard disks without formatting and sizes.
Step 3
We will now log in to one of the hard disks and partition it and check free storage. To enter a particular hard disk, we will use the following command:
Note: we will use sdb in our example.
fdisk /dev/sdb
/dev stands for device, and /sdb is the name of the hard disk.
Step 4
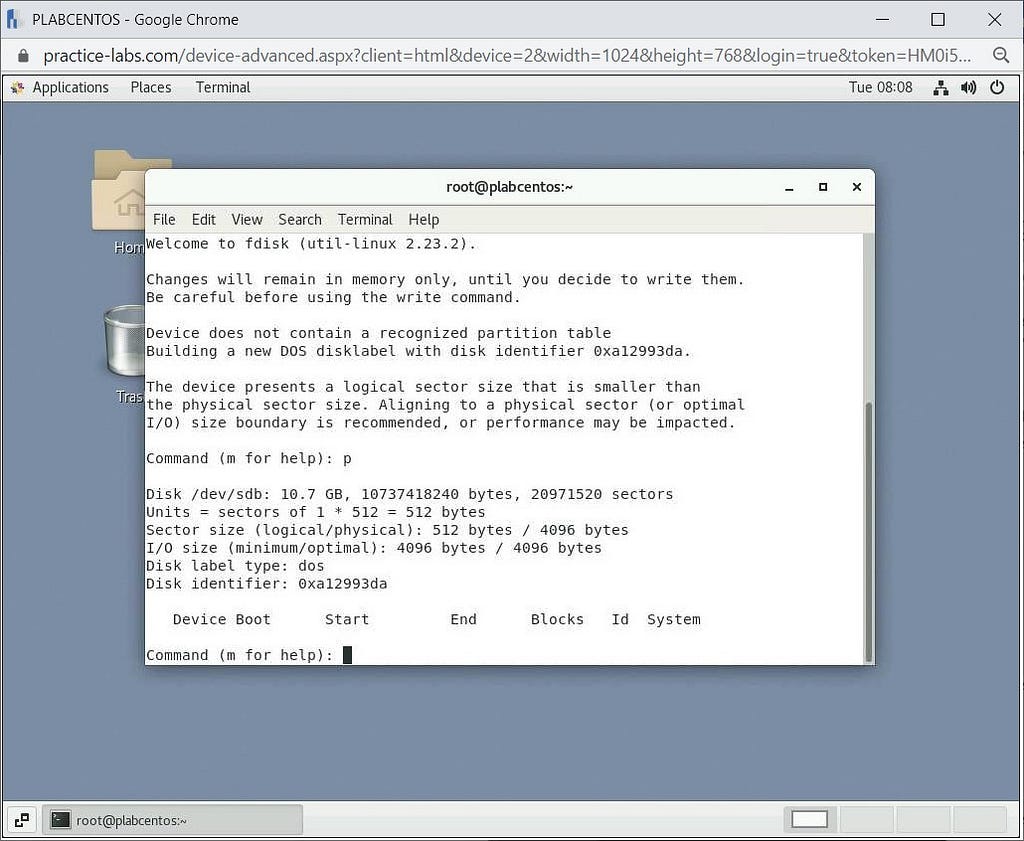
Now that we have entered the sdb hard disk, the first step is to check free storage and then use it to create a new partition. We can do that by just typing the p key in the hard disk command prompt.
p
Step 5
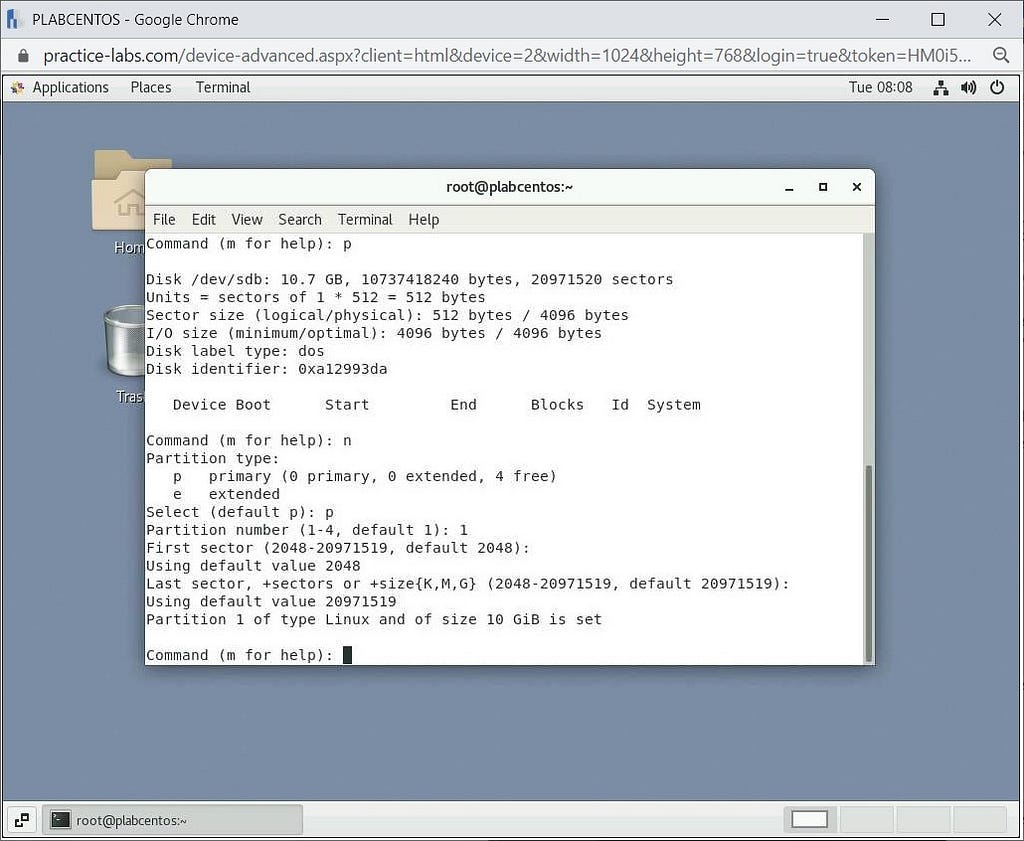
Now that we know how much storage we have; we will create a new partition by using the n command in the same prompt:
n
After typing the command, it will give you two options, of which we will select primary by typing p as follows:
p
It will then ask for a partition number for which we will select one:
1
For the next two options of the First and Last Sector, we will press Enter, which will select default values.
Step 6
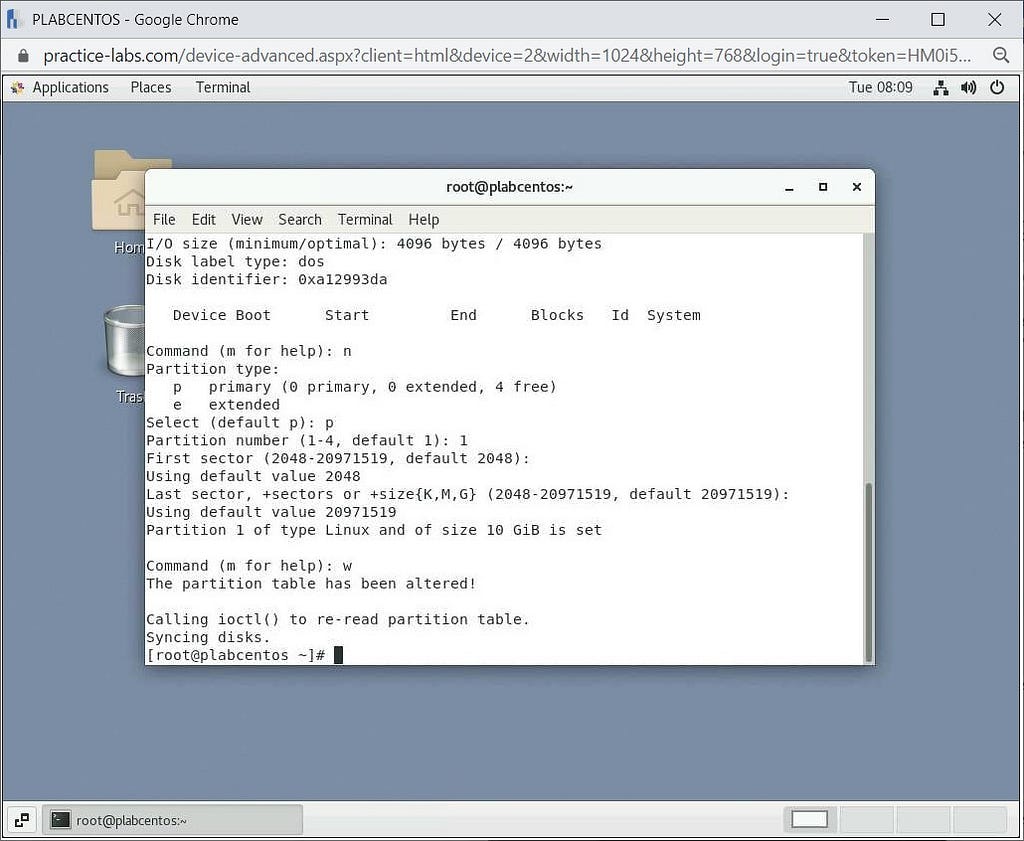
Now we will save all the changes to the hard disk by typing w:
w
Step 7
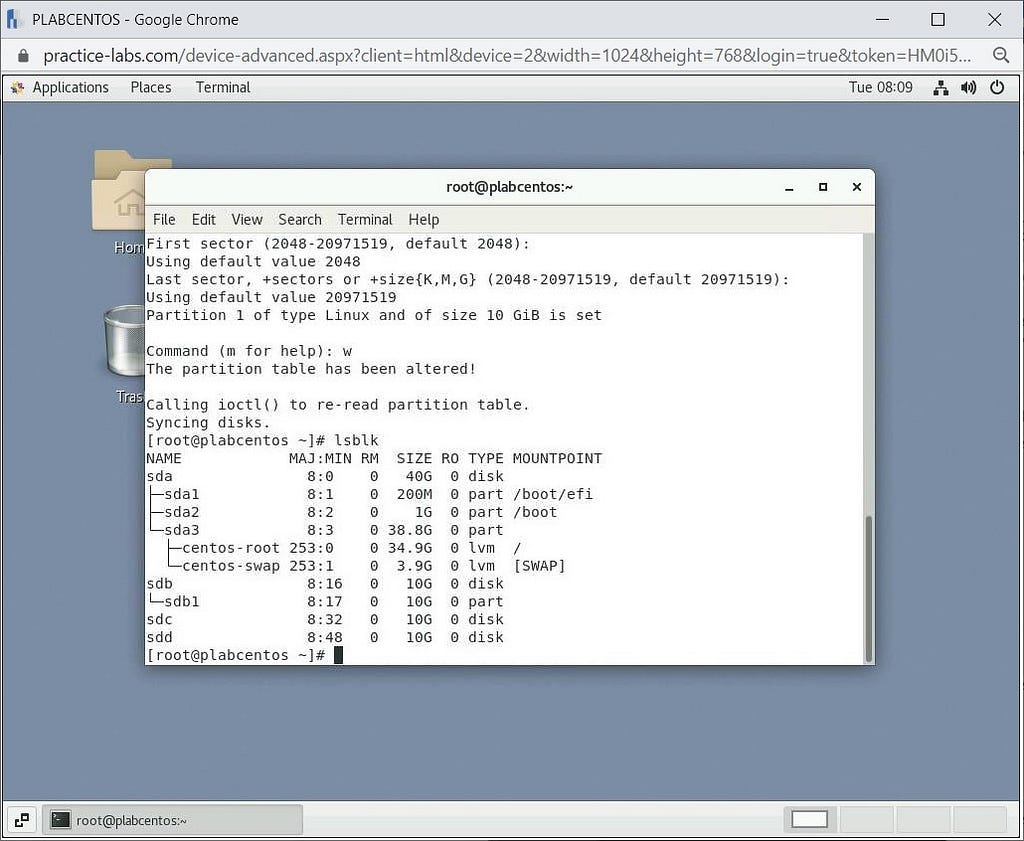
We will now check the partition by just using the same command (lsblk) again that we used in Step 2:
lsblk
Step 8
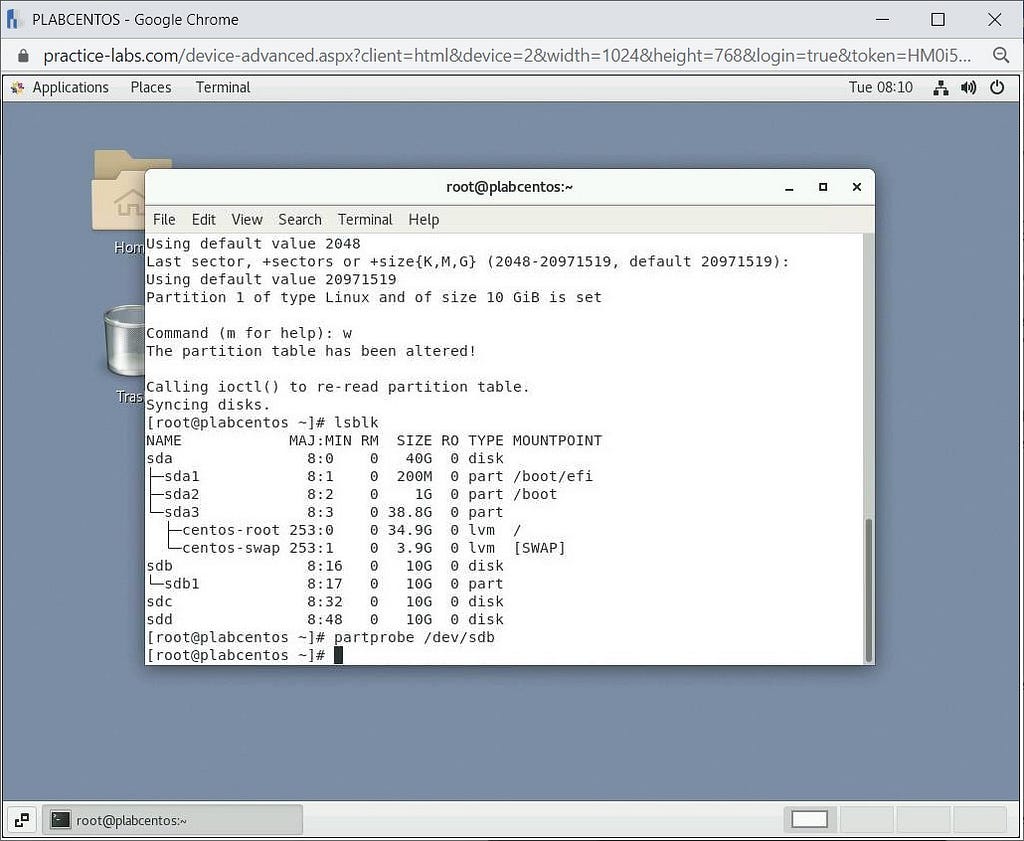
At last, we will update the Master Boot Record (MBR) to refresh everything that we have changed by using the following command:
partprobe /dev/sdb
Task 2 — Temporary Mounting
We will now mount the hard disk partition that we created to a particular directory of our choice. There are two types of mounting — temporary and permanent, and we will be doing temporary in this task. Temporary mounting is removed on a reboot of the machine, whereas permanent mounting will persist.
Step 1
First, we will make a folder with the name data by using the following command:
mkdir /data
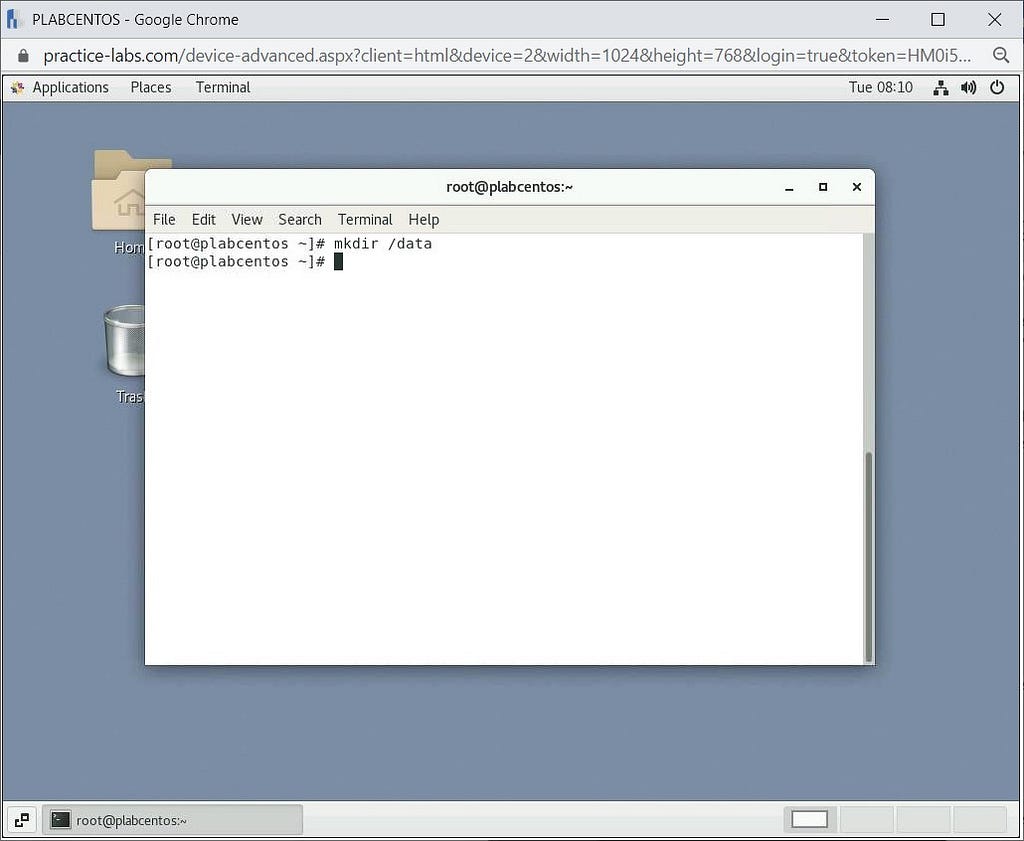
Note: The mkdir command is used to create a new directory entry.
Step 2
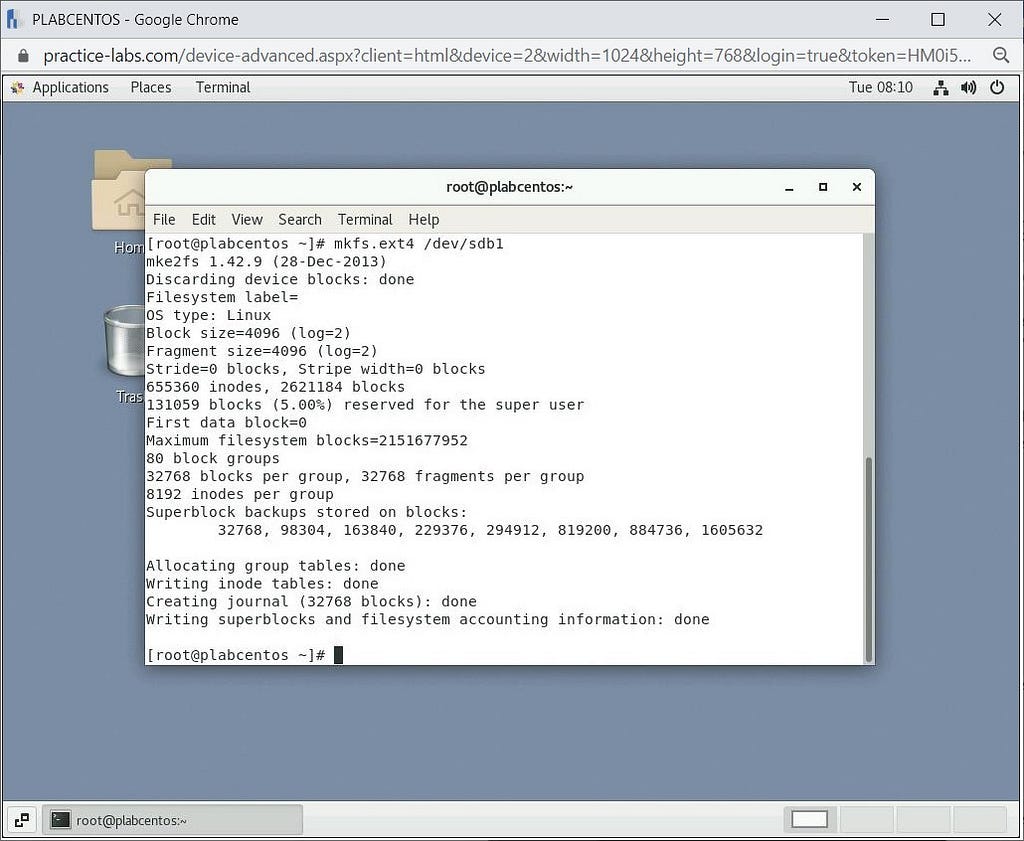
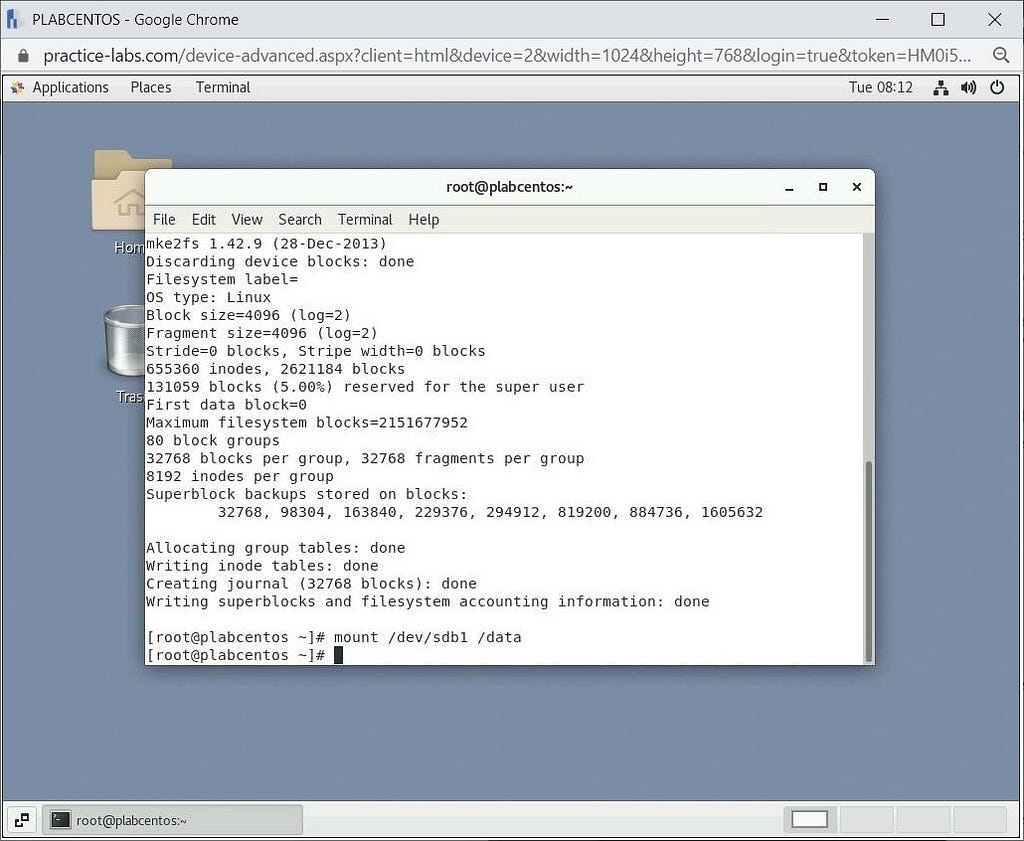
Assigning a file system is a very important step while mounting a partition. To do that, we will use the following command:
mkfs.ext4 /dev/sdb1
Step 3
We will now mount the partition to the directory ‘data’ by using the following command:
mount /dev/sdb1 /data
Step 4
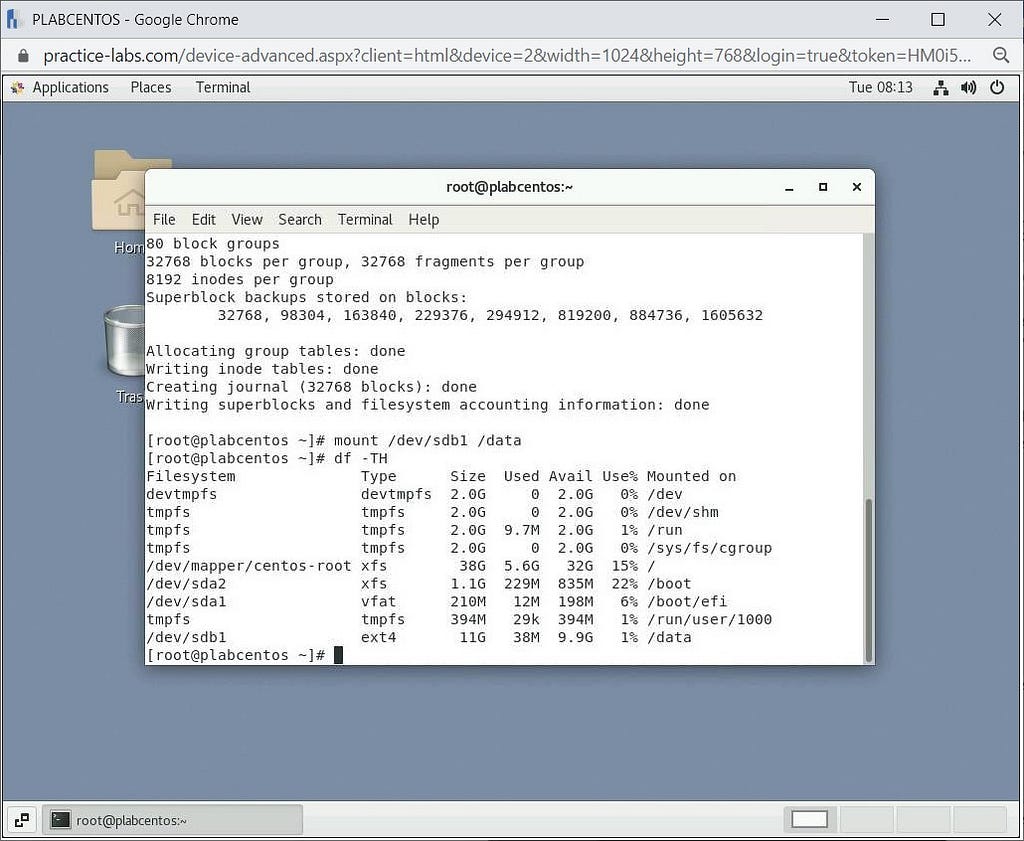
To check if our partition has been successfully mounted, we will use the following command:
df -TH
Note: the df command checks to see if the disk is free.
Task 3 — Permanent Mounting
In this task, we will be permanently mounting the hard disk, which will not be removed after a machine reboot. This is done by editing the fstab file.
Step 1
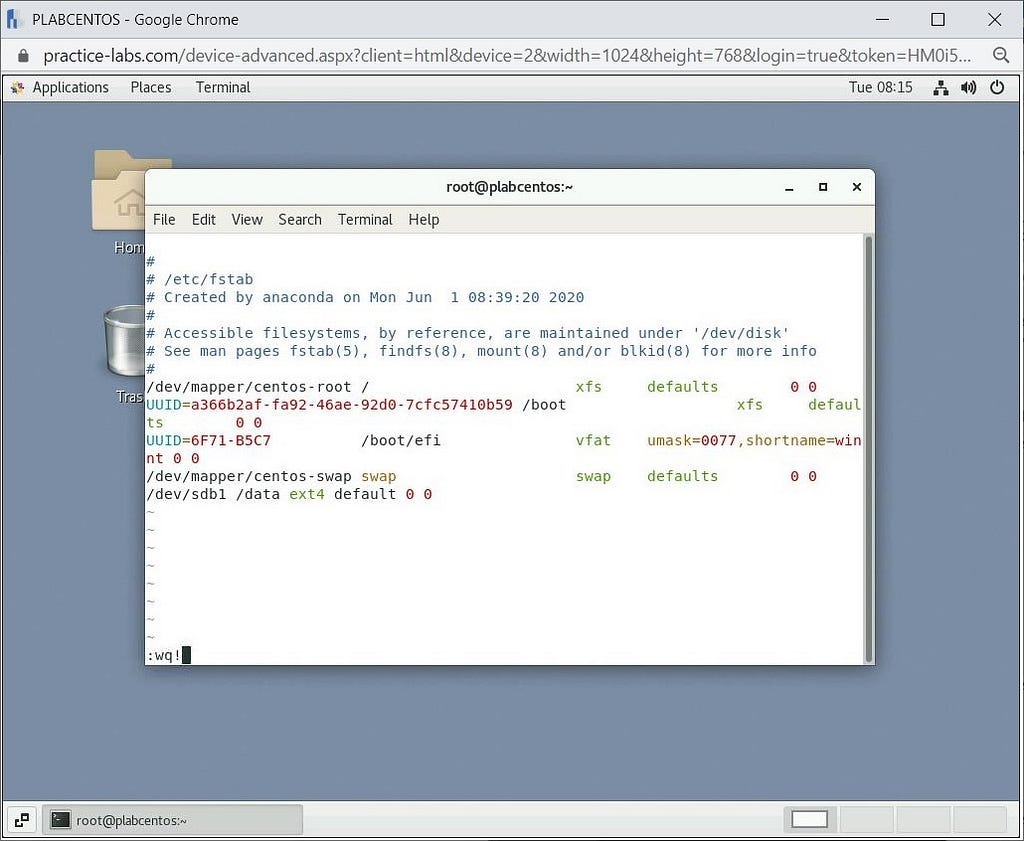
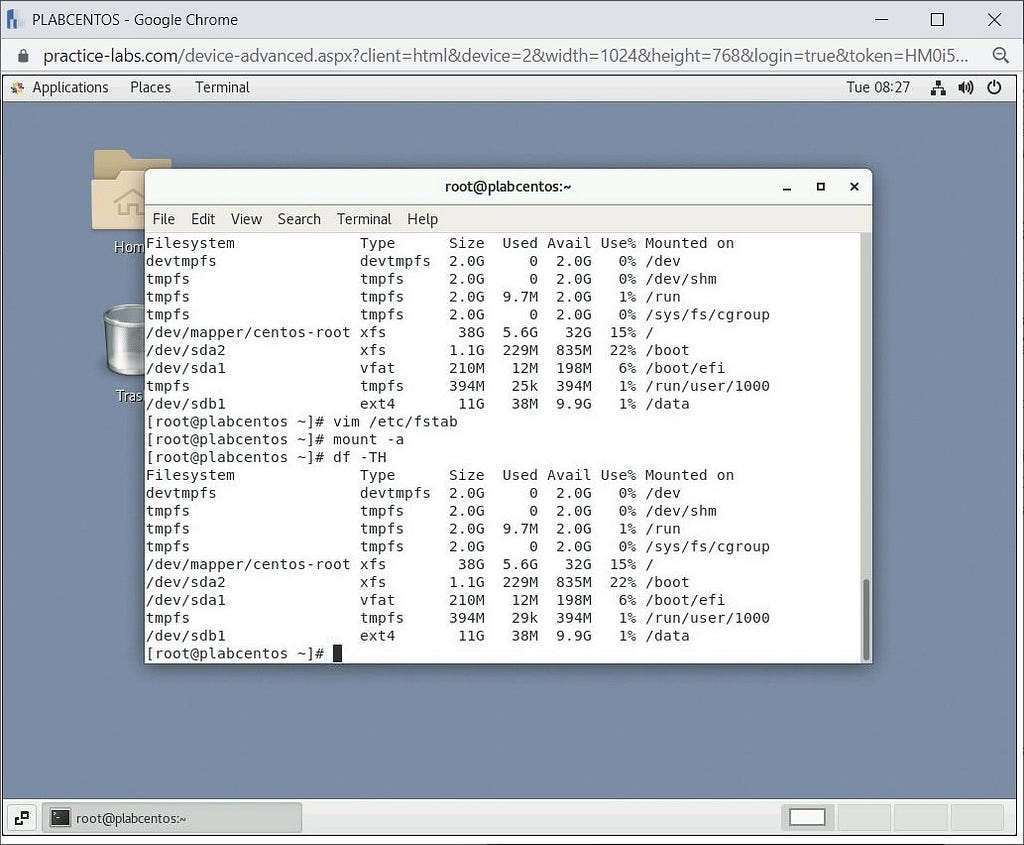
First, we will put an entry in the fstab file by using the following command:
vim /etc/fstab
Press the I key to enter Insert mode, and navigate to the bottom of the pre-existing text. Type the following line in the fstab file:
/dev/sdb1 /data ext4 default 0 0
Once done, press the ESC key, and type the following to save the file:
:wq!
Step 2
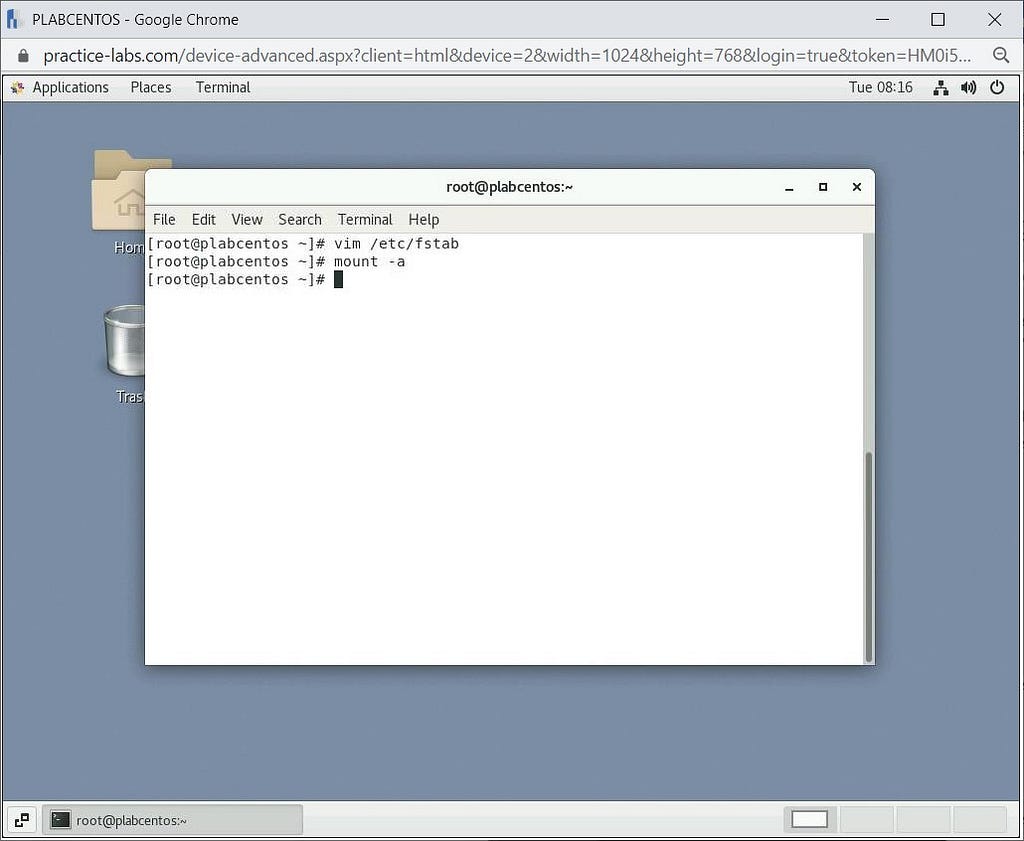
To refresh the entry in fstab, use the following command:
mount -a
Step 4
We can check the mount by running the following command:
df -TH
Task 4 — Unmounting and Deleting the Partition
In this task, we will unmount the hard disk from /data and delete the partition we created in the previous step.
Please be careful while choosing which partition to delete.
Step 1
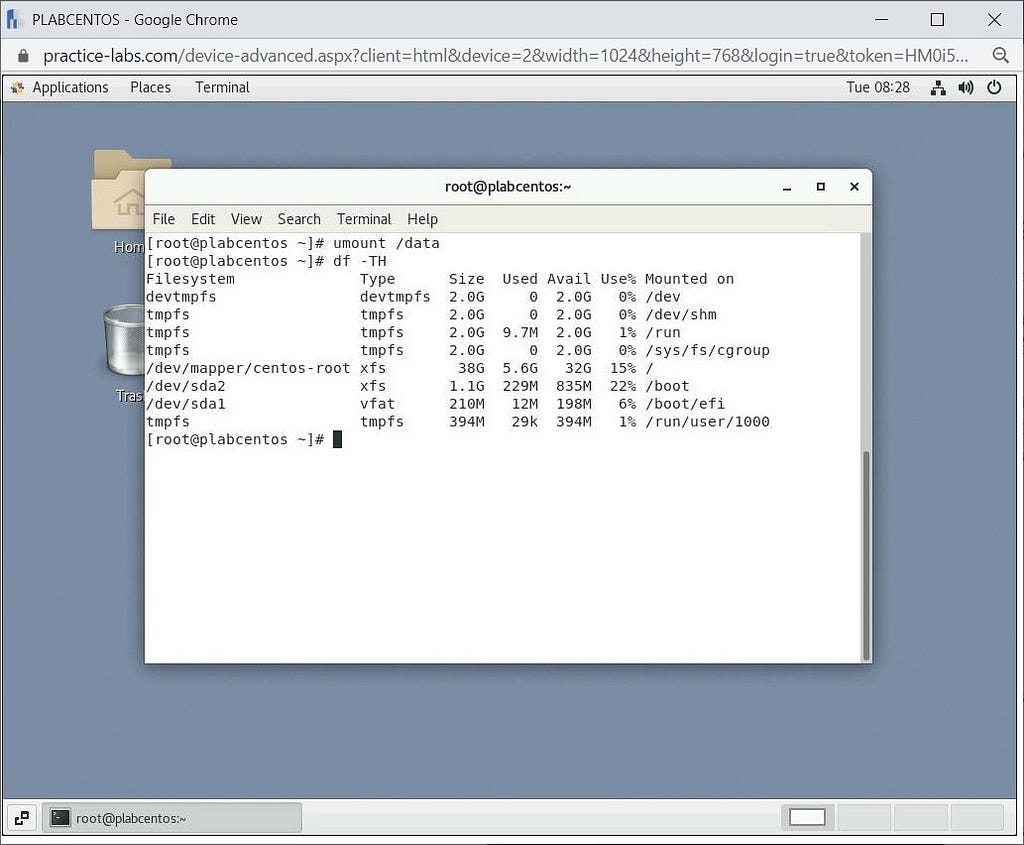
Use the following command to unmount the disk from /data directory:
umount /data
Now check if it is unmounted using the following command:
df -TH
Step 2
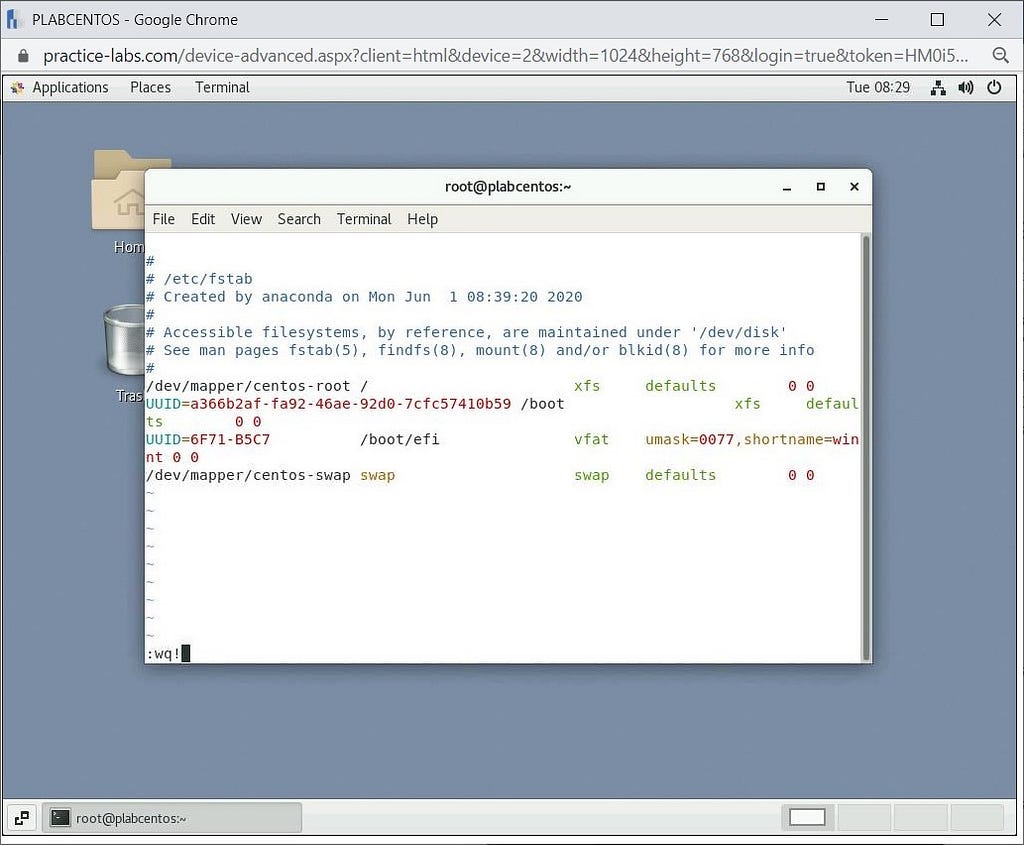
Now we will remove the sdb1 partition entry from fstab that we entered in the previous task. This will be done using the following command:
vim /etc/fstab
delete the last line and save the file.
Step 3
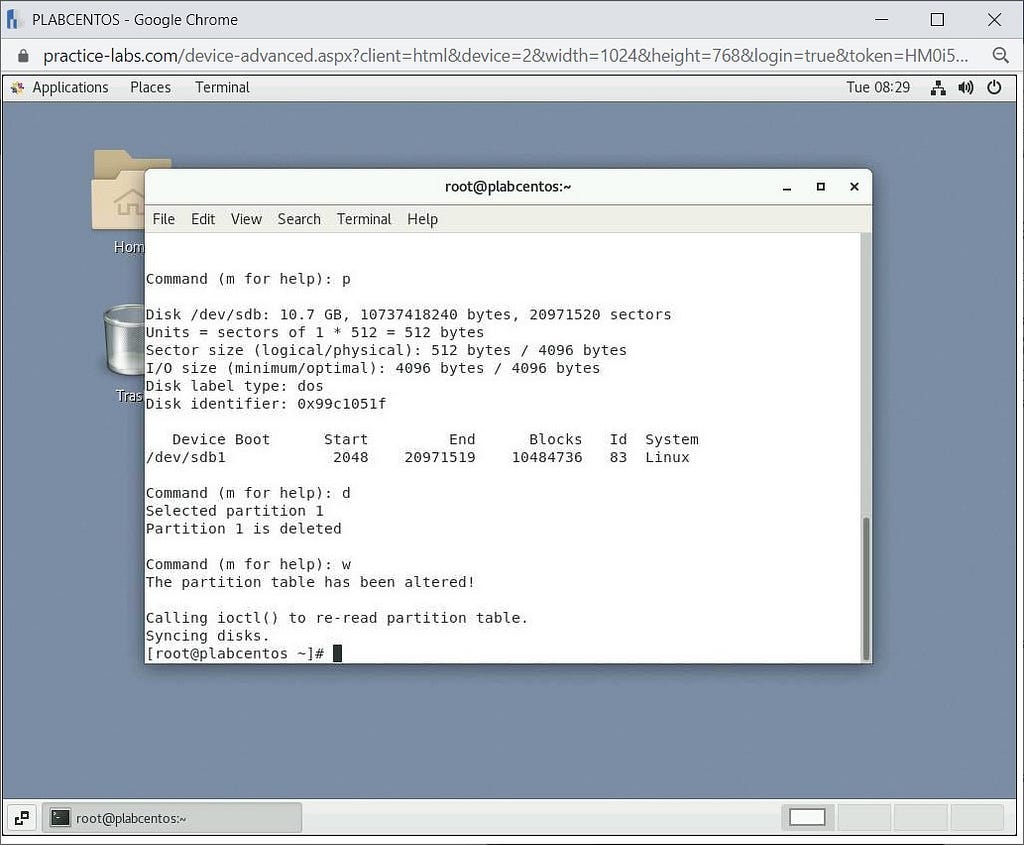
The last step would be to delete the partition from the hard disk, first by entering into it. Use the following command to enter the hard disk and further actions:
fdisk /dev/sdb
Now once you enter the disk, type the following commands step by step:
p
This will show the current partition:
d
This will delete the partition:
w
This will save all the changes.
Step 4
At last, you can reboot the machine and check the status of storage using the following command:
df -TH
Review
Well done, you have completed the Managing Storage in Linux Practice lab.
Article posted by: https://certmaster.me/linux-fundamentals-lesson-7-managing-storage-in-linux-1e0876bfe49f?source=rss-d9e5f258a4e8——2
——————————————————————————————————————–
Infocerts, 5B 306 Riverside Greens, Panvel, Raigad 410206 Maharashtra, India
Contact us – https://www.infocerts.com
