November 1, 2022
Linux Fundamentals Lesson 10 : Managing Software Updates and Patches
Exercises
Introduction
Lab Topology
Exercise 1 — Updating an Ubuntu Operating System
Exercise 2 — Updating a CentOS Operating System
Review
Learning Outcomes
In this module, you will complete the following exercises:
- Exercise 1 — Updating an Ubuntu Operating System
- Exercise 2 — Updating a CentOS Operating System
After completing this lab, you will be able to:
- Check for Updates and Kernel Version on Ubuntu/CentOS
- Apply Patches / Repository Updates on Ubuntu/CentOS
Note: Our main focus is to cover the practical, hands-on aspects of the exam objectives. We recommend referring to course material or a search engine to research theoretical topics in more detail.
Lab Duration
It will take approximately 30 minutes to complete this lab.
Lab Topology
During your session, you will have access to the following lab configuration.
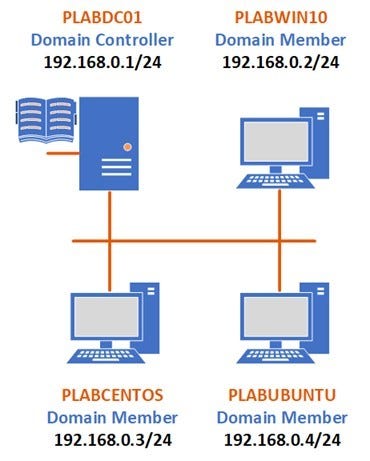
Depending on the exercises, you may or may not use all of the devices, but they are shown here in the layout to get an overall understanding of the topology of the lab.
- PLABDC01 — Windows Server 2019 (1809) (Domain Controller)
- PLABWIN10 — Windows 10 (1903) (Domain Member)
- PLABCENTOS — Centos 7 (Domain Member)
- PLABUBUNTU — Ubuntu 19.04 (Domain Member)
Exercise 1 — Updating an Ubuntu Operating System
In this exercise, we learn how to check the current kernel version. First, we will inspect available updates, and accordingly apply the patch to all of them. As with most things in Linux, we can perform updates both graphically and through the command line.
We will use the command line, but we have also covered some aspects of the graphical process. This update process is different in both Ubuntu and CentOS operating systems, so we will discuss both methods. Let’s first discuss how to perform these patches in Ubuntu.
Learning Outcomes
After completing this exercise, you will be able to:
- Check for updates and kernel version on Ubuntu
- Apply patches/repository updates on Ubuntu
Your Devices
During your session, you will have access to the following lab configuration.
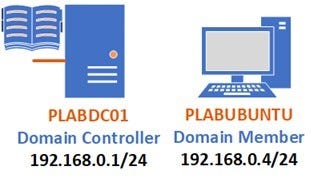
Depending on the exercises, you may or may not use all of the devices, but they are shown here in the layout to get an overall understanding of the topology of the lab.
- PLABDC01 — Windows Server 2019 (1809) (Domain Controller)
- PLABUBUNTU — Ubuntu 19.04 (Domain Member)
Task 1 — How to Update Patches through the Command Line
Let’s learn how to check the current kernel version of our Ubuntu device and apply patch updates based on available updates for the Operating system.
Step 1
Connect to PLABUBUNTU, logging in using the following credentials if needed:
Username:
Admin
Password:
Passw0rd
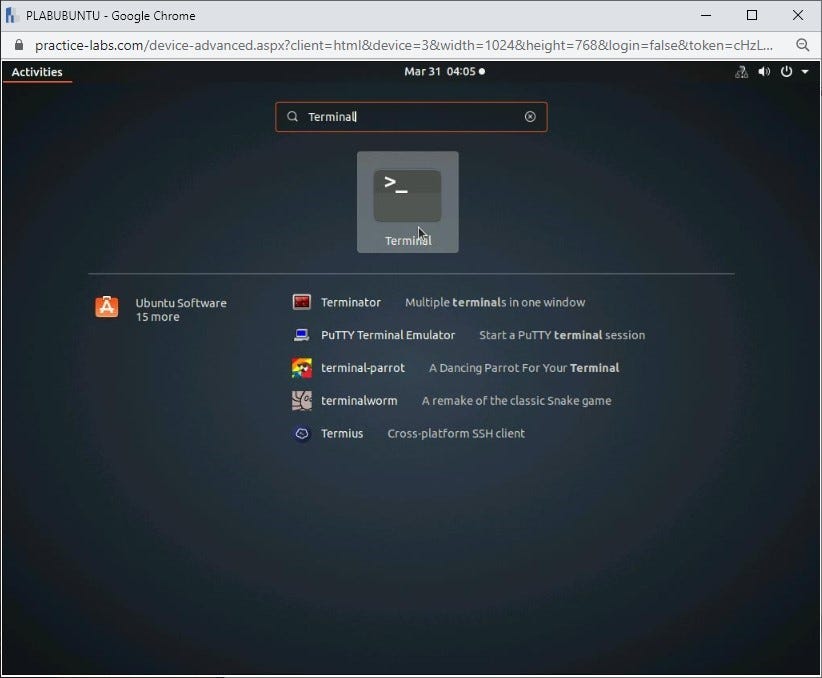
Once logged in, navigate to Show Applications on the bottom-left hand side of the screen and open the Terminal by typing the following into the search bar:
Terminal
Step 2
Please select the program once it appears.
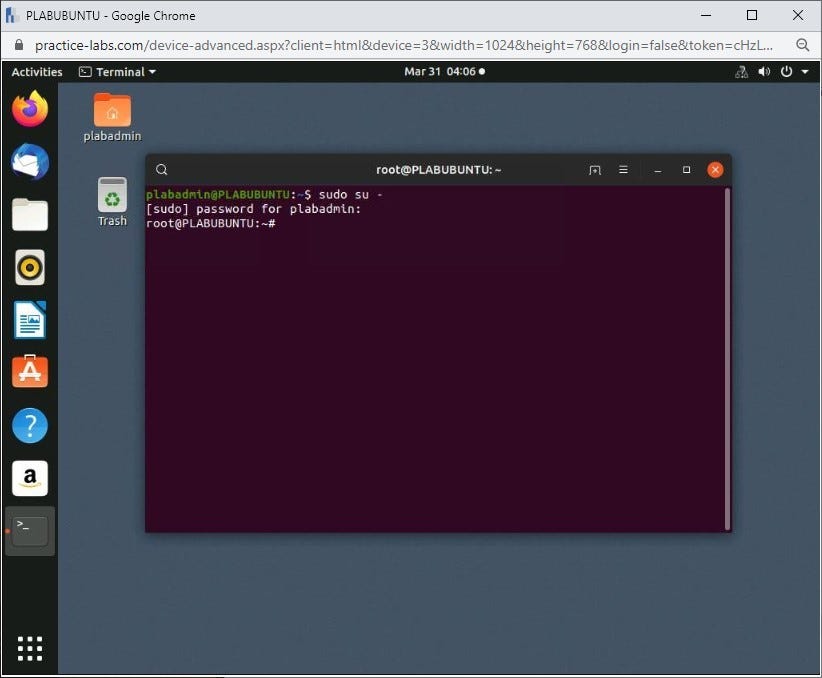
Once the program has opened, first log in as the root user using the command:
sudo su -
and enter the password for the root user:
Passw0rd
Step 3
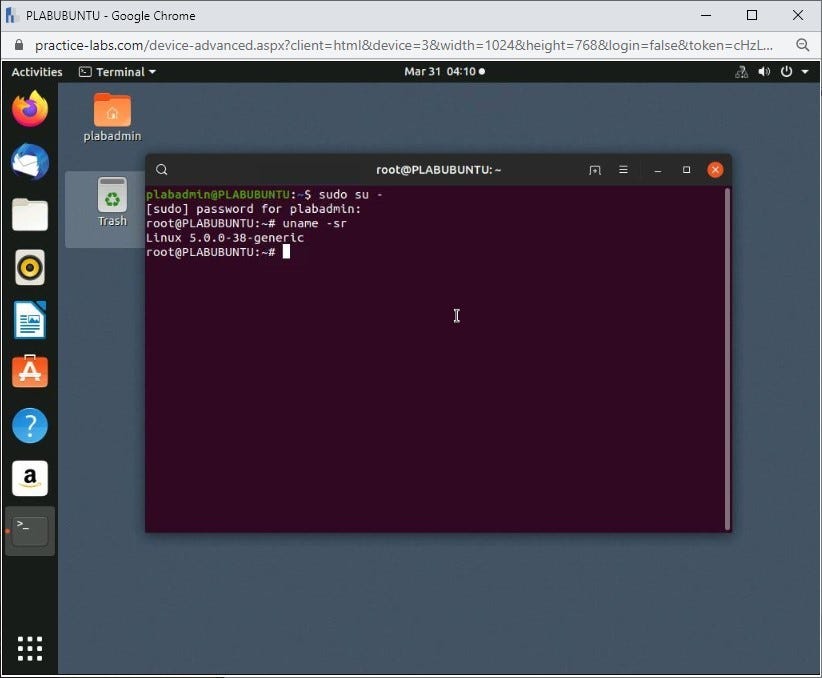
We will check the current kernel version by running the following command:
uname -sr
Step 4
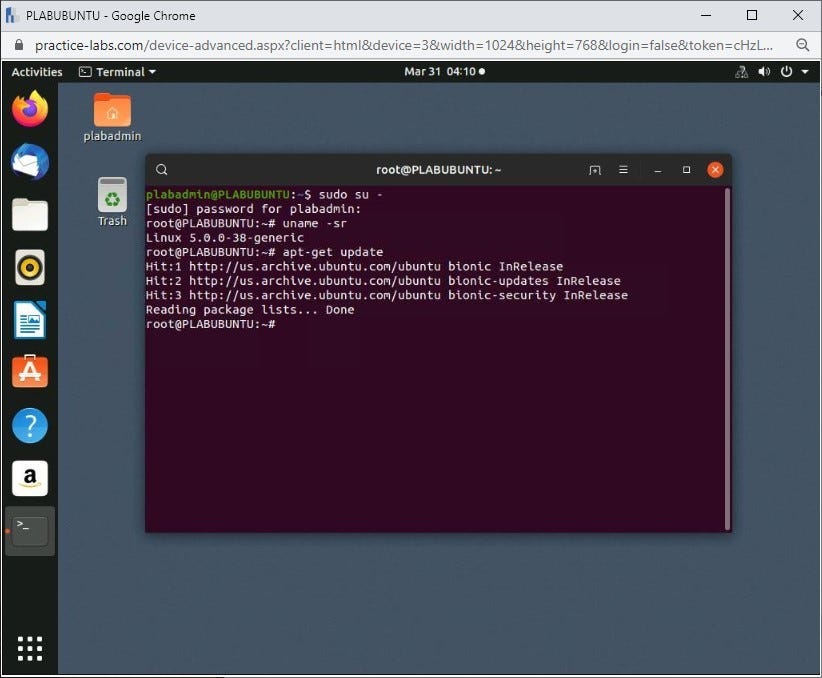
We will run the following command to refresh the local software list and notifying the OS of any newer versions if available.
apt-get update
Step 5
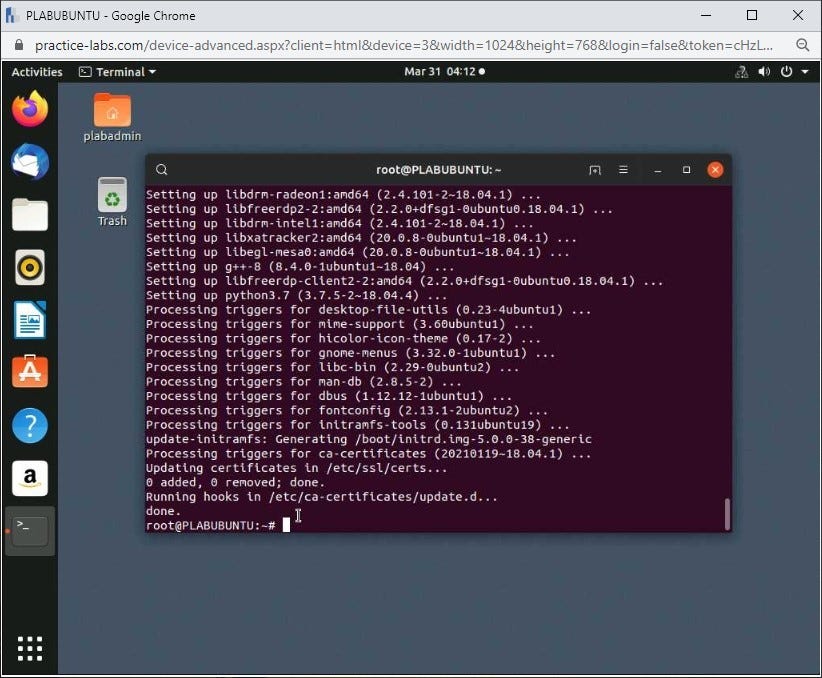
In this step, we will start the actual update. We will use the dist switch, making sure the dependent package is updated before upgrading the actual package.
apt-get dist-upgrade
After running this command, you will receive a prompt of Yes/No for proceeding further. We will type:
y
And press Enter to proceed.
Close the Terminal window and proceed to the next task.
Task 2 — How to Perform Software Updates Graphically
In this task, we will see where to perform the same update process graphically. In most professional situations everything is handled command line, but you also may need to know the same process using the graphical version of Ubuntu.
Step 1
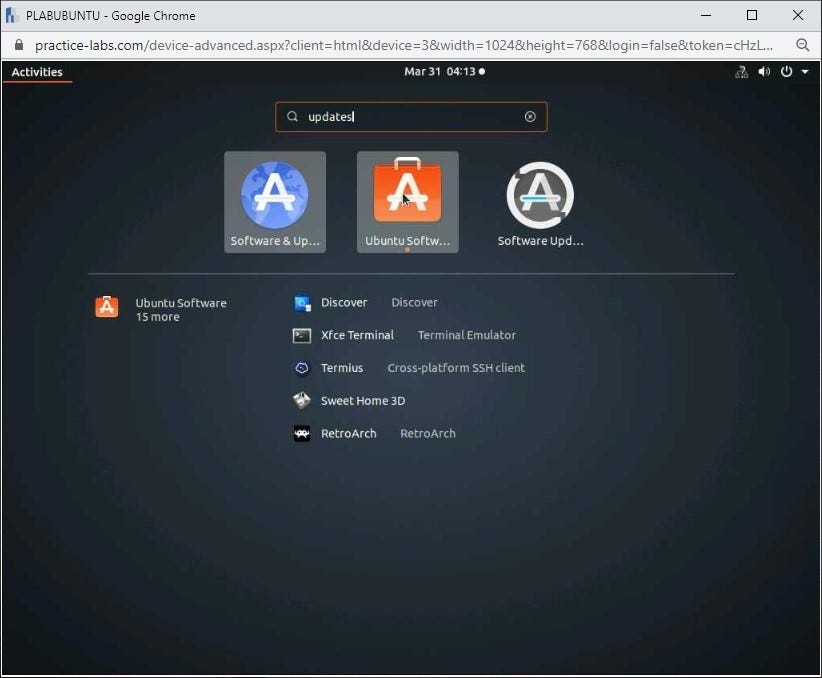
Navigate to Show Applications on the bottom-left hand side of the screen and open the Ubuntu Software by typing the following into the search bar:
Updates
Please select the program once it appears.
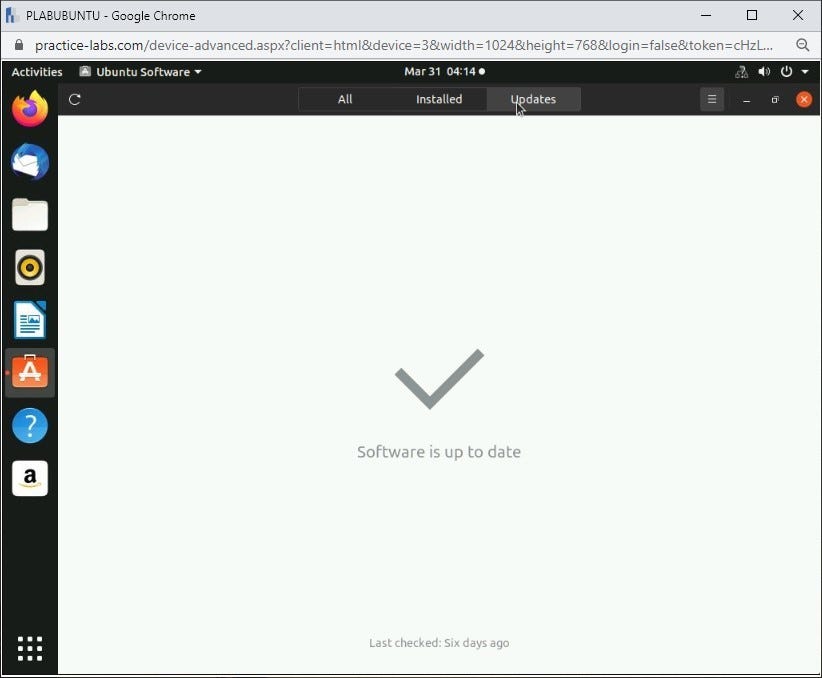
Step 2
We will move to the updates tab and check if the software update is available. In our case, everything is up to date, so we do not need to take any further action.
Exercise 2 — Updating a CentOS Operating System
In this exercise, we learn how to check the current kernel version. First, we will inspect the available updates and accordingly apply the patch update to all of them. We can perform updates both graphically and through the command line. Most of the time, we will use the command line, but we have also tried to cover the graphical process. This update process is different in both Ubuntu and CentOS operating systems.
Learning Outcomes
After completing this exercise, you will be able to:
- Check for updates and kernel version on CentOS
- Apply patches/repository updates on CentOS
Your Devices
During your session, you will have access to the following lab configuration.
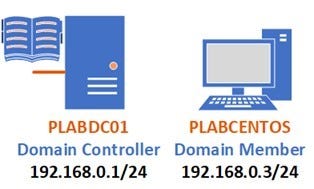
Depending on the exercises, you may or may not use all of the devices, but they are shown here in the layout to get an overall understanding of the topology of the lab.
- PLABDC01 — Windows Server 2019 (1809) (Domain Controller)
- PLABCENTOS — Centos 7 (Domain Member)
Task 1 — How to Update Patches through the Command Line
In this task, you will learn how to check the current kernel version. Apply patch updates based on the available updates of the CentOS Operating system.
Step 1
Connect to PLABCENTOS, logging in using the following credentials if needed:
Username:
Plabadmin
Password:
Passw0rd
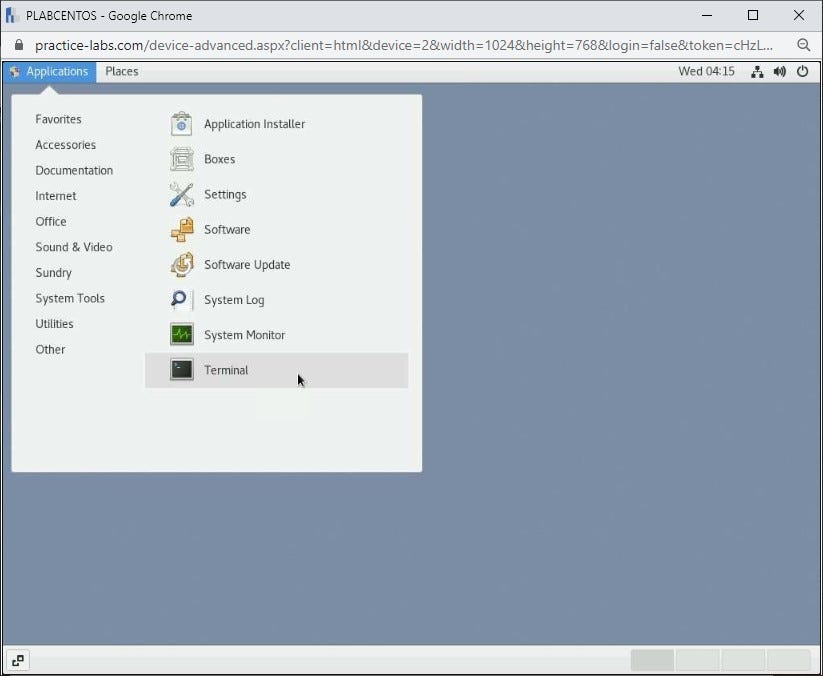
Once logged in, navigate to Applications > System Tools > Terminal on the top right-hand side of the screen.
Step 2
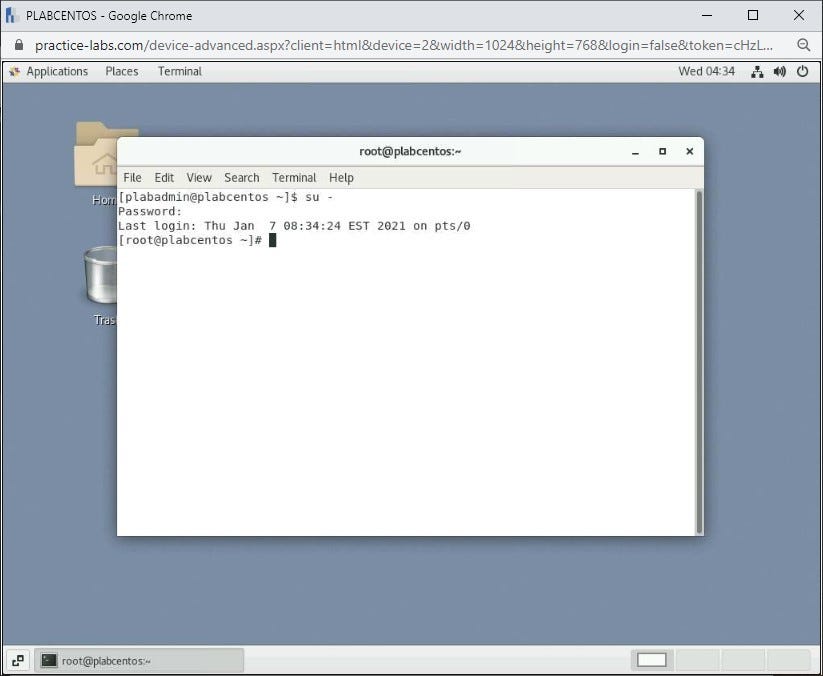
Next, we will enter as root user by running the following command:
su -
Again, you will be prompted to provide a password, so please type the following:
Passw0rd
Step 3
We will check the current kernel version by running the following command:
uname -sr
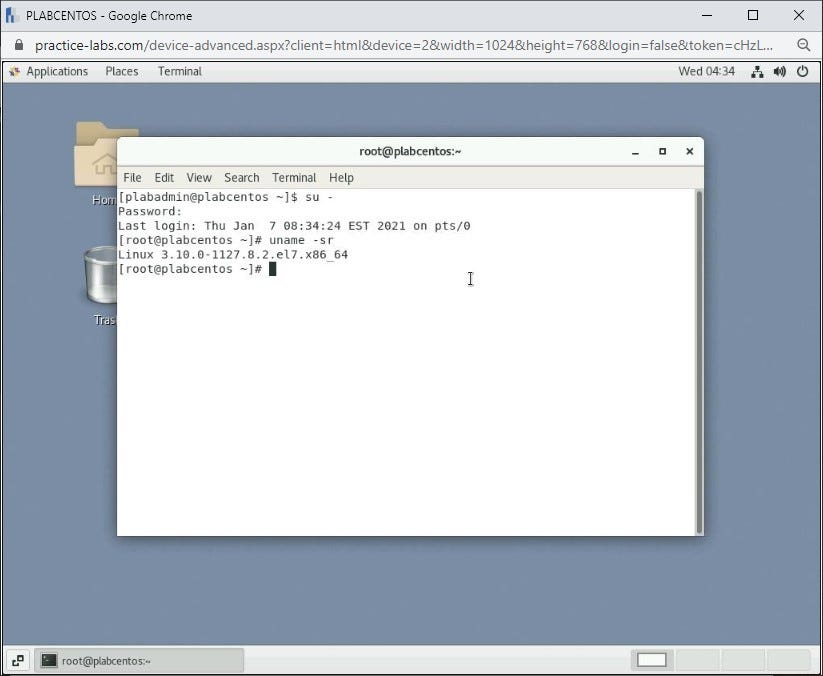
Step 4
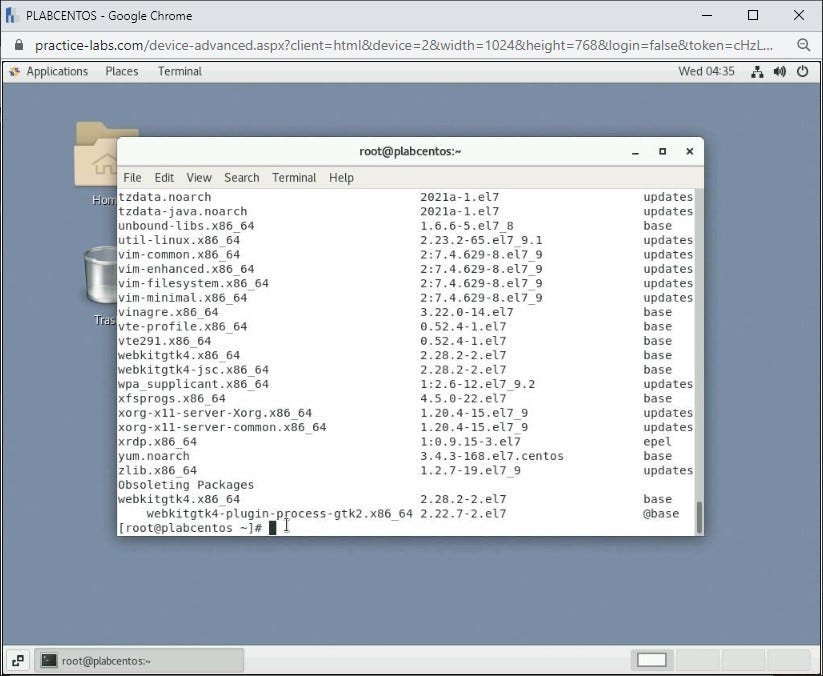
We will run the following command to refresh the local software list and notifying the OS of any newer versions if available. We will also check the repository and see what all updates are available by running the following command:
yum check-update
Step 5
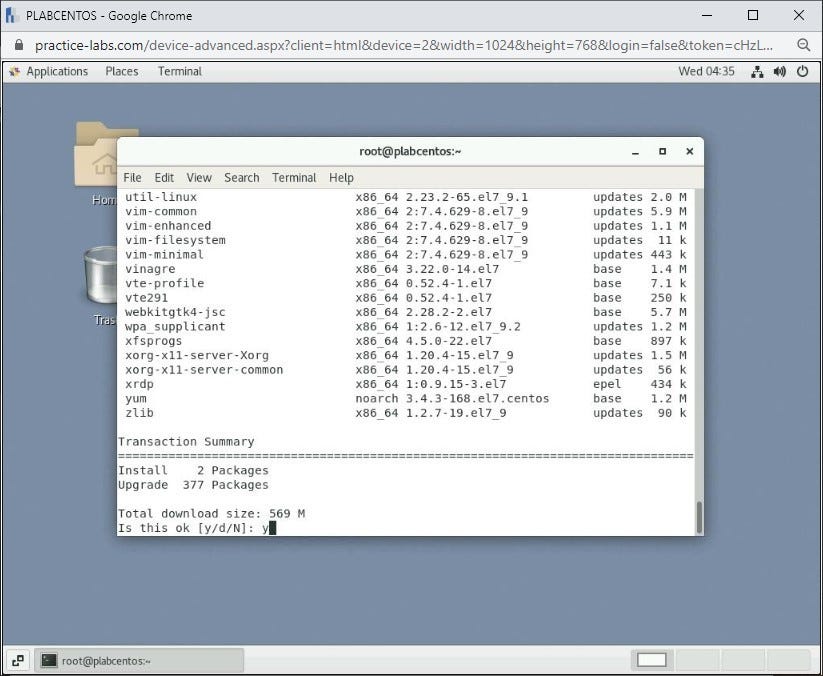
Let’s start the update by running the following command:
yum update
After running this command, you will receive a prompt of Yes / No for proceeding further. We will type:
y
And then press Enter to proceed.
Close the Terminal window and proceed to the next task.
Task 2 — How to Perform Software Updates Graphically.
Again, let’s see how to perform the same update process graphically. As with Ubuntu, most of the time, everything is handled command line, although we will also run through how to perform an update via the GUI of CentOS.
Step 1
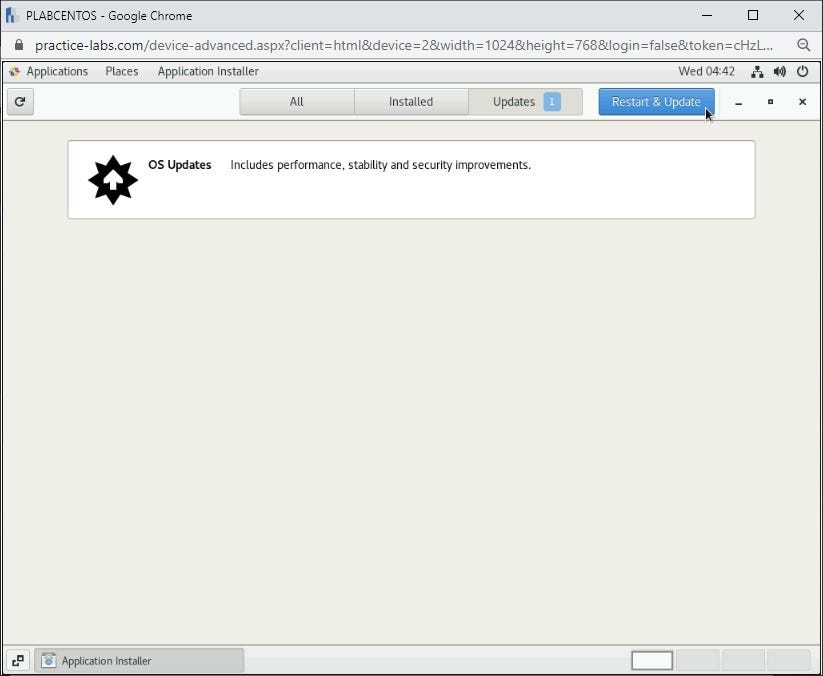
Navigate to Applications >Application Installer on the top right-hand side of the screen.
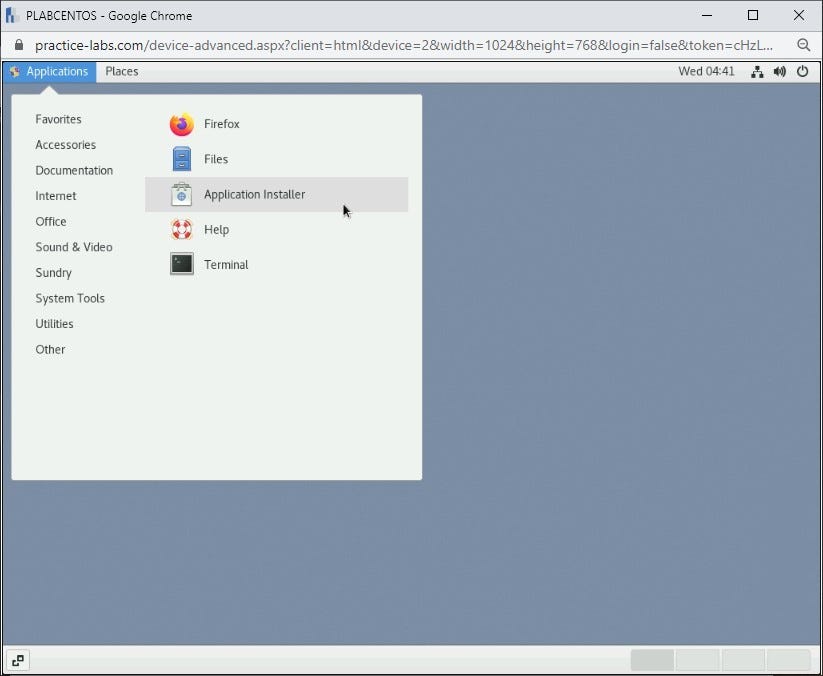
Step 2
We will move to the updates tab as displayed in the screenshot below and check if the software update is available. It will show an option of Restart and Update on the upper right corner and show all the updates available. Once you click on that, it will again ask you to Restart and Install updates.
Review
Well done, you have completed the Managing Software Updates and Patches Practice lab.
Article posted by: https://certmaster.me/linux-fundamentals-lesson-10-managing-software-updates-and-patches-f8b8e04f5799?source=rss-d9e5f258a4e8——2
——————————————————————————————————————–
Infocerts, 5B 306 Riverside Greens, Panvel, Raigad 410206 Maharashtra, India
Contact us – https://www.infocerts.com
